🌸SpringBoot2 复习笔记🌸
运维相关 工程打包与运行 spring-boot-maven-plugin 打包器
<build > <plugins > <plugin > <groupId > org.springframework.boot</groupId > <artifactId > spring-boot-maven-plugin</artifactId > </plugin > </plugins > </build >
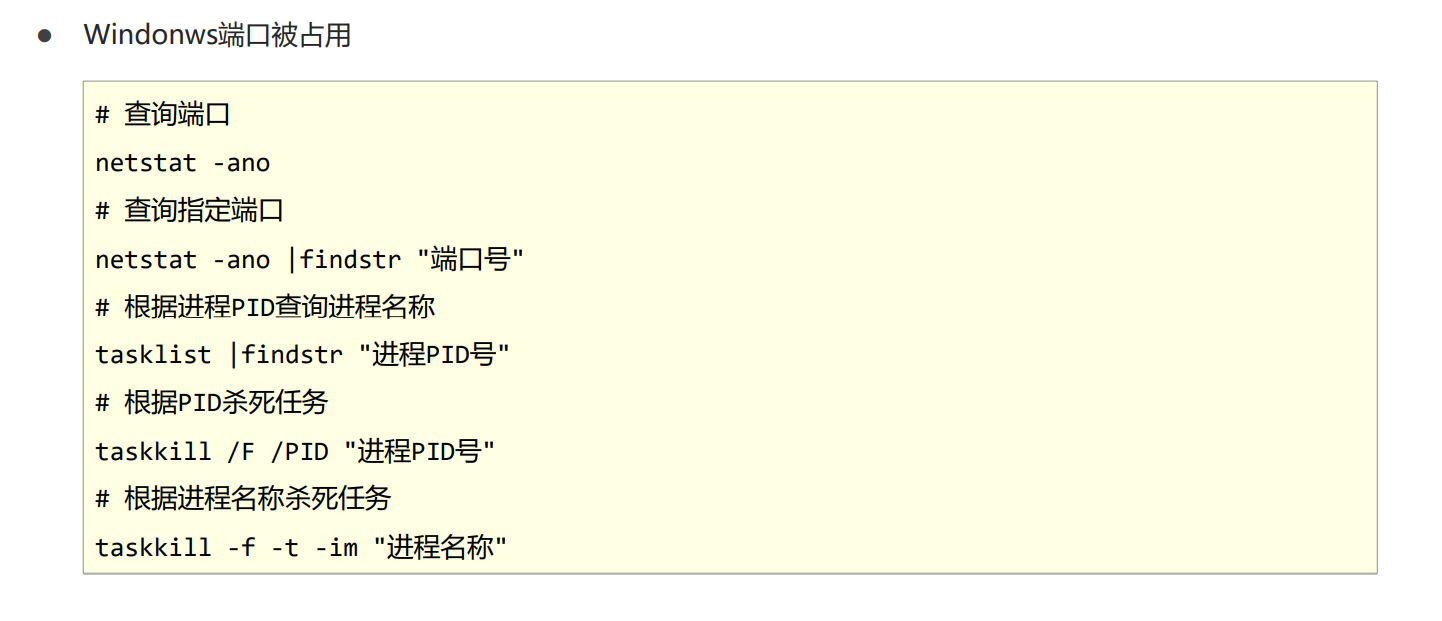
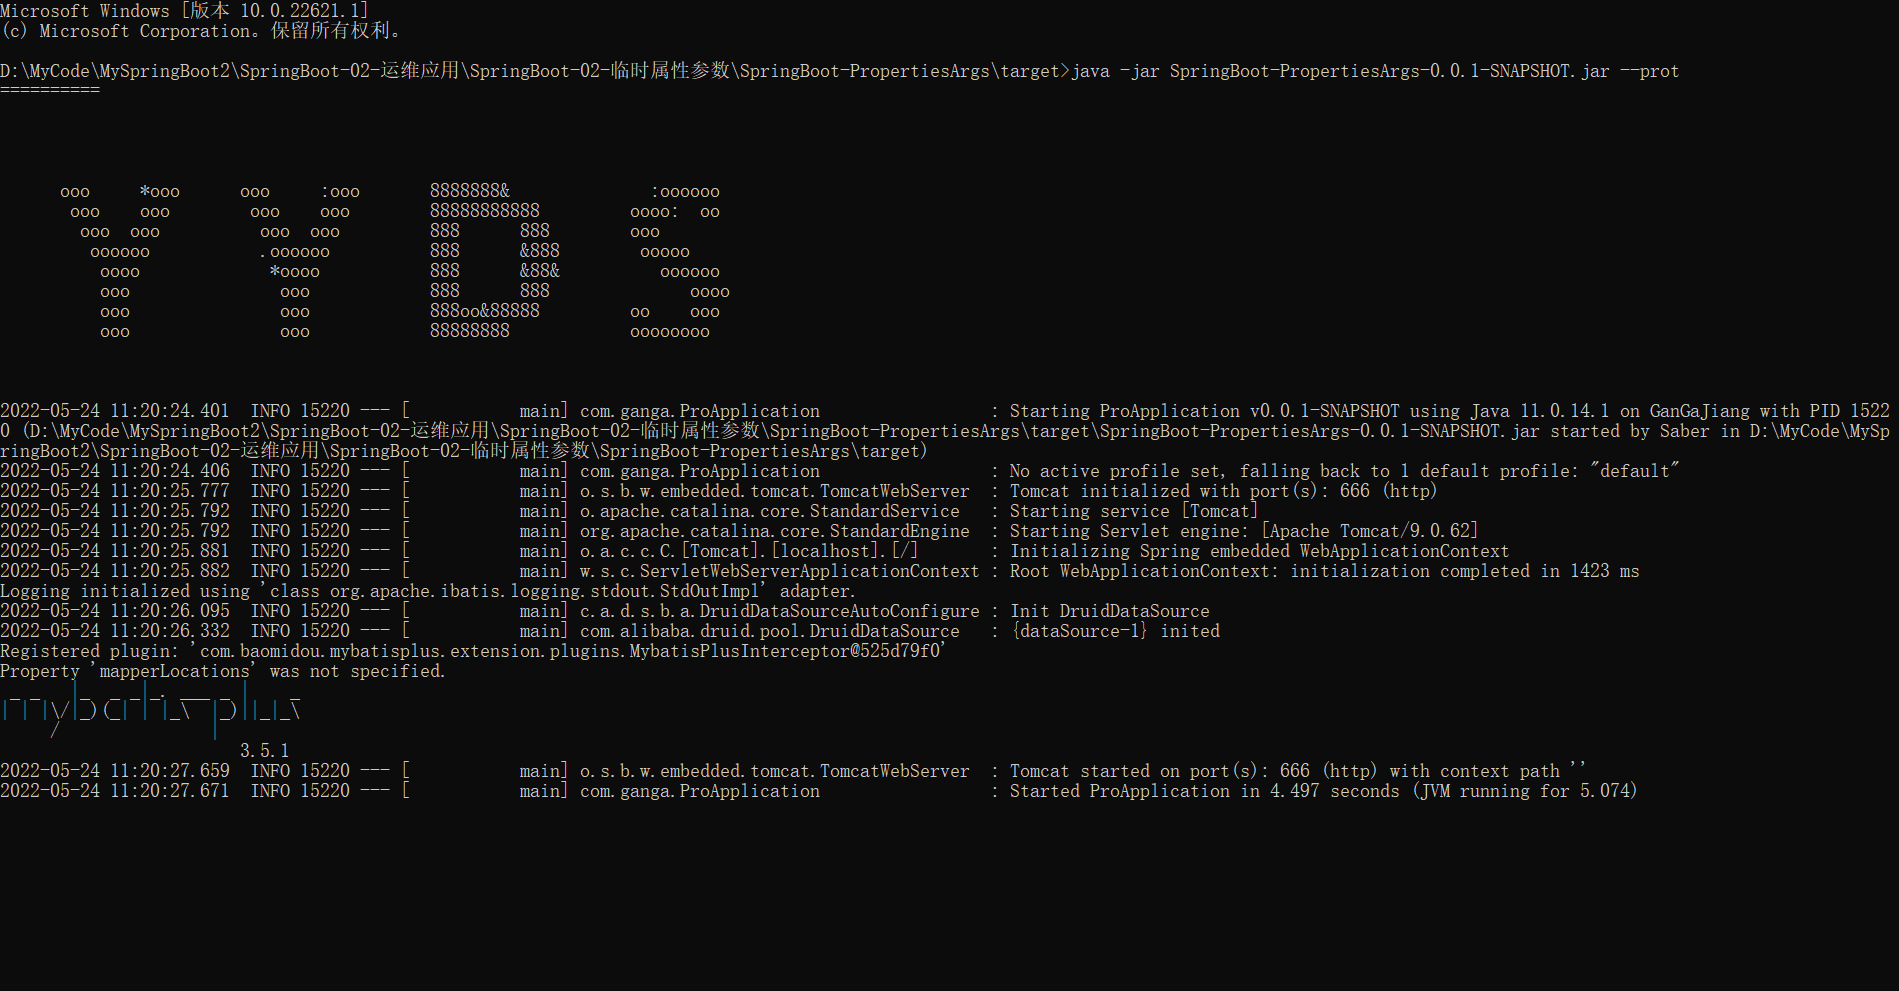
命令行启动常见问题及解决方案
临时参数与属性 程序入口参数
关闭程序程序入口 | 开发期调试配置
@SpringBootApplication public class ProApplication { public static void main (String[] args) { System.out.println("==========" ); SpringApplication.run(ProApplication.class,test()); } private static String[] test(){ String[] args = new String []{ "--server.port=666" }; return args; } }
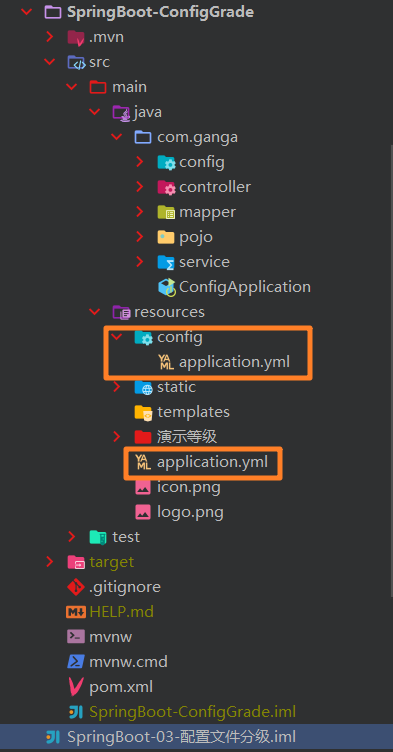
配置文件分级 不同文件类型级别:.properties > .yaml
同文件类型级别:
resource 目录下的配置文件级别最低
resource目录下的config文件下的目录文件比1高
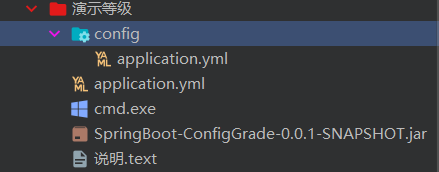
工程jar包文件同级目录下的配置文件比2高
工程jar包文件同级目录下的config文件下的配置文件最高
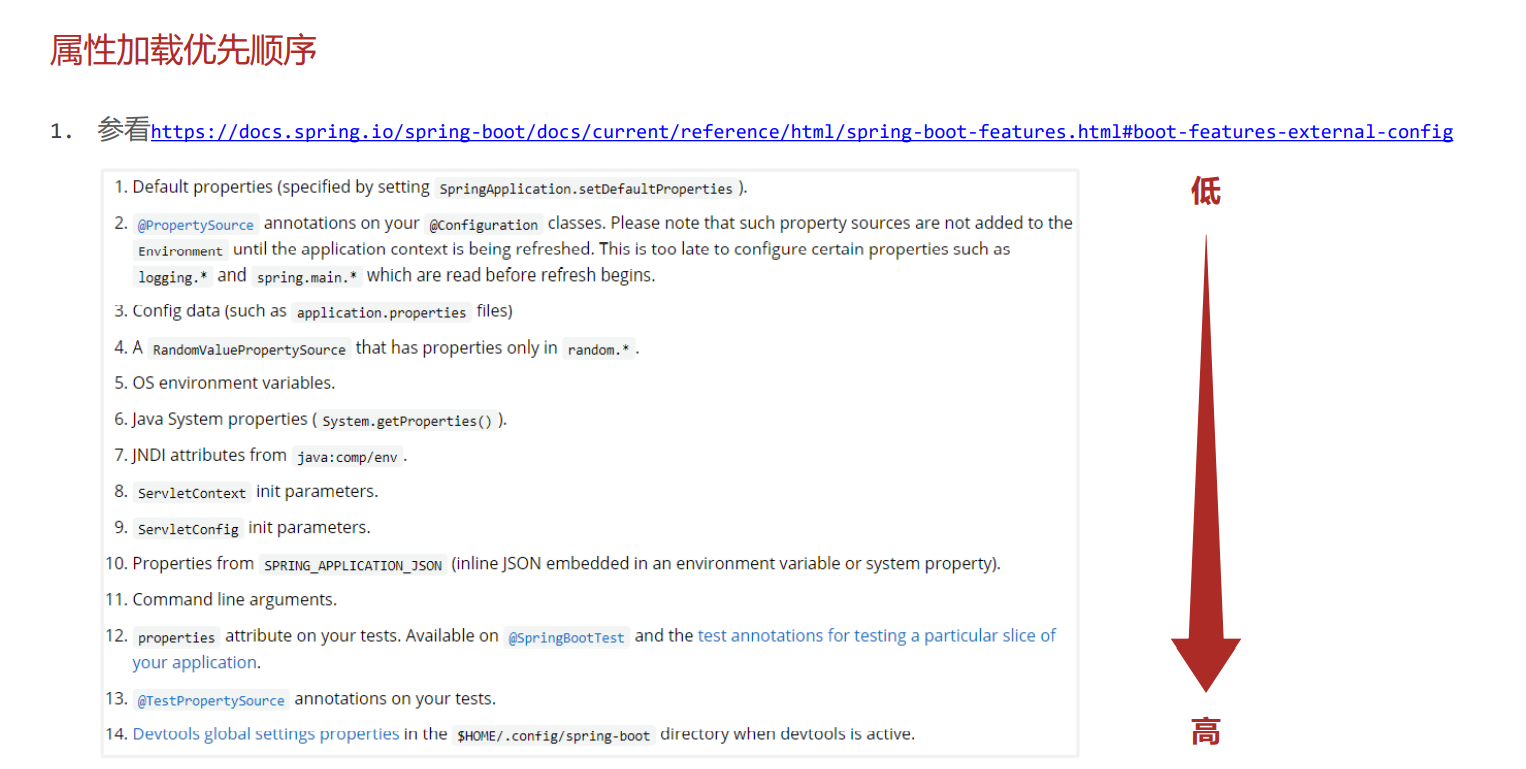
不同属性加载的优先级顺序
参看:连接:https://docs.spring.io/spring-boot/docs/current/reference/html/spring-boot-features.html#boot-features-external-config
自定义配置文件
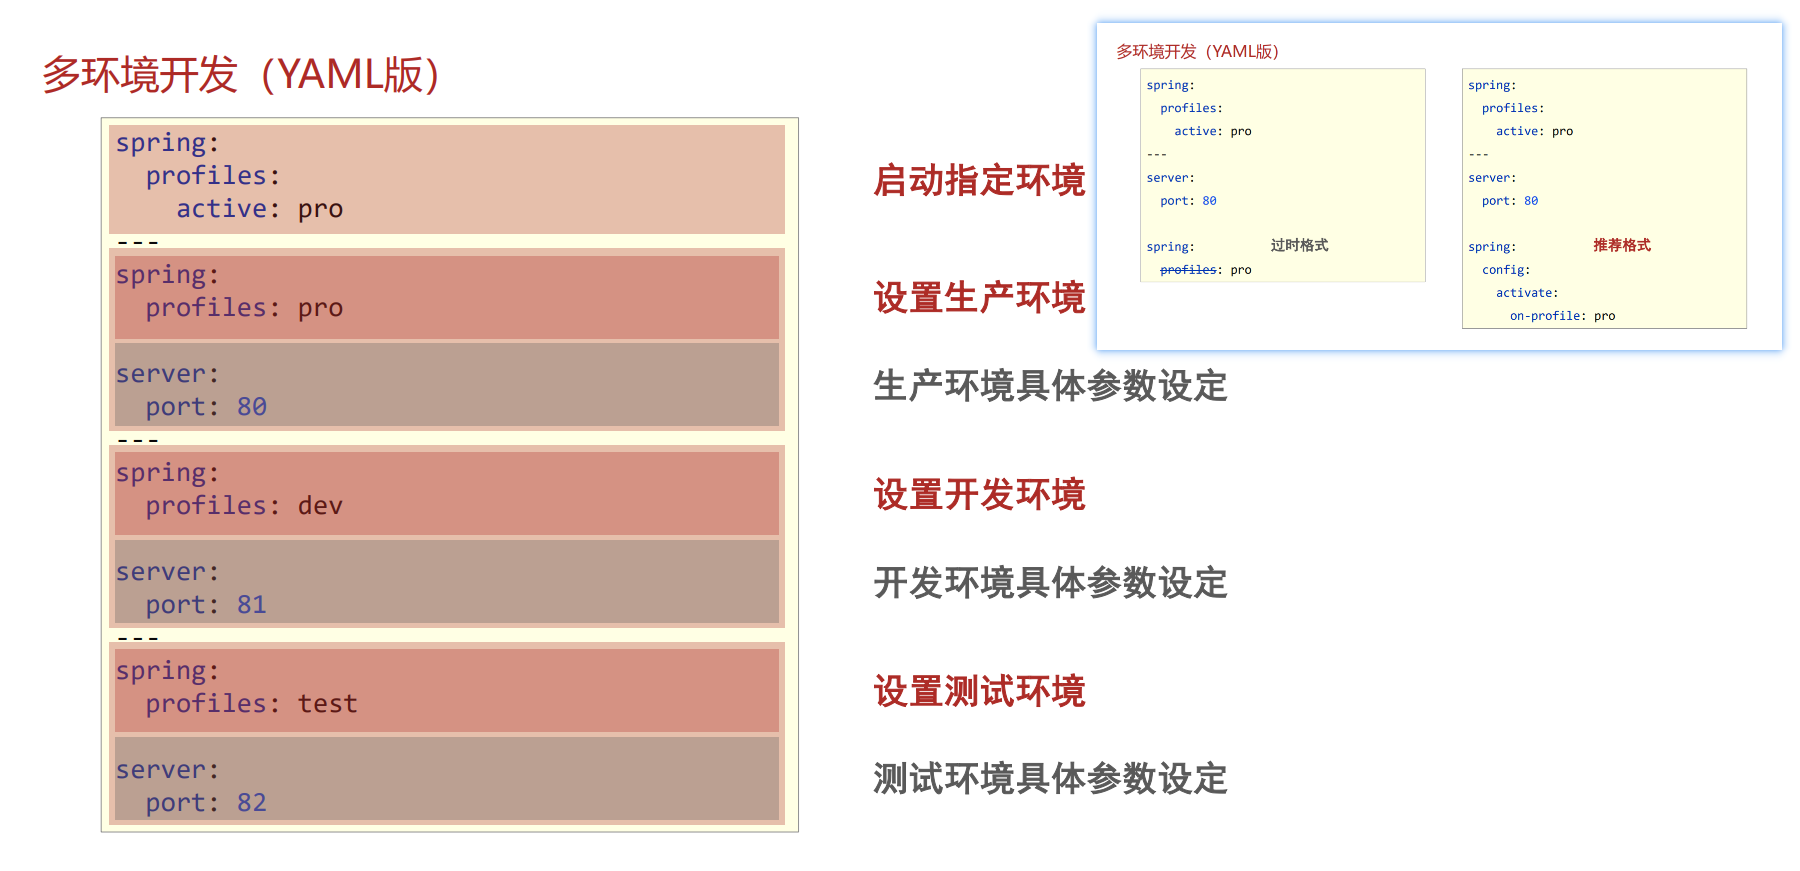
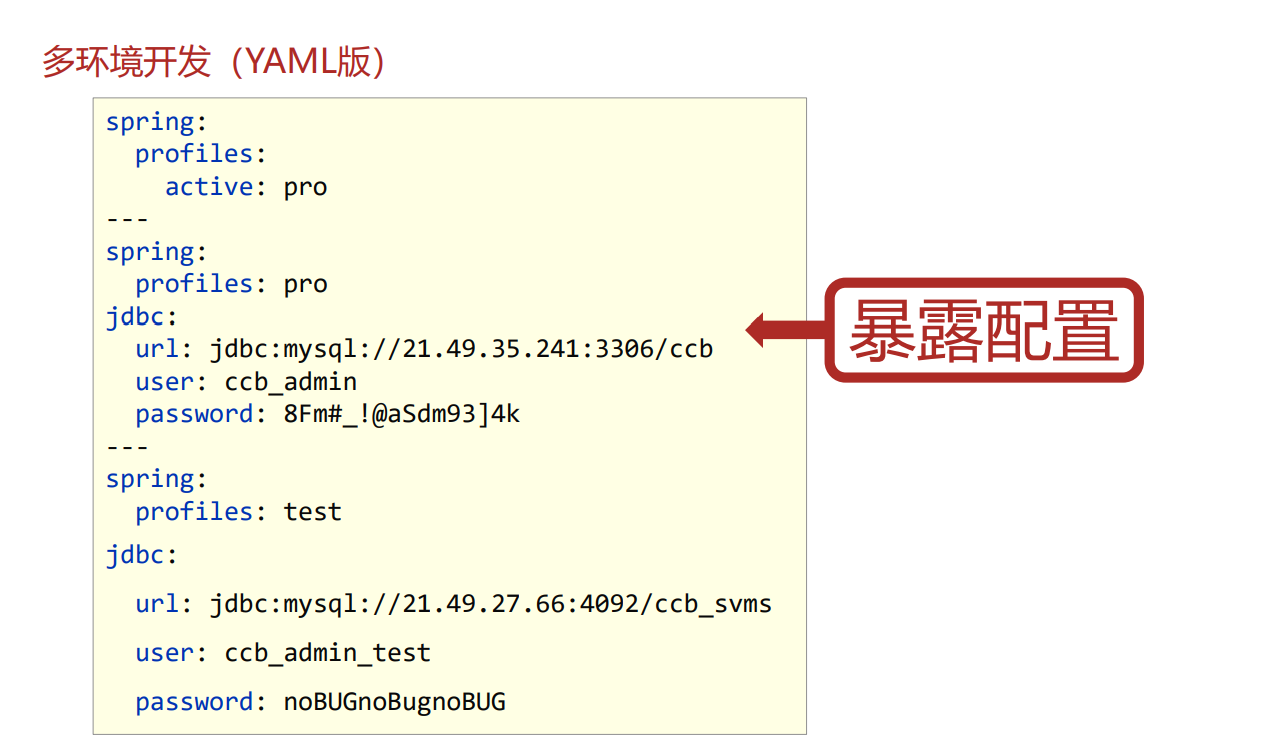
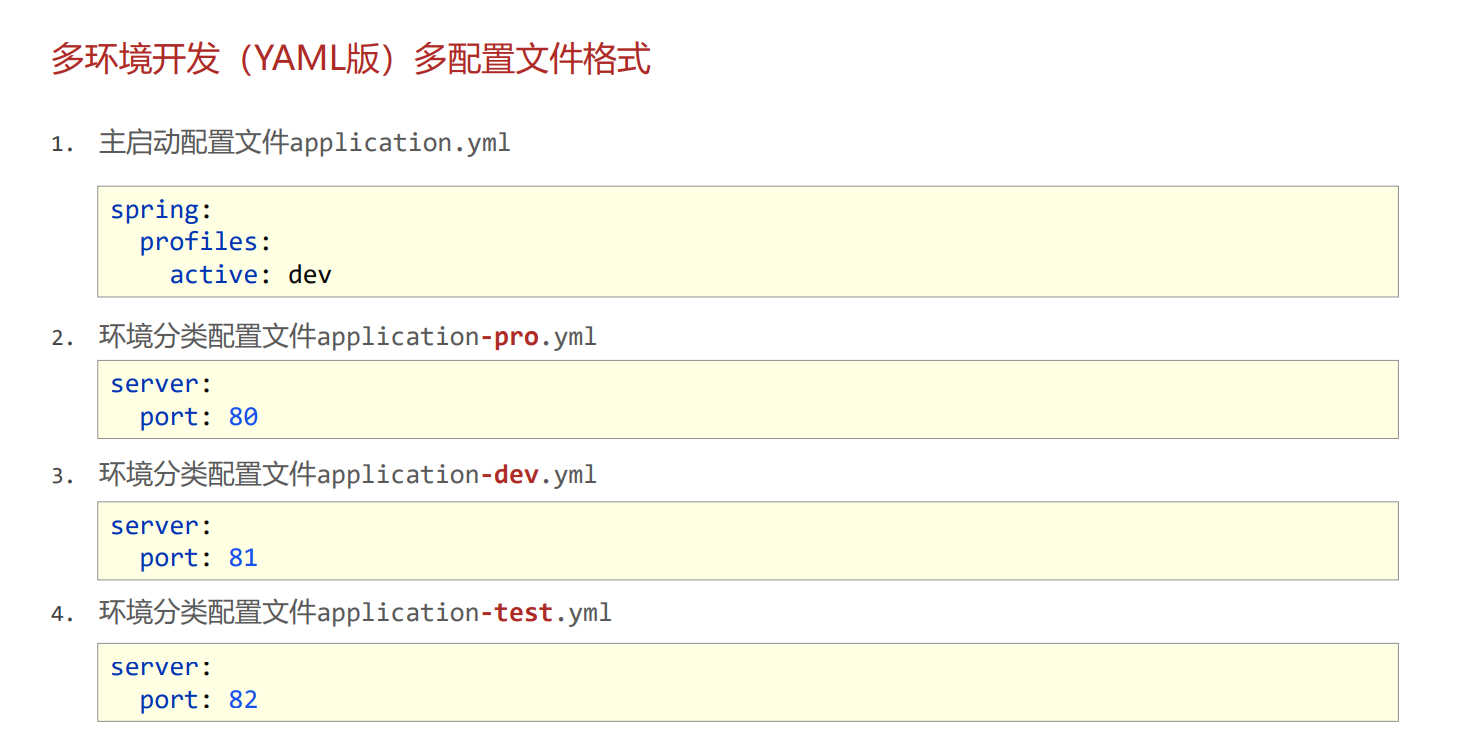
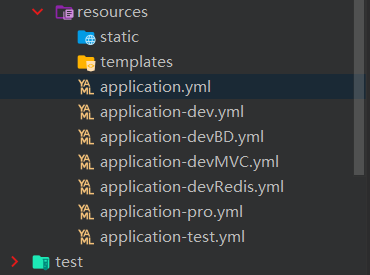
多环境开发 基于yaml的多环境开发 application.yml
spring: profiles: active: outfile datasource: druid: driver-class-name: com.mysql.cj.jdbc.Driver url: jdbc:mysql:///springboot_db?useSSL=false&serverTimezone=UTC username: root password: ganga main: banner-mode: console banner: image: location: icon.png mybatis-plus: global-config: db-config: table-prefix: tb_ id-type: auto configuration: log-impl: org.apache.ibatis.logging.stdout.StdOutImpl --- spring: profiles: pro banner: image: location: logo.png server: port: 88 --- spring: profiles: dev server: port: 99 --- spring: profiles: test server: port: 1010 --- spring: config: activate: on-profile: 推荐格式
application-outfile.yml
基于properties文件的多环境开发 基于properties的多文件开发就一种
基于Maven的多环境开发 和 分组开发 springboot 是依赖于 maven的
Maven中设置多环境属性
pro.xml
<profiles > <profile > <id > pro_env</id > <properties > <profile.active > pro</profile.active > </properties > </profile > <profile > <id > dev_env</id > <properties > <profile.active > dev</profile.active > </properties > <activation > <activeByDefault > true</activeByDefault > </activation > </profile > <profile > <id > test_env</id > <properties > <profile.active > test</profile.active > </properties > </profile > </profiles >
SpringBoot中引用Maven属性
application.yml
spring: profiles: active: @profile.active@
日志文件 日志级别
TRACE:运行堆栈信息,使用率低
DEBUG:程序员调试代码使用
INFO:记录运维过程数据
WARN:记录运维过程报警数据
ERROR:记录错误堆栈信息
FATAL:灾难信息,合并计入ERROR
Demo
import org.slf4j.LoggerFactory;import org.springframework.stereotype.Repository;@Repository public class TestDao { public static final Logger log = LoggerFactory.getLogger(TestDao.class); public void me () { System.out.println("=======================" ); System.out.println("=====com.ganga.dao=====" ); log.trace("trace..." ); log.debug("debug..." ); log.info("info..." ); log.warn("warn..." ); log.debug("debug..." ); log.error("error..." ); System.out.println("=======================" ); } }
application.yml
server: port: 80 spring: profiles: active: config04 --- spring: config: activate: on-profile: config01 debug: true --- spring: config: activate: on-profile: config02 logging: level: root: warn --- spring: config: activate: on-profile: config03 logging: level: com.ganga.controller: trace --- spring: config: activate: on-profile: config04 logging: group: ebank: com.ganga.controller,com.ganga.service,com.ganga.dao edao: com.ganga.dao level: ebank: debug edao: trace
Test01
public String me () { System.out.println("SpringBoot2..." ); System.out.println("========Test01=========" ); log.trace("trace..." ); log.debug("debug..." ); log.info("info..." ); log.warn("warn..." ); log.debug("debug..." ); log.error("error..." ); testDao.me(); return "SpringBoot2..." ; }
Test02
@RequestMapping("/run") @ResponseBody public String me () { System.out.println("SpringBoot2..." ); System.out.println("========Test02=========" ); log.trace("trace..." ); log.debug("debug..." ); log.info("info..." ); log.warn("warn..." ); log.debug("debug..." ); log.error("error..." ); testDao.me(); return "SpringBoot2..." ; }
Test03
@RequestMapping("/run") @ResponseBody public String me () { System.out.println("SpringBoot2..." ); System.out.println("========Test03=========" ); log.trace("trace..." ); log.debug("debug..." ); log.info("info..." ); log.warn("warn..." ); log.debug("debug..." ); log.error("error..." ); testDao.me(); return "SpringBoot2..." ; }
自定义创建 Logger对象 public static final Logger log = LoggerFactory.getLogger(TestDao.class);
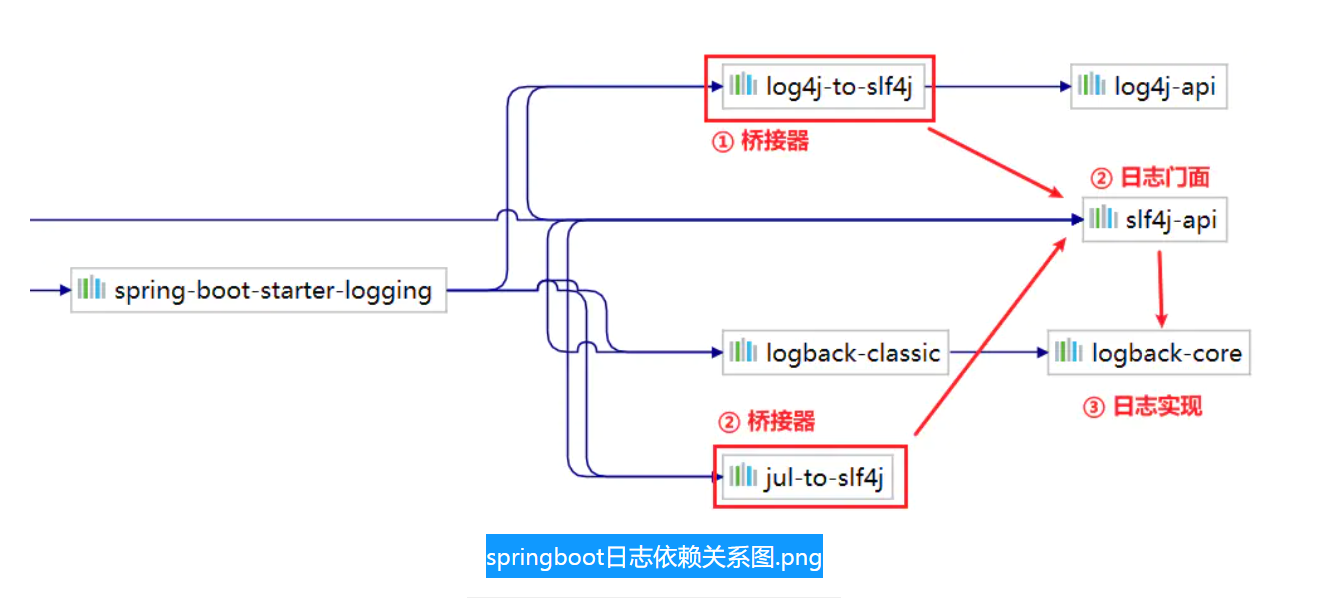
SpringBoot 整合及配置Logger springboot默认使用的日志技术就是Logging
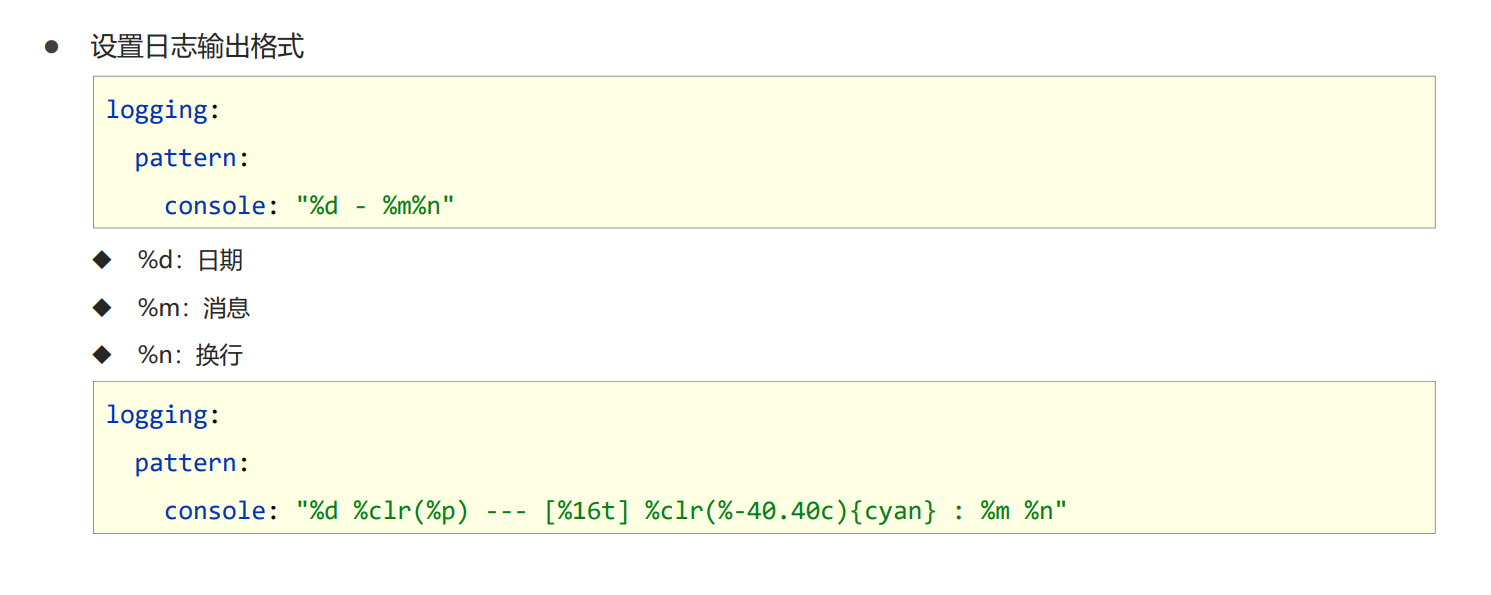
日志输出格式
application.yml
server: port: 80 logging: group: ebank: com.ganga.controller,com.ganga.service,com.ganga.dao edao: com.ganga.dao level: ebank: debug edao: trace pattern: console: "%d %clr(%5p) --- [%16t] %clr(%-40.40c){cyan} : %clr(%m){blue} %n"
使用lombok 提供的注解 @slf4g 该类当中就创建了一个名为 log的Logger对象了
package com.ganga.controller;import com.ganga.dao.TestDao;import lombok.extern.slf4j.Slf4j;import org.springframework.beans.factory.annotation.Autowired;import org.springframework.stereotype.Controller;import org.springframework.web.bind.annotation.RequestMapping;import org.springframework.web.bind.annotation.ResponseBody;@Slf4j @Controller @RequestMapping("/test") public class TestController { @Autowired private TestDao testDao; @RequestMapping("/run") @ResponseBody public String me () { System.out.println("SpringBoot2..." ); System.out.println("========Test03=========" ); log.trace("trace..." ); log.debug("debug..." ); log.info("info..." ); log.warn("warn..." ); log.debug("debug..." ); log.error("error..." ); testDao.me(); return "SpringBoot2..." ; } }
日志文件 application.yml 配置
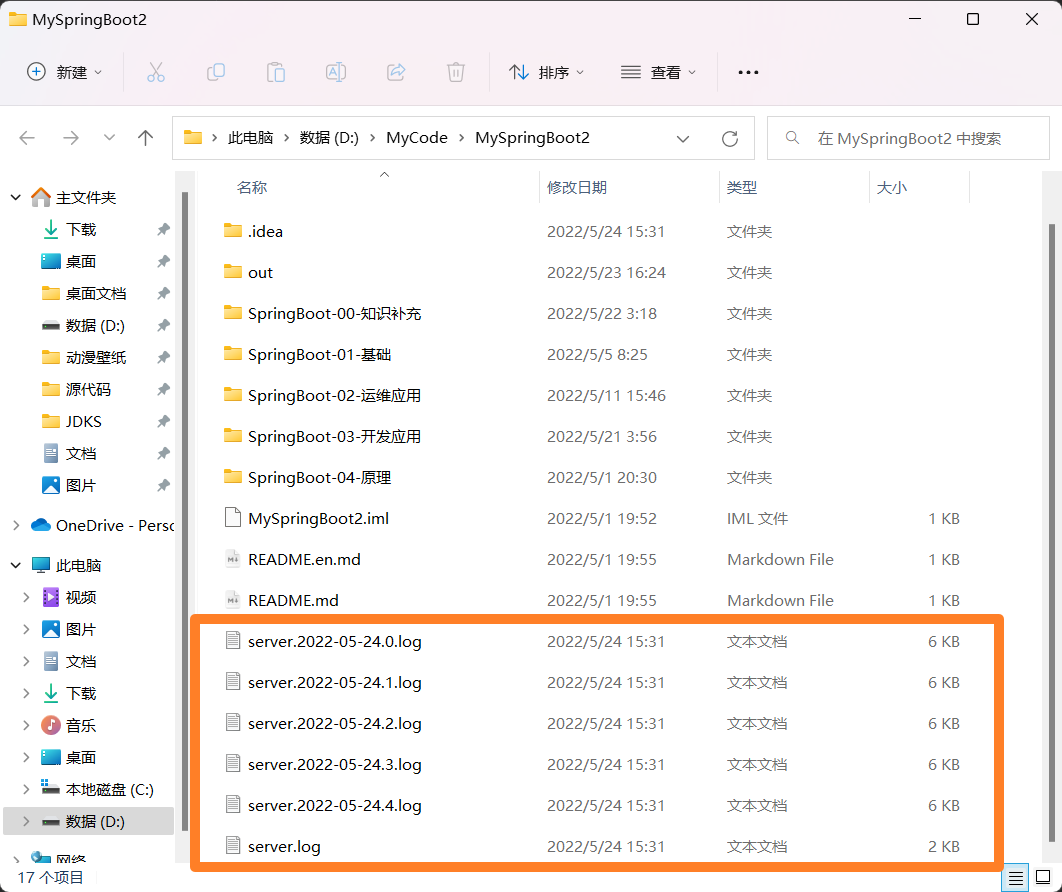
server: port: 80 logging: group: ebank: com.ganga.controller,com.ganga.service,com.ganga.dao edao: com.ganga.dao level: ebank: debug edao: trace pattern: console: "%d %clr(%5p) --- [%16t] %clr(%-40.40c){cyan} : %clr(%m){blue} %n" file: name: server.log logback: rollingpolicy: file-name-pattern: server.%d{yyyy-MM-dd}.%i.log max-file-size: 4KB
文件位置在整个项目文件夹当中
开发相关 热部署 坐标
<dependency > <groupId > org.springframework.boot</groupId > <artifactId > spring-boot-devtools</artifactId > </dependency >
application.yml 配置文件
server: devtools: restart: exclude: static/**,public/**,config/application.yml
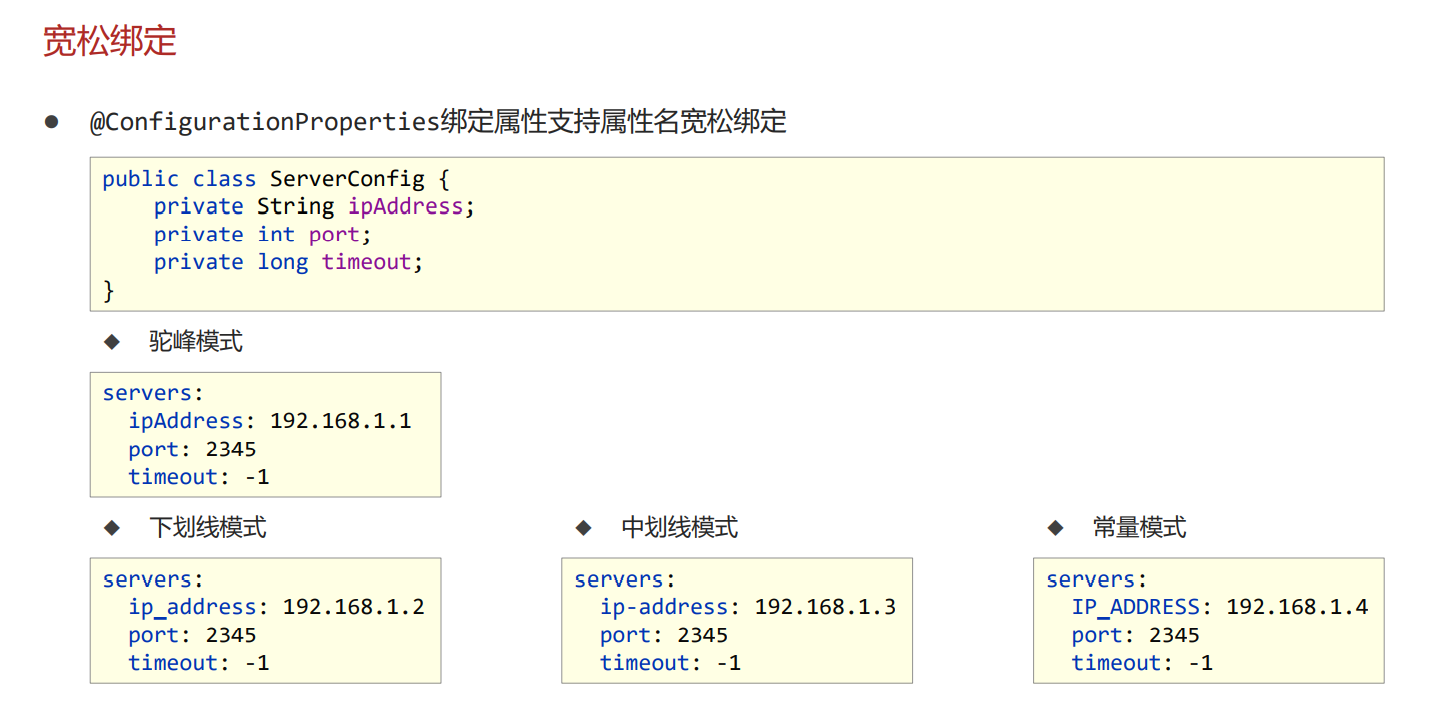
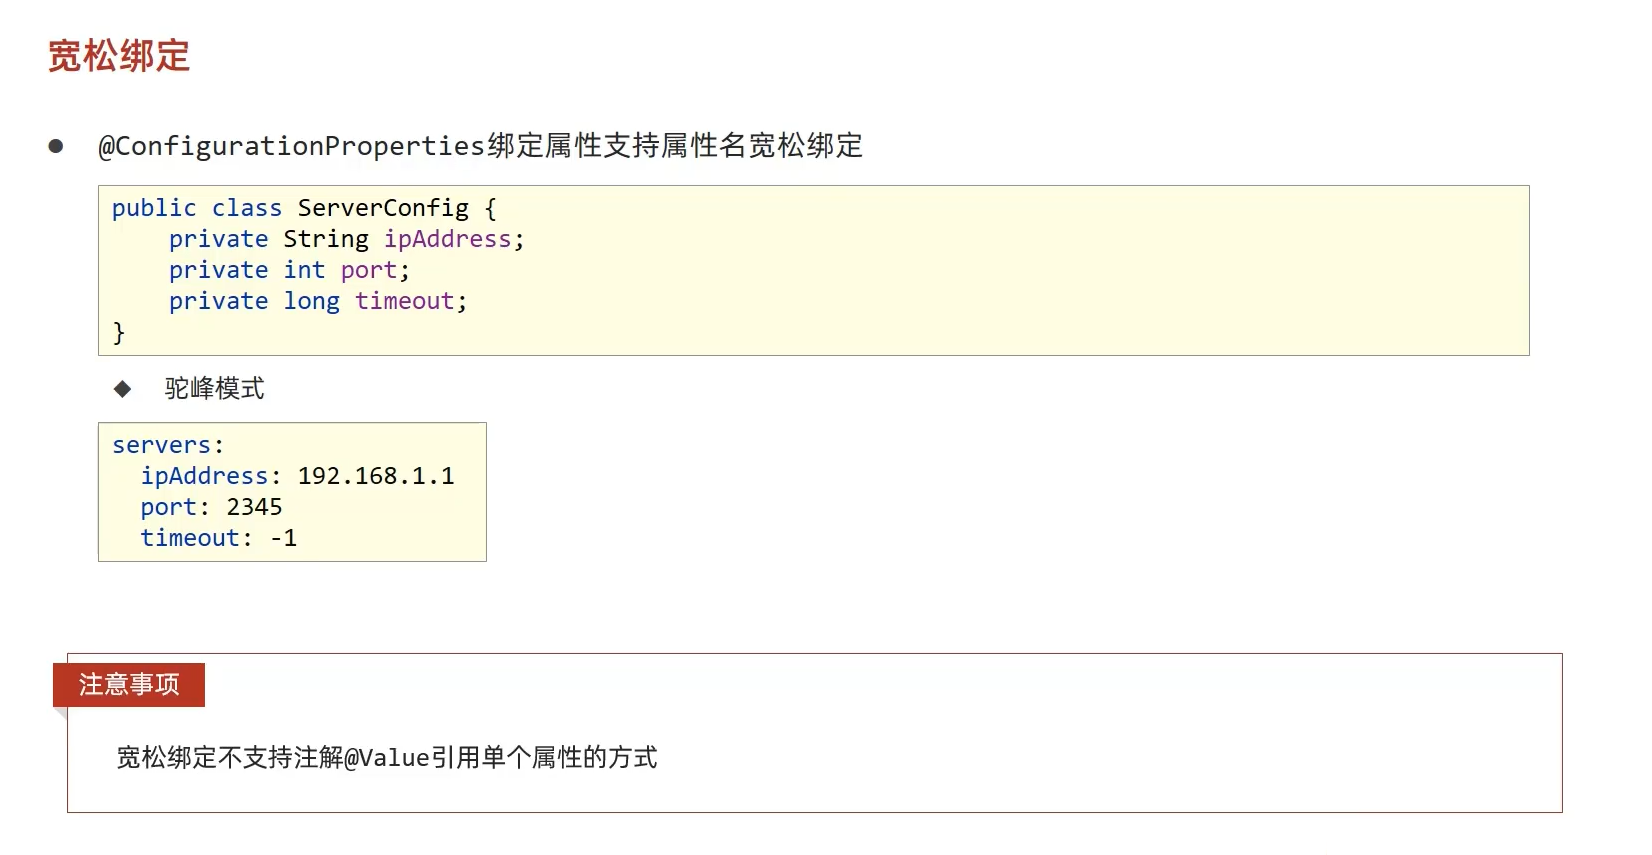
配置高级 @EnableConfigurationProperties注解 @EnableConfigurationProperties注解支持宽松绑定
而@Value不支持宽松绑定
application.yml
ganga: ip-address: 192.168 .0 .10 port: 6666 prefix: /ganga myDataSource: driver: com.mysql.jdbc.Driver URL: jdbc:mysql:///xxx?xxx=xxx&xxx=xxx name: ganga password: 666
Application.java
package com.ganga;import com.ganga.config.MyDataSource;import com.ganga.config.ServerConfig;import org.springframework.boot.SpringApplication;import org.springframework.boot.autoconfigure.SpringBootApplication;import org.springframework.boot.context.properties.EnableConfigurationProperties;import org.springframework.context.ConfigurableApplicationContext;@SpringBootApplication @EnableConfigurationProperties({ ServerConfig.class,MyDataSource.class }) public class ConfigurationApplication { public static void main (String[] args) { ConfigurableApplicationContext cac = SpringApplication.run(ConfigurationApplication.class, args); ServerConfig bean = cac.getBean(ServerConfig.class); System.out.println(bean); MyDataSource bean1 = cac.getBean(MyDataSource.class); System.out.println(bean1); } }
config01
package com.ganga.config;import lombok.Data;import org.springframework.boot.context.properties.ConfigurationProperties;import org.springframework.stereotype.Component;@Data @ConfigurationProperties(prefix = "ganga") public class ServerConfig { private String ipAddress; private int port; private String prefix; }
config02
package com.ganga.config;import lombok.Data;import org.springframework.boot.context.properties.ConfigurationProperties;import org.springframework.stereotype.Component;@Data @ConfigurationProperties(prefix = "mydatasource") public class MyDataSource { private String driver; private String url; private String name; private String password; }
@Value不支持宽松绑定
@SpringBootTest class ValueTests { @Value("${ganga.ip-address}") private String ip; @Test void contextLoads () { System.out.println(ip); } }
Java新数据类型 及 配置 @DurationUnit(ChronoUnit.HOURS) private Duration serverTimeOut02;@DataSizeUnit(DataUnit.MEGABYTES) private DataSize logSize02;
Application.java
@SpringBootApplication @EnableConfigurationProperties({ ServerConfig.class }) public class DurationDataSizeApplication { public static void main (String[] args) { SpringApplication.run(DurationDataSizeApplication.class, args); } }
application.yml
ganga: id-address: 192.168 .0 .1 port: 8080 timeout: 1200 server-timeout-01: 1200 log-size-01: 1024 server-timeout-02: 6 log-size-02: 10
config
package com.ganga.config;import lombok.Data;import org.springframework.boot.context.properties.ConfigurationProperties;import org.springframework.boot.convert.DataSizeUnit;import org.springframework.boot.convert.DurationUnit;import org.springframework.util.unit.DataSize;import org.springframework.util.unit.DataUnit;import java.time.Duration;import java.time.temporal.ChronoUnit;@Data @ConfigurationProperties(prefix = "ganga") public class ServerConfig { private String ipAddress; private int port; private long timeOut; private Duration serverTimeOut01; private DataSize logSize01; @DurationUnit(ChronoUnit.HOURS) private Duration serverTimeOut02; @DataSizeUnit(DataUnit.MEGABYTES) private DataSize logSize02; }
数据校验 开启数据校验有助于系统安全性,J2EE规范中JSR303规范 定义了一组有关数据校验相关的API
pom坐标
<dependency > <groupId > javax.validation</groupId > <artifactId > validation-api</artifactId > </dependency > <dependency > <groupId > org.hibernate.validator</groupId > <artifactId > hibernate-validator</artifactId > </dependency >
application.yml
ganga: id-address: 192.168 .0 .1 port: 201 timeout: 1200 server-timeout-01: 1200 log-size-01: 1024 server-timeout-02: 6 log-size-02: 10
Application.java
@SpringBootApplication @EnableConfigurationProperties({ ServerConfig.class }) public class DataValidationApplication { public static void main (String[] args) { SpringApplication .run(DataValidationApplication.class); } }
config
package com.ganga.config;import lombok.Data;import lombok.NonNull;import org.hibernate.validator.constraints.Length;import org.springframework.boot.context.properties.ConfigurationProperties;import org.springframework.boot.convert.DataSizeUnit;import org.springframework.boot.convert.DurationUnit;import org.springframework.util.unit.DataSize;import org.springframework.util.unit.DataUnit;import org.springframework.validation.annotation.Validated;import javax.validation.constraints.Max;import javax.validation.constraints.Min;import java.time.Duration;import java.time.temporal.ChronoUnit;@Data @ConfigurationProperties(prefix = "ganga") @Validated public class ServerConfig { @Length(max = 12,min = 6,message = "ip地址最大12字符 最小6字符") private String ipAddress; @Max(value = 8888,message = "端口号最大值不能超过8888") @Min(value = 202, message = "端口号最小值不能小于202") private int port; private long timeOut; private Duration serverTimeOut01; private DataSize logSize01; @DurationUnit(ChronoUnit.HOURS) private Duration serverTimeOut02; @DataSizeUnit(DataUnit.MEGABYTES) private DataSize logSize02; }
测试高级 加载测试专用属性
@SpringBootTest(properties = {“server.port=8888”,”ganga.hobby=原神”})
@SpringBootTest(args = {“–server.port=6666”,”–ganga.hobby=这就尴尬了”})
根据配置文件的优先级 程序入口args 要大于 properties
@SpringBootTest(properties = "server.port=6666",args = "--server.port=9999") @ContextConfiguration(classes = Test01Application.class) public class Test04_PriorityTest { @Value("${server.port}") private int port; @Test void PriorityTest () { System.out.println("port===>" + port); } }
优势:比多环境开发中的测试环境影响范围更小,仅对当前测试类有效
加载测试专用配置 加载测试临时属性应用于小范围测试环境
config - bean
package com.ganga.config;import org.springframework.context.annotation.Bean;import org.springframework.context.annotation.Configuration;@Configuration public class BeanConfig { @Bean public String msg () { return "String Bean msg..." ; } }
使用@Import注解 在类上 就可以这个bean了
package com.ganga;import com.ganga.config.BeanConfig;import org.junit.jupiter.api.Test;import org.springframework.beans.factory.annotation.Autowired;import org.springframework.boot.test.context.SpringBootTest;import org.springframework.context.annotation.Import;@SpringBootTest @Import({BeanConfig.class}) class TestBeanTest { @Autowired private String msg; @Test void contextLoads () { System.out.println(msg); } }
Web环境模拟测试 开启Web环境测试使用
@SpringBootTest()的
webEnvironment = SpringBootTest.WebEnvironment.RANDOM_PORT 开启 随机端口
webEnvironment = SpringBootTest.WebEnvironment.DEFINED_PORT 开启 配置端口
webEnvironment = SpringBootTest.WebEnvironment.NONE 默认值 关闭
package com.ganga;import com.ganga.controller.TestController;import org.junit.jupiter.api.Test;import org.springframework.beans.factory.annotation.Autowired;import org.springframework.boot.test.context.SpringBootTest;@SpringBootTest(webEnvironment = SpringBootTest.WebEnvironment.RANDOM_PORT) class WebEnvironmentTest { @Test void contextLoads (@Autowired TestController testController) { testController.me(); } }
Web服务层代码测试 package com.ganga;import org.junit.jupiter.api.Test;import org.springframework.beans.factory.annotation.Autowired;import org.springframework.boot.test.autoconfigure.web.servlet.AutoConfigureMockMvc;import org.springframework.boot.test.context.SpringBootTest;import org.springframework.test.web.servlet.MockMvc;import org.springframework.test.web.servlet.ResultActions;import org.springframework.test.web.servlet.ResultMatcher;import org.springframework.test.web.servlet.request.MockHttpServletRequestBuilder;import org.springframework.test.web.servlet.request.MockMvcRequestBuilders;import org.springframework.test.web.servlet.result.ContentResultMatchers;import org.springframework.test.web.servlet.result.HeaderResultMatchers;import org.springframework.test.web.servlet.result.MockMvcResultMatchers;import org.springframework.test.web.servlet.result.StatusResultMatchers;@SpringBootTest(webEnvironment = SpringBootTest.WebEnvironment.RANDOM_PORT) @AutoConfigureMockMvc class WebTests { @Test void statusTest (@Autowired MockMvc mockMvc) throws Exception { MockHttpServletRequestBuilder builder = MockMvcRequestBuilders.delete("/brand" ); ResultActions perform = mockMvc.perform(builder); StatusResultMatchers status = MockMvcResultMatchers.status(); ResultMatcher is = status.isOk(); perform.andExpect(is); } @Test public void content (@Autowired MockMvc mockMvc) throws Exception { MockHttpServletRequestBuilder builder = MockMvcRequestBuilders.delete("/brands" ); ResultActions perform = mockMvc.perform(builder); ContentResultMatchers matcher = MockMvcResultMatchers.content(); ResultMatcher is = matcher.string("SpringBoot2 getById is running..." ); perform.andExpect(is); } @Test public void contentJsonTest (@Autowired MockMvc mockMvc) throws Exception { MockHttpServletRequestBuilder builder = MockMvcRequestBuilders.get("/brands" ); ResultActions perform = mockMvc.perform(builder); ContentResultMatchers matcher = MockMvcResultMatchers.content(); ResultMatcher is = matcher.json("{\n" + " \"id\": 1,\n" + " \"brandName\": \"SpringBoot2 setBrandName\",\n" + " \"companyName\": \"SpringBoot setCompanyName\",\n" + " \"ordered\": 1,\n" + " \"description\": \"SpringBoot setDescription\"\n" + "}" ); perform.andExpect(is); } @Test public void headerTest (@Autowired MockMvc mockMvc) throws Exception { MockHttpServletRequestBuilder builder = MockMvcRequestBuilders.get("/brands" ); ResultActions perform = mockMvc.perform(builder); HeaderResultMatchers matcher = MockMvcResultMatchers.header(); ResultMatcher is = matcher.string("content-Type" , "application/json" ); perform.andExpect(is); } @Test public void getByIdTest (@Autowired MockMvc mockMvc) throws Exception { MockHttpServletRequestBuilder builder = MockMvcRequestBuilders.get("/brands" ); ResultActions perform = mockMvc.perform(builder); StatusResultMatchers status = MockMvcResultMatchers.status(); ResultMatcher is = status.isOk(); perform.andExpect(is); HeaderResultMatchers header = MockMvcResultMatchers.header(); ResultMatcher type = header.string("content-Type" , "application/json" ); perform.andExpect(type); ContentResultMatchers content = MockMvcResultMatchers.content(); ResultMatcher json = content.json("{\n" + " \"id\": 1,\n" + " \"brandName\": \"SpringBoot setBrandName\",\n" + " \"companyName\": \"SpringBoot setCompanyName\",\n" + " \"ordered\": 1,\n" + " \"description\": \"SpringBoot setDescription\"\n" + "}" ); perform.andExpect(json); } }
测试的越多 精准 测试多少取决于公司 取决于( $ _ $ )…
业务层测试回滚 两个注解
@Transactional 开启事务
@Rollback 回滚
package com.ganga.service;import com.ganga.pojo.Brand;import com.ganga.server.impl.BrandService;import org.junit.jupiter.api.Test;import org.springframework.beans.factory.annotation.Autowired;import org.springframework.boot.test.context.SpringBootTest;import org.springframework.test.annotation.Rollback;import org.springframework.transaction.annotation.Transactional;@SpringBootTest @Transactional @Rollback(value = false) public class BrandServiceTest { @Test void testSave (@Autowired BrandService brandService) { Brand brand = new Brand (); brand.setBrandName("SpringBoot2" ); brand.setCompanyName("SpringBoot2" ); brand.setOrdered(666 ); brand.setDescription("SpringBoot2" ); brand.setStatus(1 ); boolean save = brandService.save(brand); System.out.println(save); } }
测试用例数据设定 测试用例数据通常采用随机值进行测试,使用SpringBoot提供的随机数为其赋值
◆ ${random.int}表示随机整数
◆ ${random.int(10)}表示10以内的随机数
◆ ${random.int(10,20)}表示10到20的随机数
◆ 其中()可以是任意字符,例如[],!!均可
application.yml
testcase: student: id: ${random.int} id2: ${random.int(10)} id3: ${random.int(10,25)} id4: ${random.int@2,12@} id5: ${random.int!3,5!} name: ${random.value} name2: 尴尬${random.value}酱 uuid: ${random.uuid} time: ${random.long}
test.config
@Data @Component @ConfigurationProperties(prefix = "testcase.student") public class TestCase { private int id; private int id2; private int id3; private int id4; private int id5; private String name; private String name2; private String uuid; private long time; }
test.service
package com.ganga.service;import com.ganga.pojo.Brand;import com.ganga.server.impl.BrandService;import org.junit.jupiter.api.Test;import org.springframework.beans.factory.annotation.Autowired;import org.springframework.boot.test.context.SpringBootTest;import org.springframework.test.annotation.Rollback;import org.springframework.transaction.annotation.Transactional;@SpringBootTest @Transactional public class BrandServiceTest { @Test void testSave (@Autowired BrandService brandService) { Brand brand = new Brand (); brand.setBrandName("SpringBoot2" ); brand.setCompanyName("SpringBoot2" ); brand.setOrdered(666 ); brand.setDescription("SpringBoot2" ); brand.setStatus(1 ); boolean save = brandService.save(brand); System.out.println(save); } }
整合第三方技术 🌸基础整合技术🌸 整个Junit SpringBoot整合了Junit
pom
<dependencies > <dependency > <groupId > org.springframework.boot</groupId > <artifactId > spring-boot-starter</artifactId > </dependency > <dependency > <groupId > org.springframework.boot</groupId > <artifactId > spring-boot-starter-test</artifactId > <scope > test</scope > </dependency > </dependencies >
整合MyBatis SpringBoot整合了MyBatis
pom
<dependency > <groupId > org.mybatis.spring.boot</groupId > <artifactId > mybatis-spring-boot-starter</artifactId > <version > 2.2.2</version > </dependency > <dependency > <groupId > mysql</groupId > <artifactId > mysql-connector-java</artifactId > <scope > runtime</scope > </dependency >
application.yml
spring: datasource: driver-class-name: com.mysql.cj.jdbc.Driver url: jdbc:mysql:///springboot_db?useSSL=false&serverTimezone=UTC username: root password: ganga mybatis: configuration: map-underscore-to-camel-case: true
整合MyBatisPlus SpringBoot原生并没有整个MyBatisPlus
但有对应的starter
pom坐标
<dependency > <groupId > com.baomidou</groupId > <artifactId > mybatis-plus-boot-starter</artifactId > <version > 3.5.1</version > </dependency > <dependency > <groupId > mysql</groupId > <artifactId > mysql-connector-java</artifactId > <scope > runtime</scope > </dependency >
application.yml
mybatis-plus: global-config: db-config: table-prefix: tb_ id-type: auto configuration: log-impl: org.apache.ibatis.logging.stdout.StdOutImpl
config 分页配置
package com.ganga.config;import com.baomidou.mybatisplus.extension.plugins.MybatisPlusInterceptor;import com.baomidou.mybatisplus.extension.plugins.inner.PaginationInnerInterceptor;import org.springframework.context.annotation.Bean;import org.springframework.context.annotation.Configuration;@Configuration public class MPConfig { @Bean public MybatisPlusInterceptor setMybatisPlusInterceptor () { MybatisPlusInterceptor interceptor = new MybatisPlusInterceptor (); interceptor.addInnerInterceptor(new PaginationInnerInterceptor ()); return interceptor; } }
整合Druid SpringBoot原生没有整合Druid 单Druid有对应的Starter
<dependency > <groupId > com.alibaba</groupId > <artifactId > druid-spring-boot-starter</artifactId > <version > 1.2.9</version > </dependency >
application.yml
spring: datasource: druid: driver-class-name: com.mysql.cj.jdbc.Driver url: jdbc:mysql:///springboot_db?useSSL=false&serverTimezone=UTC username: root password: ganga
🌸整合服务器方案🌸 内置Tomcat服务器 SpringBoot整合 内置了Tomcat服务器
整合Jetty服务器 SpringBoot整合了Jetty服务器 但是要先关闭Tomcat服务器
<dependency > <groupId > org.springframework.boot</groupId > <artifactId > spring-boot-starter-web</artifactId > <exclusions > <exclusion > <groupId > org.springframework.boot</groupId > <artifactId > spring-boot-starter-tomcat</artifactId > </exclusion > </exclusions > </dependency > <dependency > <groupId > org.springframework.boot</groupId > <artifactId > spring-boot-starter-jetty</artifactId > </dependency >
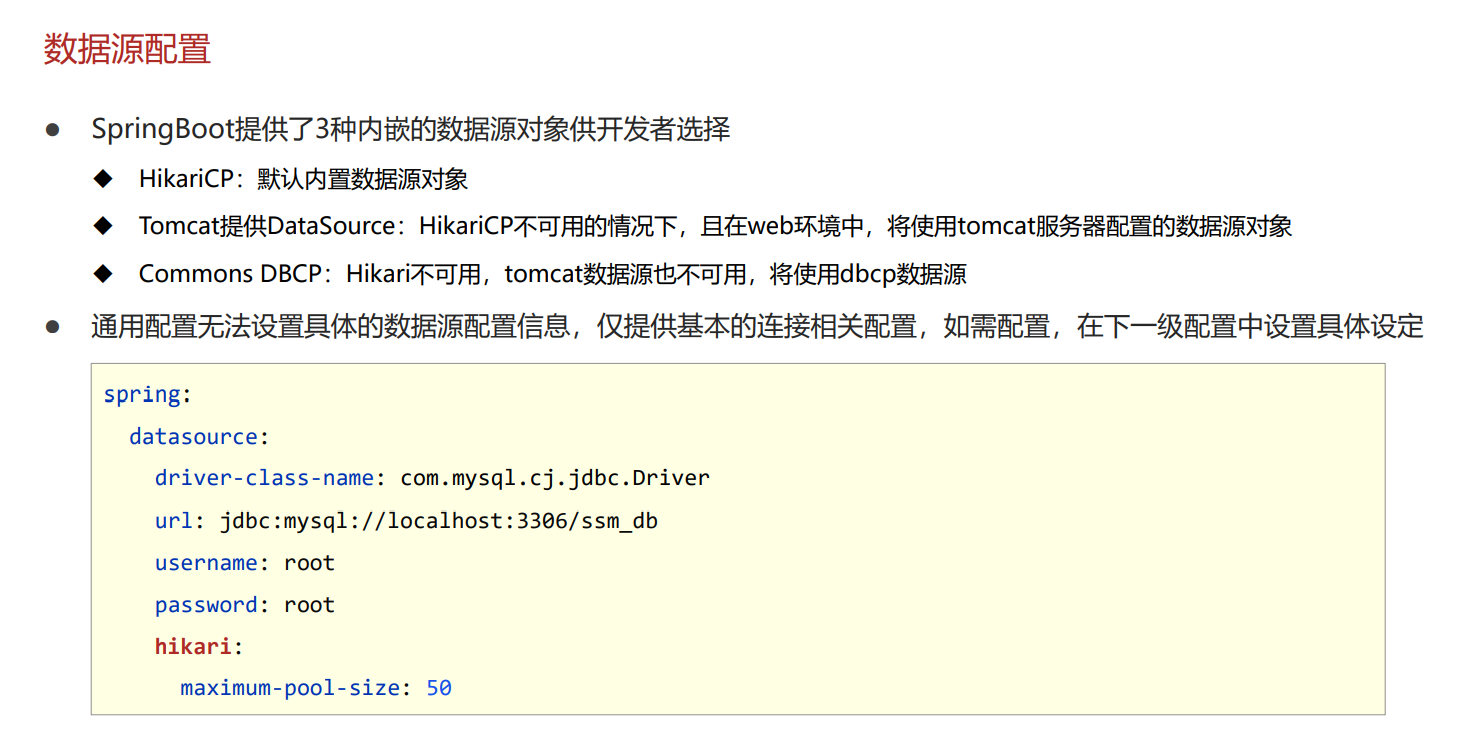
🌸数据层解决方案🌸 内置数据源 SpringBoot提供了3中内置数据源供使用 默认时是 hikari 数据源
spring: datasource: driver-class-name: org.h2.Driver url: jdbc:h2:~/test username: ganga password: 123456
内置数据库 SpringBoot提供了3种内嵌数据库供开发者选择,提高开发测试效率
◆ H2
◆ HSQL
◆ Derby
H2内嵌数据库
pom.xml 注意要导入两个坐标
<dependency > <groupId > org.springframework.boot</groupId > <artifactId > spring-boot-starter-data-jpa</artifactId > </dependency > <dependency > <groupId > com.h2database</groupId > <artifactId > h2</artifactId > <scope > runtime</scope > </dependency >
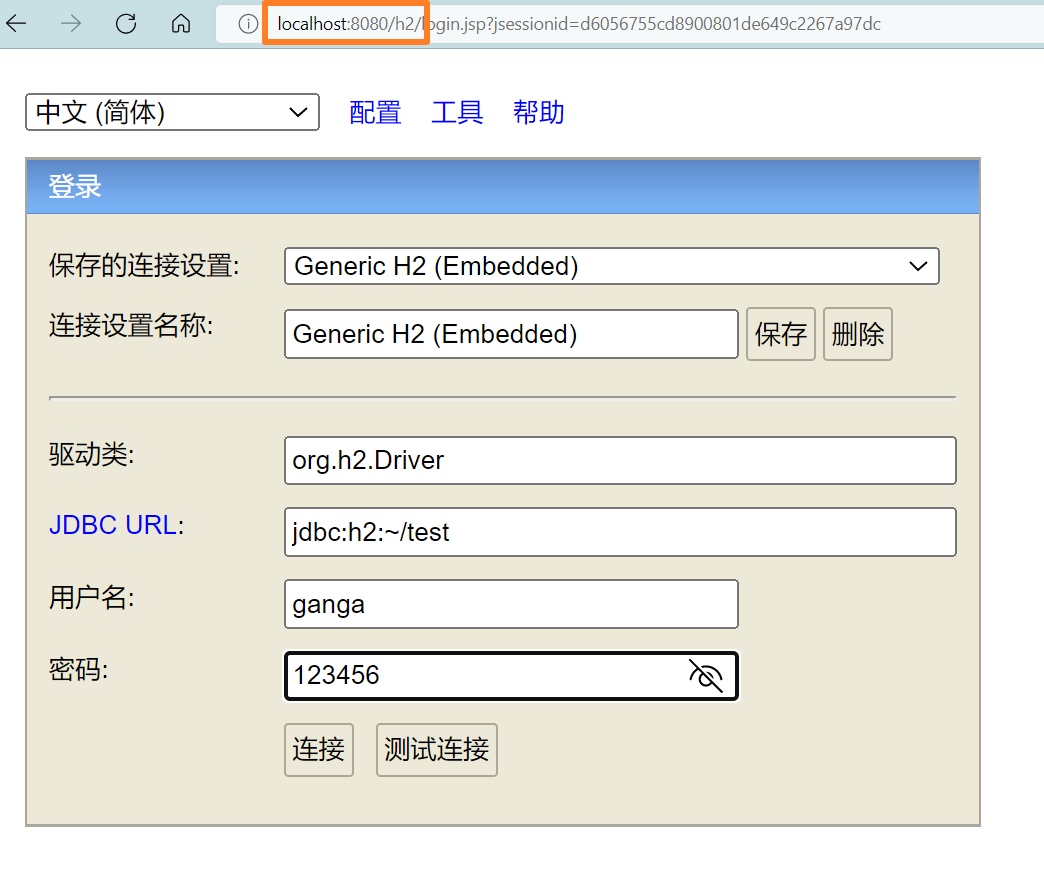
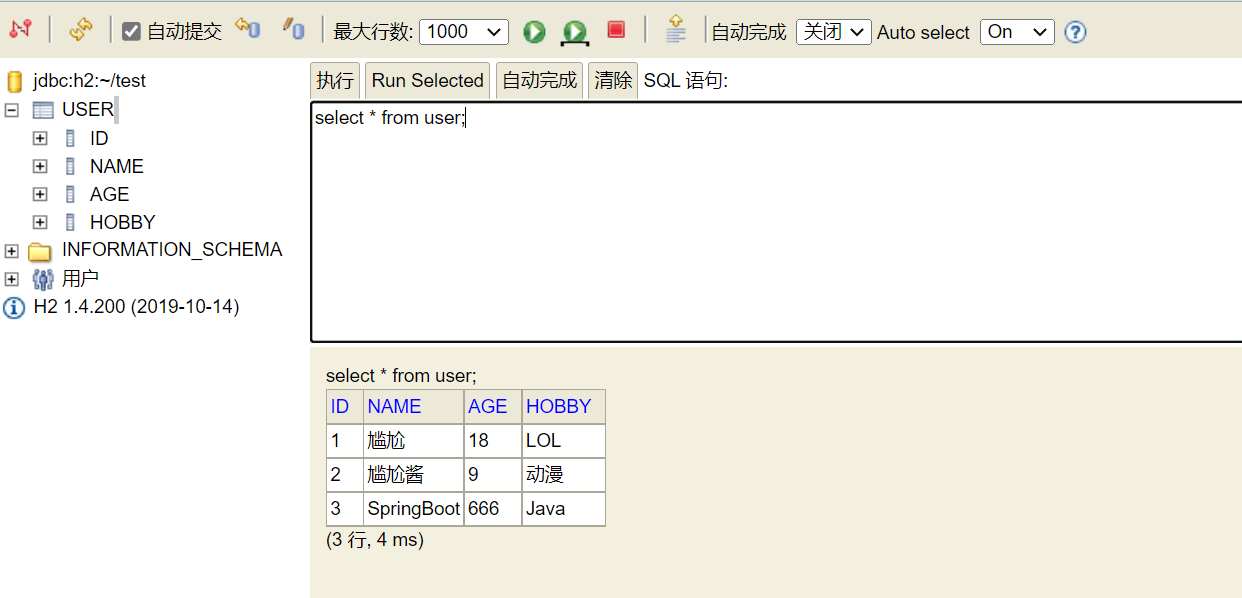
application.yml
spring: datasource: driver-class-name: org.h2.Driver url: jdbc:h2:~/test username: ganga password: 123456 h2: console: enabled: true path: /h2
整合Redis 下载连接
服务端启动命令: redis-server.exe redis.windows.conf
服务端启动命令: redis-cli.exe
pom.xml
<dependency > <groupId > org.springframework.boot</groupId > <artifactId > spring-boot-starter-data-redis</artifactId > </dependency >
默认是 lettcus 如果想用jedis只需要导入坐标 配置中开启 即可
<dependency > <groupId > redis.clients</groupId > <artifactId > jedis</artifactId > </dependency >
application.yml
spring: redis: host: localhost port: 6379 client-type: jedis lettuce: pool: max-active: 16 jedis: pool: max-active: 16
RedisTemplate
package com.ganga;import org.junit.jupiter.api.Test;import org.springframework.beans.factory.annotation.Autowired;import org.springframework.boot.test.context.SpringBootTest;import org.springframework.data.redis.core.HashOperations;import org.springframework.data.redis.core.RedisTemplate;import org.springframework.data.redis.core.ValueOperations;@SpringBootTest class RedisTests { @Autowired private RedisTemplate redisTemplate; @Test void setTest () { ValueOperations operations = redisTemplate.opsForValue(); operations.set("my_name" ,"尴尬酱" ); } @Test void getTest () { ValueOperations operations = redisTemplate.opsForValue(); Object myName = operations.get("my_name" ); System.out.println(myName); } @Test void hsetTest () { HashOperations hashOperations = redisTemplate.opsForHash(); hashOperations.put("stu1" ,"name" ,"尴尬酱" ); hashOperations.put("stu1" ,"age" ,9 ); hashOperations.put("stu1" ,"hobby" ,"动漫" ); } @Test void hgetTest () { HashOperations hashOperations = redisTemplate.opsForHash(); Object obj1 = hashOperations.get("stu1" , "name" ); Object obj2 = hashOperations.get("stu1" , "age" ); Object obj3 = hashOperations.get("stu1" , "hobby" ); System.out.println(obj1); System.out.println(obj2); System.out.println(obj3); } }
RedisTemplate<>是有泛型了 下面对String类型操作
StringRedisTemplate
package com.ganga;import org.junit.jupiter.api.Test;import org.springframework.beans.factory.annotation.Autowired;import org.springframework.boot.test.context.SpringBootTest;import org.springframework.data.redis.core.StringRedisTemplate;import org.springframework.data.redis.core.ValueOperations;@SpringBootTest public class StringRedisTests { @Autowired private StringRedisTemplate stringRedisTemplate; @Test void setTest () { ValueOperations<String, String> ops = stringRedisTemplate.opsForValue(); ops.set("尴尬了" ,"尴尬" ); } @Test void getTest () { ValueOperations<String, String> ops = stringRedisTemplate.opsForValue(); String s1 = ops.get("mylist" ); String s2 = ops.get("尴尬了" ); System.out.println(s1); System.out.println(s2); } }
整合MongoDB SpringBoot整合了MongoDB
pom.xml
<dependency > <groupId > org.springframework.boot</groupId > <artifactId > spring-boot-starter-data-mongodb</artifactId > </dependency >
application.xml
spring: config: activate: on-profile: test data: mongodb: host: localhost database: mydata port: 27017
三层演示:
pojo
package com.ganga.pojo;import lombok.AllArgsConstructor;import lombok.Data;import lombok.NoArgsConstructor;import org.springframework.data.annotation.Id;import org.springframework.data.mongodb.core.index.Indexed;import org.springframework.data.mongodb.core.mapping.Document;import org.springframework.data.mongodb.core.mapping.Field;import java.io.Serializable;import java.time.LocalDateTime;import java.util.Date;@Document(collection = "comment") @Data @NoArgsConstructor @AllArgsConstructor public class Comment implements Serializable { @Id private String id; @Field("content") private String content; private Date publishtime; @Indexed private String userid; private String nickname; private LocalDateTime createdatetime; private Integer likenum; private Integer replynum; private String state; private String parentid; private String articleid; }
dao
package com.ganga.dao;import com.ganga.pojo.Comment;import org.springframework.data.domain.Page;import org.springframework.data.domain.Pageable;import org.springframework.data.mongodb.repository.MongoRepository;public interface CommentRepository extends MongoRepository <Comment,String> { Page<Comment> findByParentid (String parentid, Pageable pageable) ; }
service
package com.ganga.service;import com.ganga.dao.CommentRepository;import com.ganga.pojo.Comment;import org.springframework.beans.factory.annotation.Autowired;import org.springframework.data.domain.Page;import org.springframework.data.domain.PageRequest;import org.springframework.data.mongodb.core.MongoTemplate;import org.springframework.data.mongodb.core.query.Criteria;import org.springframework.data.mongodb.core.query.Query;import org.springframework.data.mongodb.core.query.Update;import org.springframework.stereotype.Service;import java.util.List;@Service public class CommentService { @Autowired private CommentRepository commentRepository; @Autowired private MongoTemplate mongoTemplate; public void saveComment (Comment comment) { commentRepository.save(comment); } public void updateComment (Comment comment) { commentRepository.save(comment); } public void deleteByIdComment (String id) { commentRepository.deleteById(id); } public List<Comment> findAllComments () { List<Comment> comments = commentRepository.findAll(); return comments; } public Comment findByIdComment (String id) { Comment comment = commentRepository.findById(id).get(); return comment; } public void updateCommentLikenum (String id) { Query query= Query.query(Criteria.where("_id" ).is(id)); Update update = new Update (); update.inc("likenum" ); mongoTemplate.updateFirst(query,update,"comment" ); } public Page<Comment> findPages (String parentid, int page , int size) { return commentRepository.findByParentid(parentid, PageRequest.of(page-1 ,size)); } }
controller
略
演示 MongoTemplate
package com.ganga;import com.ganga.pojo.Book;import org.junit.jupiter.api.Test;import org.springframework.beans.factory.annotation.Autowired;import org.springframework.boot.test.context.SpringBootTest;import org.springframework.data.mongodb.core.MongoTemplate;import java.util.List;@SpringBootTest class MongoTemplateTests { @Autowired private MongoTemplate mongoTemplate; @Test void saveTest01 () { Book book = new Book (); book.setName("SpringBoot" ); book.setType("SpringBoot" ); book.setDescription("SpringBoot" ); mongoTemplate.save(book); } @Test void saveTest02 () { Book book = new Book (); book.setId("2" ); book.setName("SpringBoot2" ); book.setType("SpringBoot2" ); book.setDescription("SpringBoot2" ); mongoTemplate.save(book); } @Test void findAll () { List<Book> books = mongoTemplate.findAll(Book.class); for (Book book : books) { System.out.println(book); } } }
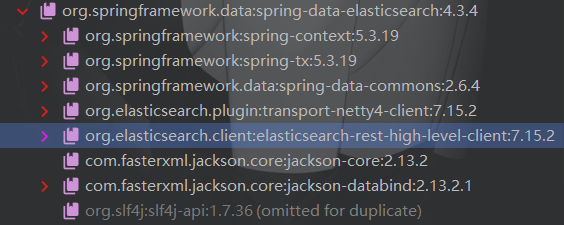
整合ElasticSearch <dependency > <groupId > org.springframework.boot</groupId > <artifactId > spring-boot-starter-data-elasticsearch</artifactId > </dependency >
演示 RestHighLevelClient Es高级客户端对象
package com.ganga;import com.alibaba.fastjson.JSON;import com.ganga.pojo.Brand;import com.ganga.server.BrandService;import org.elasticsearch.action.admin.indices.delete.DeleteIndexRequest;import org.elasticsearch.action.bulk.BulkRequest;import org.elasticsearch.action.delete.DeleteRequest;import org.elasticsearch.action.get.GetRequest;import org.elasticsearch.action.get.GetResponse;import org.elasticsearch.action.index.IndexRequest;import org.elasticsearch.action.search.SearchRequest;import org.elasticsearch.action.search.SearchResponse;import org.elasticsearch.client.RequestOptions;import org.elasticsearch.client.RestHighLevelClient;import org.elasticsearch.client.indices.CreateIndexRequest;import org.elasticsearch.common.xcontent.XContentType;import org.elasticsearch.index.query.QueryBuilder;import org.elasticsearch.index.query.QueryBuilders;import org.elasticsearch.search.SearchHit;import org.elasticsearch.search.SearchHits;import org.elasticsearch.search.builder.SearchSourceBuilder;import org.junit.jupiter.api.Test;import org.springframework.beans.factory.annotation.Autowired;import org.springframework.boot.test.context.SpringBootTest;import java.io.IOException;import java.util.List;@SpringBootTest public class AutoESTests { @Autowired private RestHighLevelClient client; @Test void autoTest () throws IOException { org.elasticsearch.client.indices.CreateIndexRequest request = new CreateIndexRequest ("bookk" ); client.indices().create(request, RequestOptions.DEFAULT); } @Test void delTest () throws IOException { DeleteIndexRequest deleteIndexRequest = new DeleteIndexRequest ("brands" ); client.indices().delete(deleteIndexRequest,RequestOptions.DEFAULT); } @Test void indexTest () throws IOException { CreateIndexRequest request = new CreateIndexRequest ("brands" ); String json = "{\n" + " \"mappings\": {\n" + " \"properties\": {\n" + " \"id\": {\n" + " \"type\": \"keyword\"\n" + " },\n" + " \"brandName\": {\n" + " \"type\": \"text\",\n" + " \"analyzer\": \"ik_max_word\",\n" + " \"copy_to\": \"all\"\n" + " },\n" + " \"companyName\": {\n" + " \"type\": \"text\",\n" + " \"analyzer\": \"ik_max_word\",\n" + " \"copy_to\": \"all\"\n" + " },\n" + " \"ordered\": {\n" + " \"type\": \"keyword\"\n" + " },\n" + " \"description\":{\n" + " \"type\": \"text\",\n" + " \"analyzer\": \"ik_max_word\",\n" + " \"copy_to\": \"all\"\n" + " },\n" + " \"status\":{\n" + " \"type\": \"keyword\"\n" + " },\n" + " \"all\": {\n" + " \"type\": \"text\",\n" + " \"analyzer\": \"ik_max_word\"\n" + " }\n" + " }\n" + " }\n" + "}" ; request.source(json, XContentType.JSON); client.indices().create(request,RequestOptions.DEFAULT); } @Test void createDocTest (@Autowired BrandService brandService) { Brand brand = brandService.getById(1 ); System.out.println(brand); IndexRequest request = new IndexRequest ("brands" ).id(brand.getId()); String json = JSON.toJSONString(brand); System.out.println(json); request.source(json,XContentType.JSON); try { client.index(request,RequestOptions.DEFAULT); } catch (IOException e) { e.printStackTrace(); } } @Test void createDocAllTest (@Autowired BrandService brandService) { List<Brand> brands = brandService.list(); System.out.println(brands); BulkRequest request = new BulkRequest (); for (Brand brand : brands) { IndexRequest ir = new IndexRequest ("brands" ).id(brand.getId()); ir.source(JSON.toJSONString(brand),XContentType.JSON); request.add(ir); } try { client.bulk(request,RequestOptions.DEFAULT); } catch (IOException e) { e.printStackTrace(); } } @Test void deleteByIdTest () { DeleteRequest request = new DeleteRequest ("brands" ).id("17" ); try { client.delete(request,RequestOptions.DEFAULT); } catch (IOException e) { e.printStackTrace(); } } @Test void getDoc () throws IOException { GetRequest request = new GetRequest ("brands" ).id("3" ); GetResponse response = client.get(request, RequestOptions.DEFAULT); String json = response.getSourceAsString(); System.out.println(json); Brand brand = JSON.parseObject(json, Brand.class); System.out.println(brand); } @Test void getDocSearch () throws IOException { SearchRequest request = new SearchRequest ("brands" ); SearchSourceBuilder builder = new SearchSourceBuilder (); builder.query(QueryBuilders.matchQuery("all" ,"技术" )); request.source(builder); SearchResponse search = client.search(request, RequestOptions.DEFAULT); SearchHits hits = search.getHits(); for (SearchHit hit : hits) { String x = hit.getSourceAsString(); System.out.println(x); } } }
三层演示
pojo
package com.ganga.pojo;import lombok.AllArgsConstructor;import lombok.Data;import lombok.NoArgsConstructor;import org.springframework.data.elasticsearch.annotations.Document;@Data @NoArgsConstructor @AllArgsConstructor @Document(indexName = "brands") public class Brand { private String id; private String brandName; private String companyName; private Integer ordered; private String description; private Integer status; }
dao
package com.ganga.dao;import com.ganga.pojo.Brand;import org.springframework.data.elasticsearch.repository.ElasticsearchRepository;public interface BrandRepository extends ElasticsearchRepository <Brand,String> {}
service
package com.ganga.server;import com.ganga.dao.BrandRepository;import com.ganga.pojo.Brand;import org.springframework.beans.factory.annotation.Autowired;import org.springframework.stereotype.Service;@Service public class BrandEsService { @Autowired private BrandRepository brandRepository; public Brand getById (String id) { return brandRepository.findById(id).get(); } public Iterable<Brand> getAll () { return brandRepository.findAll(); } public void save (Brand brand) { Brand save = brandRepository.save(brand); } public void deleteById (String id) { brandRepository.deleteById(id); } }
controller
略
🌸整合缓存方案🌸
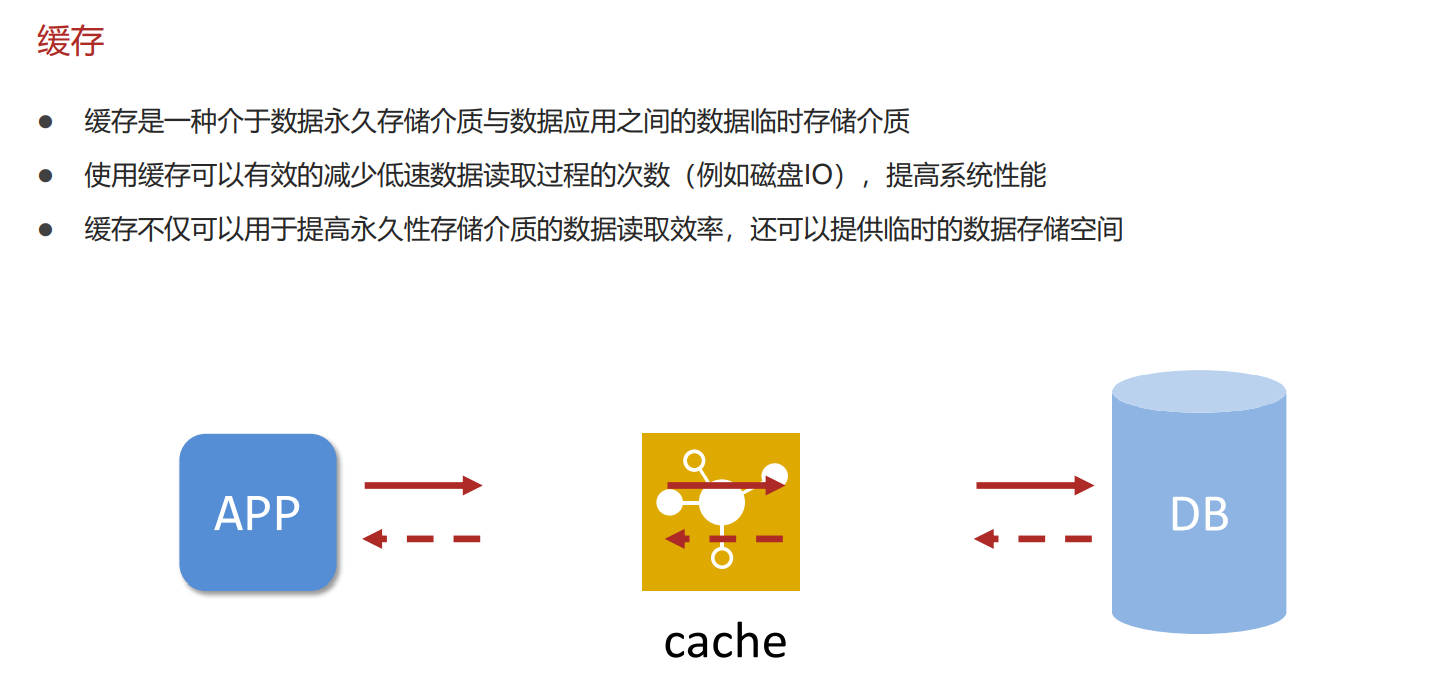
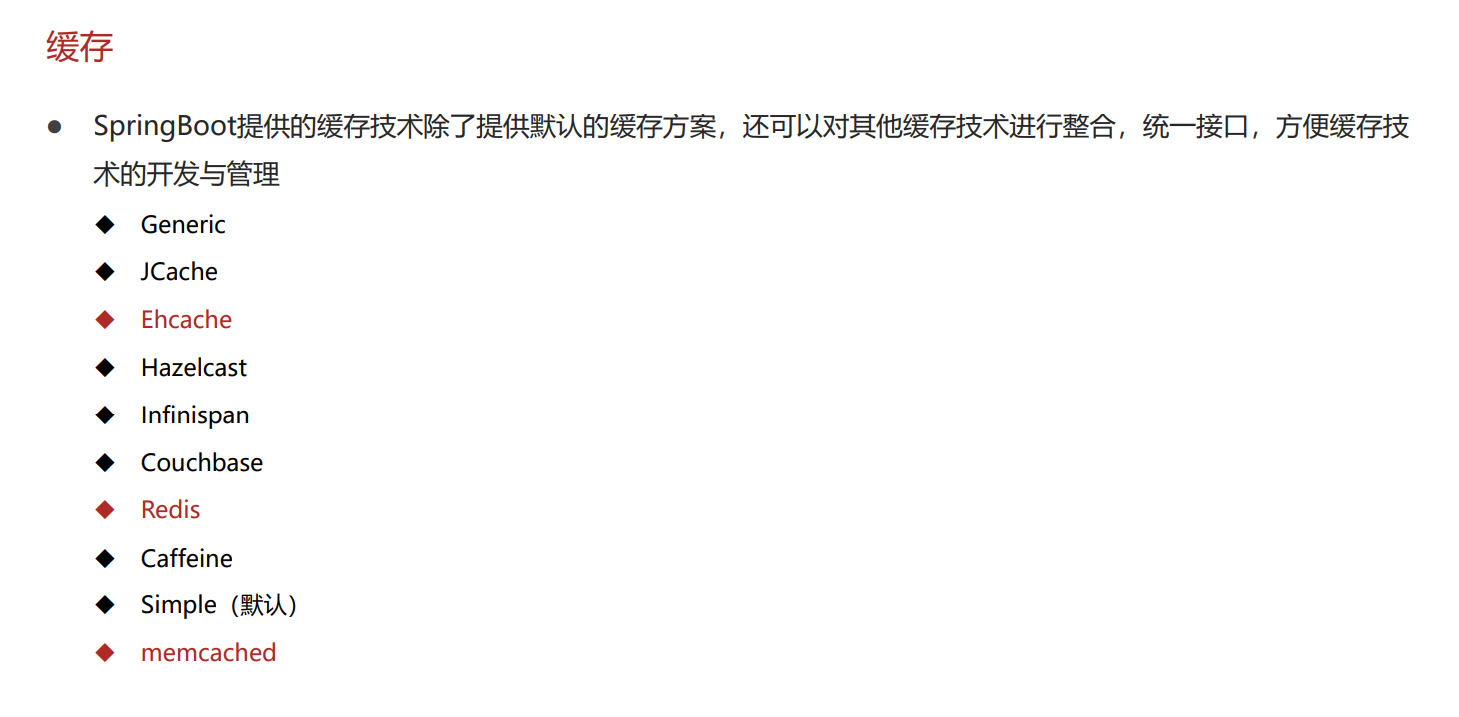
内置默认Simple缓存 pom.xml
<dependency > <groupId > org.springframework.boot</groupId > <artifactId > spring-boot-starter-cache</artifactId > </dependency >
Application.java
@SpringBootApplication @EnableCaching public class SpringCacheApplication { public static void main (String[] args) { SpringApplication.run(SpringCacheApplication.class, args); } }
BrandService
package com.ganga.server.impl;import com.ganga.dao.BrandDao;import com.ganga.pojo.Brand;import com.ganga.server.BrandService;import org.springframework.beans.factory.annotation.Autowired;import org.springframework.cache.annotation.Cacheable;import org.springframework.stereotype.Service;import java.util.HashMap;@Service public class BrandServiceImpl implements BrandService { @Autowired private BrandDao brandDao; @Override @Cacheable(value = "cacheSpace", key = "#id") public Brand getById (int id) { System.out.println("===============" ); Brand brand = brandDao.selectById(id); System.out.println("===============" ); return brand; } }
MsgService
package com.ganga.server.impl;import com.ganga.pojo.MsgCode;import com.ganga.server.MsgService;import com.ganga.utils.CodeUtils;import org.springframework.beans.factory.annotation.Autowired;import org.springframework.cache.annotation.CachePut;import org.springframework.stereotype.Service;@Service public class MsgServiceImpl implements MsgService { @Autowired private CodeUtils codeUtils; @Override @CachePut(value = "msgCacheSpace",key = "#tel") public String getAndSave (String tel) { return codeUtils.generator(tel); } @Override public boolean check (MsgCode msgCode) { String code = msgCode.getCode(); String cacheCode = codeUtils.getCacheCode(msgCode.getTal()); return code.equals(cacheCode); } }
utils.CodeUtils
package com.ganga.utils;import org.springframework.cache.annotation.Cacheable;import org.springframework.stereotype.Component;@Component public class CodeUtils { private String [] patch = {"000000" ,"00000" ,"0000" ,"000" ,"00" ,"0" ,"" }; public String generator (String tele) { int hash = tele.hashCode(); int encryption = 20206666 ; long result = hash ^ encryption; long nowTime = System.currentTimeMillis(); result = result ^ nowTime; long code = result % 1000000 ; code = code < 0 ? -code : code; String codeStr = code + "" ; int len = codeStr.length(); return patch[len] + codeStr; } @Cacheable(value = "msgCacheSpace", key = "#tel") public String getCacheCode (String tel) { return null ; } }
整合Ehcache缓存 <dependency > <groupId > org.springframework.boot</groupId > <artifactId > spring-boot-starter-cache</artifactId > </dependency > <dependency > <groupId > net.sf.ehcache</groupId > <artifactId > ehcache</artifactId > </dependency >
application.xml
spring: cache: type: ehcache ehcache: config: classpath:ehcache.xml
ehcache.xml
<?xml version="1.0" encoding="UTF-8" ?> <ehcache xmlns:xsi ="http://www.w3.org/2001/XMLSchema-instance" xsi:noNamespaceSchemaLocation ="http://ehcache.org/ehcache.xsd" updateCheck ="false" > <diskStore path ="D:\ehcache" /> <defaultCache eternal ="false" diskPersistent ="false" maxElementsInMemory ="1000" overflowToDisk ="false" timeToIdleSeconds ="60" timeToLiveSeconds ="60" memoryStoreEvictionPolicy ="LRU" /> <cache name ="msgCacheSpace" eternal ="false" diskPersistent ="false" maxElementsInMemory ="1000" overflowToDisk ="false" timeToIdleSeconds ="10" timeToLiveSeconds ="10" memoryStoreEvictionPolicy ="LRU" /> <cache name ="cacheSpace" eternal ="false" diskPersistent ="false" maxElementsInMemory ="1000" overflowToDisk ="false" timeToIdleSeconds ="1800" timeToLiveSeconds ="3600" memoryStoreEvictionPolicy ="LRU" /> </ehcache >
Application.java
@SpringBootApplication @EnableCaching public class EhcacheApplication { public static void main (String[] args) { SpringApplication.run(EhcacheApplication.class, args); } }
BrandService
@Override @Cacheable(value = "cacheSpace", key = "#id") public Brand getById (int id) { return brandDao.selectById(id); }
MsgService
package com.ganga.server.impl;import com.ganga.pojo.MsgCode;import com.ganga.server.MsgService;import com.ganga.utils.CodeUtils;import org.springframework.beans.factory.annotation.Autowired;import org.springframework.cache.annotation.CachePut;import org.springframework.stereotype.Service;@Service public class MsgServiceImpl implements MsgService { @Autowired private CodeUtils codeUtils; @Override @CachePut(value = "msgCacheSpace",key = "#tel") public String getAndSave (String tel) { return codeUtils.generator(tel); } @Override public boolean check (MsgCode msgCode) { String code = msgCode.getCode(); String cacheCode = codeUtils.getCacheCode(msgCode.getTal()); return code.equals(cacheCode); } }
整合Redis缓存 <dependency > <groupId > org.springframework.boot</groupId > <artifactId > spring-boot-starter-data-redis</artifactId > </dependency >
application.yml
spring: cache: type: redis redis: cache-null-values: true use-key-prefix: true key-prefix: msg_ time-to-live: 10s redis: port: 6379 host: localhost redis: host: localhost port: 6379 lettuce: pool: max-active: 16
Application.java
package com.ganga;import org.springframework.boot.SpringApplication;import org.springframework.boot.autoconfigure.SpringBootApplication;import org.springframework.cache.annotation.EnableCaching;@SpringBootApplication @EnableCaching public class RedisApplication { public static void main (String[] args) { SpringApplication.run(RedisApplication.class, args); } }
。。。其他都不变 使用都一样
整合Memcache SpringBoot没有整合Memcache 需要手动配置
<dependency > <groupId > org.springframework.boot</groupId > <artifactId > spring-boot-starter-cache</artifactId > </dependency > <dependency > <groupId > com.googlecode.xmemcached</groupId > <artifactId > xmemcached</artifactId > <version > 2.4.6</version > </dependency >
memcached: servers: localhost:11211 poolSize: 10 opTimeout: 5000
配置config
导入配置参数
package com.ganga.config;import lombok.Data;import org.springframework.boot.context.properties.ConfigurationProperties;import org.springframework.stereotype.Component;@Data @Component @ConfigurationProperties(prefix = "memcached") public class XMemcachedProperties { private String servers; private Integer poolSize; private Long opTimeout; }
配置客户端放入容器
package com.ganga.config;import net.rubyeye.xmemcached.MemcachedClient;import net.rubyeye.xmemcached.MemcachedClientBuilder;import net.rubyeye.xmemcached.XMemcachedClientBuilder;import org.springframework.beans.factory.annotation.Autowired;import org.springframework.context.annotation.Bean;import org.springframework.context.annotation.Configuration;import java.io.IOException;@Configuration public class XMemcachedConfig { @Autowired private XMemcachedProperties properties; @Bean public MemcachedClient getXMemcachedClient () throws IOException { MemcachedClientBuilder builder = new XMemcachedClientBuilder (properties.getServers()); builder.setConnectionPoolSize(properties.getPoolSize()); builder.setOpTimeout(properties.getOpTimeout()); MemcachedClient memcachedClient = builder.build(); return memcachedClient; } }
使用 service.MsgService
package com.ganga.server.impl;import com.ganga.pojo.MsgCode;import com.ganga.server.MsgService;import com.ganga.utils.CodeUtils;import net.rubyeye.xmemcached.MemcachedClient;import net.rubyeye.xmemcached.exception.MemcachedException;import org.springframework.beans.factory.annotation.Autowired;import org.springframework.cache.annotation.CachePut;import org.springframework.stereotype.Service;import java.util.concurrent.TimeoutException;@Service public class MsgServiceImpl implements MsgService { @Autowired private CodeUtils codeUtils; @Autowired private MemcachedClient memcachedClient; @Override public String getAndSave (String tel) { String code = codeUtils.generator(tel); System.out.println(code); try { memcachedClient.set(tel, 20 , code); } catch (Exception e) { e.printStackTrace(); } return code; } @Override public boolean check (MsgCode msgCode) { String code = msgCode.getCode(); System.out.println("user===>" + code); String cacheCode = null ; try { cacheCode = memcachedClient.get(msgCode.getTal()); } catch (Exception e) { e.printStackTrace(); } System.out.println("cache===>" + cacheCode); return code.equals(cacheCode); } }
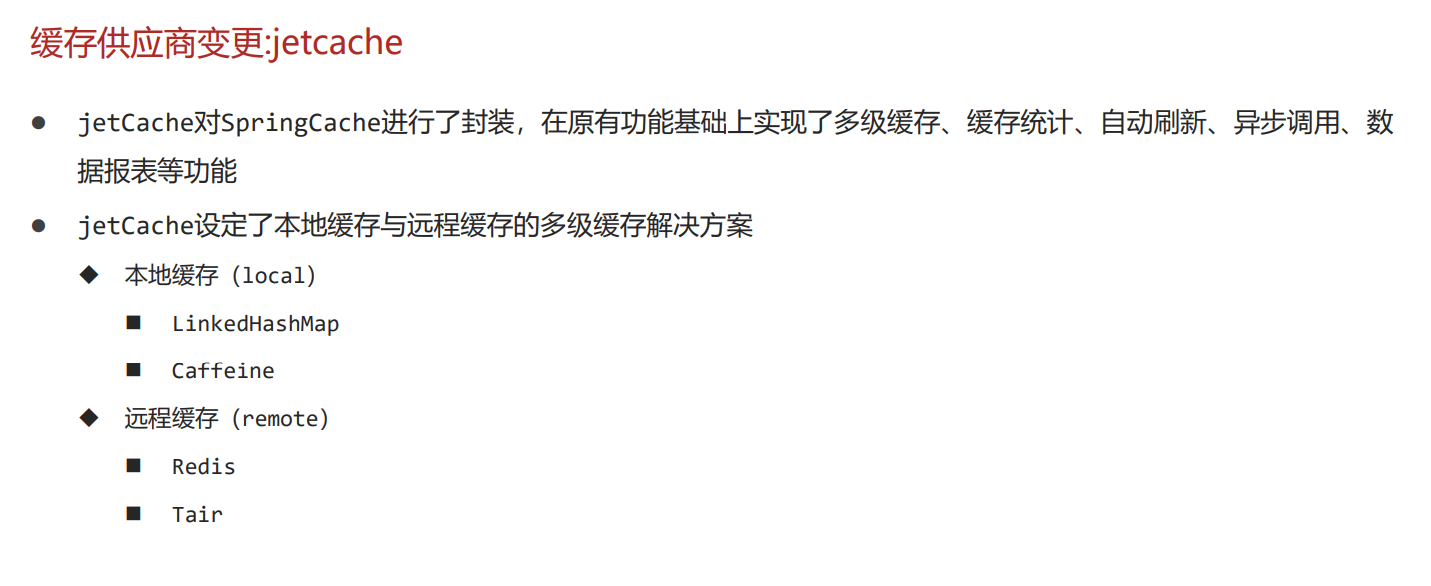
整合Jetcache缓存
pom.xml
<dependency > <groupId > com.alicp.jetcache</groupId > <artifactId > jetcache-starter-redis</artifactId > <version > 2.6.0</version > </dependency >
application.yml
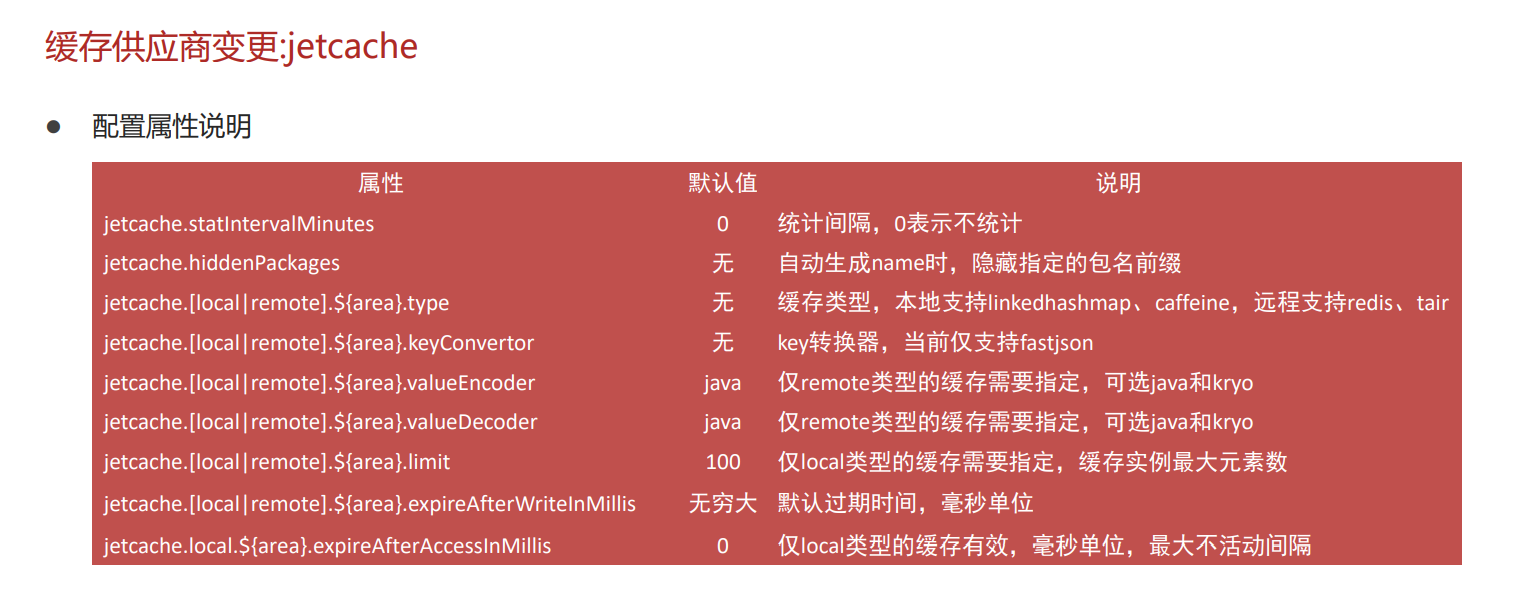
jetcache: statIntervalMinutes: 1 local: default: type: linkedhashmap keyConvertor: fastjson valueEncoder: java valueDecoder: java limit: 50 expireAfterWriteInMillis: 100000 env2: type: linkedhashmap keyConvertor: fastjson valueEncoder: java valueDecoder: java limit: 50 expireAfterWriteInMillis: 100000 remote: default: keyConvertor: fastjson valueEncoder: java valueDecoder: java type: redis host: localhost port: 6379 poolConfig: maxTotal: 30 env1: keyConvertor: fastjson valueEncoder: java valueDecoder: java type: redis host: localhost port: 6379 poolConfig: maxTotal: 30
Application.java
package com.ganga;import com.alicp.jetcache.anno.config.EnableCreateCacheAnnotation;import com.alicp.jetcache.anno.config.EnableMethodCache;import org.springframework.boot.SpringApplication;import org.springframework.boot.autoconfigure.SpringBootApplication;@SpringBootApplication @EnableCreateCacheAnnotation @EnableMethodCache(basePackages = "com.ganga") public class JetCacheApplication { public static void main (String[] args) { SpringApplication.run(JetCacheApplication.class, args); } }
MsgService.java
package com.ganga.server.impl;import com.alicp.jetcache.Cache;import com.alicp.jetcache.anno.CacheType;import com.alicp.jetcache.anno.CreateCache;import com.ganga.pojo.MsgCode;import com.ganga.server.MsgService;import com.ganga.utils.CodeUtils;import org.springframework.beans.factory.annotation.Autowired;import org.springframework.stereotype.Service;import java.util.concurrent.TimeUnit;@Service public class MsgServiceImpl implements MsgService { @Autowired private CodeUtils codeUtils; @CreateCache(area = "env1",name = "msg_",expire = 20,timeUnit = TimeUnit.SECONDS,cacheType = CacheType.REMOTE) private Cache<String,String> msgCache; @Override public String getAndSave (String tel) { String code = codeUtils.generator(tel); msgCache.put(tel,code); return code; } @Override public boolean check (MsgCode msgCode) { String code = msgCache.get(msgCode.getTal()); System.out.println(code); return msgCode.getCode().equals(code); } }
BrandService.java
package com.ganga.server.impl;import com.alicp.jetcache.Cache;import com.alicp.jetcache.anno.*;import com.ganga.dao.BrandDao;import com.ganga.pojo.Brand;import com.ganga.server.BrandService;import org.springframework.beans.factory.annotation.Autowired;import org.springframework.stereotype.Service;import java.util.concurrent.TimeUnit;@Service public class BrandServiceImpl implements BrandService { @Autowired private BrandDao brandDao; @CreateCache(area = "env2",name = "test_",expire = 10,timeUnit = TimeUnit.MINUTES,cacheType = CacheType.LOCAL) private Cache<Integer,Brand> brandCache; @Override public Brand getByIdDemo01 (int id) { Brand brand = brandCache.get(id); System.out.println(brand); if (brand == null ){ brand = brandDao.selectById(id); System.out.println("====>" + brand); brandCache.put(id,brand); } return brand; } @Override @Cached(name = "brand_",key = "#id",expire = 10,cacheType = CacheType.REMOTE,timeUnit = TimeUnit.MINUTES) @CacheRefresh(refresh = 10,timeUnit = TimeUnit.MINUTES) public Brand getByIdDemo02 (int id) { return brandDao.selectById(id); } @Override public boolean save (Brand brand) { return brandDao.insert(brand) > 0 ; } @Override @CacheUpdate(name="brand_", key="#brand.id", value="#brand") public boolean updateById (Brand brand) { return brandDao.updateById(brand) > 0 ; } @Override @CacheInvalidate(name="brand_", key = "#id") public boolean deleteById (int id) { return brandDao.deleteById(id) > 0 ; } }
整合J2cache二级缓存 <dependency > <groupId > net.oschina.j2cache</groupId > <artifactId > j2cache-core</artifactId > <version > 2.8.5-release</version > <exclusions > <exclusion > <groupId > org.slf4j</groupId > <artifactId > slf4j-simple</artifactId > </exclusion > </exclusions > </dependency > <dependency > <groupId > net.oschina.j2cache</groupId > <artifactId > j2cache-spring-boot2-starter</artifactId > <version > 2.8.0-release</version > </dependency > <dependency > <groupId > net.sf.ehcache</groupId > <artifactId > ehcache</artifactId > </dependency >
SpringBoot整合J2cache 就一个配置
j2cache: config-location: j2cache.properties
j2cache.properties
j2cache.L1.provider_class = ehcache ehcache.configXml = ehcache.xml j2cache.L2.provider_class = net.oschina.j2cache.cache.support.redis.SpringRedisProvider j2cache.L2.config_section = redis redis.hosts = localhost:6379 redis.mode = single redis.namespace = ganga j2cache.broadcast = net.oschina.j2cache.cache.support.redis.SpringRedisPubSubPolicy j2cache.l2-cache-open = true
ehcache.xml
<?xml version="1.0" encoding="UTF-8" ?> <ehcache xmlns:xsi ="http://www.w3.org/2001/XMLSchema-instance" xsi:noNamespaceSchemaLocation ="http://ehcache.org/ehcache.xsd" updateCheck ="false" > <diskStore path ="D:\ehcache" /> <defaultCache eternal ="false" diskPersistent ="false" maxElementsInMemory ="1000" overflowToDisk ="false" timeToIdleSeconds ="60" timeToLiveSeconds ="60" memoryStoreEvictionPolicy ="LRU" /> <cache name ="msgCacheSpace" eternal ="false" diskPersistent ="false" maxElementsInMemory ="1000" overflowToDisk ="false" timeToIdleSeconds ="10" timeToLiveSeconds ="30" memoryStoreEvictionPolicy ="LRU" /> <cache name ="cacheSpace" eternal ="false" diskPersistent ="false" maxElementsInMemory ="1000" overflowToDisk ="false" timeToIdleSeconds ="1800" timeToLiveSeconds ="3600" memoryStoreEvictionPolicy ="LRU" /> </ehcache >
使用: MsgService
package com.ganga.server.impl;import com.ganga.pojo.MsgCode;import com.ganga.server.MsgService;import com.ganga.utils.CodeUtils;import net.oschina.j2cache.CacheChannel;import org.springframework.beans.factory.annotation.Autowired;import org.springframework.stereotype.Service;@Service public class MsgServiceImpl implements MsgService { @Autowired private CodeUtils codeUtils; @Autowired private CacheChannel cacheChannel; @Override public String getAndSave (String tel) { String code = codeUtils.generator(tel); cacheChannel.set("msgCacheSpace" ,tel,code); return code; } @Override public boolean check (MsgCode msgCode) { String code = msgCode.getCode(); String codeCache = cacheChannel.get("msgCacheSpace" , msgCode.getTal()).asString(); return code.equals(codeCache); } }
🌸整合任务方案🌸
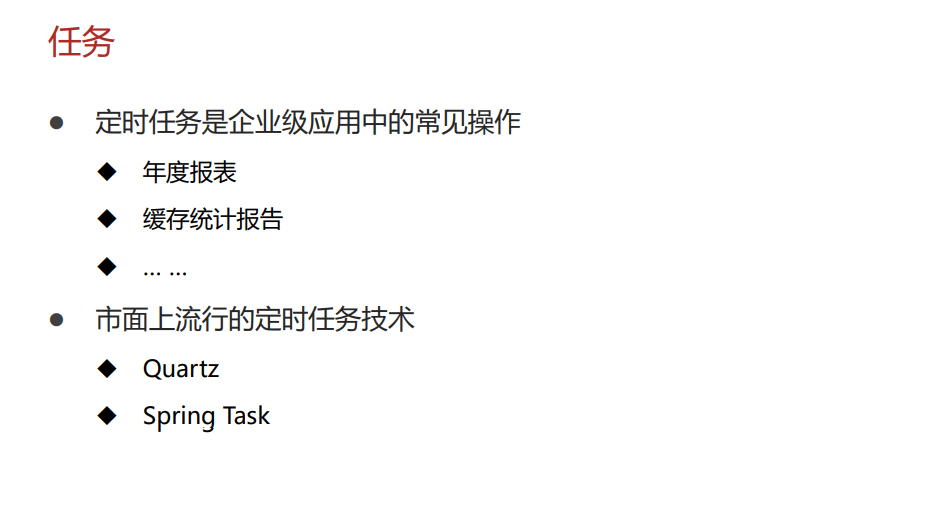
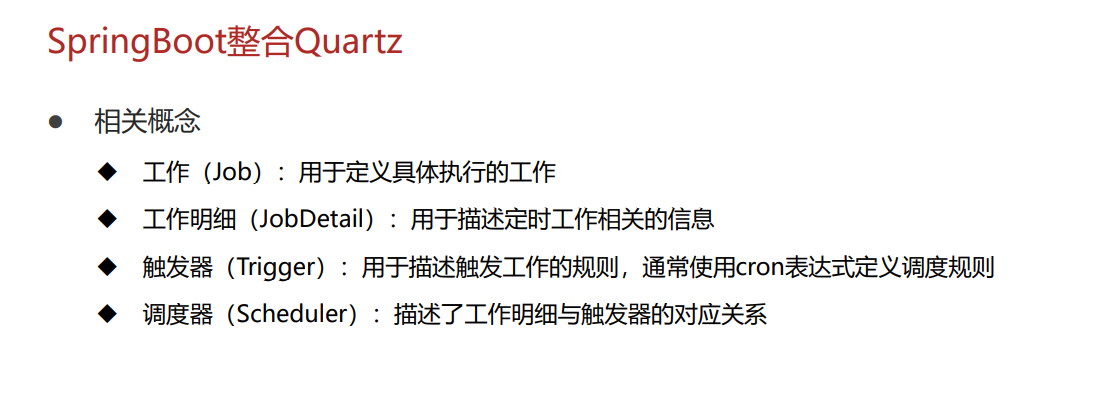
整合Quartz任务 SpringBoot整合了Quartz
pom.xml
<dependency > <groupId > org.springframework.boot</groupId > <artifactId > spring-boot-starter-quartz</artifactId > </dependency >
task.MyTask 继承 QuartzJobBean 具体执行的工作
package com.ganga.task;import org.quartz.JobExecutionContext;import org.quartz.JobExecutionException;import org.springframework.scheduling.quartz.QuartzJobBean;public class MyTask extends QuartzJobBean { @Override protected void executeInternal (JobExecutionContext context) throws JobExecutionException { System.out.println("quartz task running ..." ); } }
config.QuartzConfig 创建两个bean
package com.ganga.config;import com.ganga.task.MyTask;import org.quartz.*;import org.springframework.context.annotation.Bean;import org.springframework.context.annotation.Configuration;@Configuration public class QuartzConfig { @Bean public JobDetail getJobDetail () { return JobBuilder. newJob(MyTask.class). storeDurably(). build(); } @Bean public Trigger getTrigger () { ScheduleBuilder schedule = CronScheduleBuilder.cronSchedule("0/3 * * * * ?" ); return TriggerBuilder. newTrigger(). withSchedule(schedule). forJob(getJobDetail()). build(); } }
原生SpringTask任务 spring: task: scheduling: thread-name-prefix: Test_task_ pool: size: 20 shutdown: await-termination: false await-termination-period: 10s
@EnableScheduling
package com.ganga;import org.springframework.boot.SpringApplication;import org.springframework.boot.autoconfigure.SpringBootApplication;import org.springframework.scheduling.annotation.EnableScheduling;@EnableScheduling @SpringBootApplication public class SpringTaskApplication { public static void main (String[] args) { SpringApplication.run(SpringTaskApplication.class, args); } }
@Scheduled
package com.ganga.task;import org.springframework.scheduling.annotation.Scheduled;import org.springframework.stereotype.Component;@Component public class MyTask { @Scheduled(cron = "0/2 * * * * ?") public void printStr () { System.out.println(Thread.currentThread().getName() + ": Spring Task Running ... " ); } }
Cron表达式
🌸整合邮件方案🌸 原生SpringMail邮箱 <dependency > <groupId > org.springframework.boot</groupId > <artifactId > spring-boot-starter-mail</artifactId > </dependency >
application.yml
spring: profiles: active: formqq --- spring: profiles: formqq mail: host: smtp.qq.com username: xxxxxx@qq.com password: xxxxxx --- spring: profiles: form163 mail: host: smtp.163.com username: xxxxxx password: xxxxxx
注入JavaMailSender对象
简单的消息 SimpleMailMessage
package com.ganga.mail.impl;import com.ganga.mail.MailService;import org.springframework.beans.factory.annotation.Autowired;import org.springframework.mail.SimpleMailMessage;import org.springframework.mail.javamail.JavaMailSender;import org.springframework.stereotype.Service;@Service public class MailServiceImpl implements MailService { @Autowired private JavaMailSender javaMailSender; @Override public void sendMail (String from, String to, String subject, String text) { SimpleMailMessage message = new SimpleMailMessage (); message.setFrom(from); message.setTo(to); message.setSubject(subject); message.setText(text); javaMailSender.send(message); } }
复杂的消息 MimeMessage & MimeMessageHelper
package com.ganga.mail;import org.springframework.beans.factory.annotation.Autowired;import org.springframework.mail.javamail.JavaMailSender;import org.springframework.mail.javamail.MimeMessageHelper;import org.springframework.stereotype.Component;import javax.mail.internet.MimeMessage;import java.io.File;@Component public class AnnexMail { @Autowired private JavaMailSender javaMailSender; private String from = "xxxxx@qq.com" +"(小可爱)" ; private String to = "xxxxx@qq.com" ; private String subject = "文件标题^_^subject" ; private String text = "发送文件正文 -- 测试" ; private String html0 = "<br> <h3> SpringBoot整合SpringMail 测试内容 </h3><br>" ; private String html1 = "<a href=\"https://gitee.com/embarrassing-sauce/my-code/raw/master/img/Ximg/imgs.jpg\">这就尴尬了呢 [超链接]</a> <br>" ; private String html2 = "<img src=\"https://www.17imoe.com/wp-content/uploads/2021/04/REfJuE.jpg\"/> <br>" ; private String html3 = "<img src=\"https://www.17imoe.com/wp-content/uploads/2021/04/93tUB4.jpg\"/> <br>" ; private String html4 = "<img src=\"https://www.17imoe.com/wp-content/uploads/2021/04/y6uQ59.jpg\"/> <br>" ; private String html5 = "<img src=\"https://www.17imoe.com/wp-content/uploads/2021/04/kqE3pF.jpg\"/> <br>" ; private String html6 = "<img src=\"https://www.17imoe.com/wp-content/uploads/2021/04/7Q46sj.jpg\"/> <br>" ; private String html7 = "<img src=\"https://www.17imoe.com/wp-content/uploads/2021/04/fGZX14.jpg\"/> <br>" ; private String html8 = "<a href=\"https://www.17imoe.com/98115.html\">点开有福利哦,[尴尬 胡桃坏笑]</a> <br><br><br>" ; private File file1 = new File ("D:\\桌面文件\\弥豆子.png" ); private File file2 = new File ("D:\\桌面文件\\壁纸\\手机动漫壁纸.zip" ); private File file3 = new File ("D:\\桌面文件\\源码.png" ); public void sendMail () { try { MimeMessage mimeMessage = javaMailSender.createMimeMessage(); MimeMessageHelper helper = new MimeMessageHelper (mimeMessage,true ); helper.setFrom(this .from); helper.setTo(this .to); helper.setSubject(this .subject); helper.setText(this .text + this .html0 + this .html1 +this .html2 +this .html3 +this .html4 +this .html5 +this .html6 +this .html7 +this .html8, true ); helper.addAttachment("可爱的弥豆子.png" ,file1); helper.addAttachment(file2.getName(),file2); helper.addAttachment(file3.getName(),file3); javaMailSender.send(mimeMessage); } catch (Exception e) { e.printStackTrace(); } } }
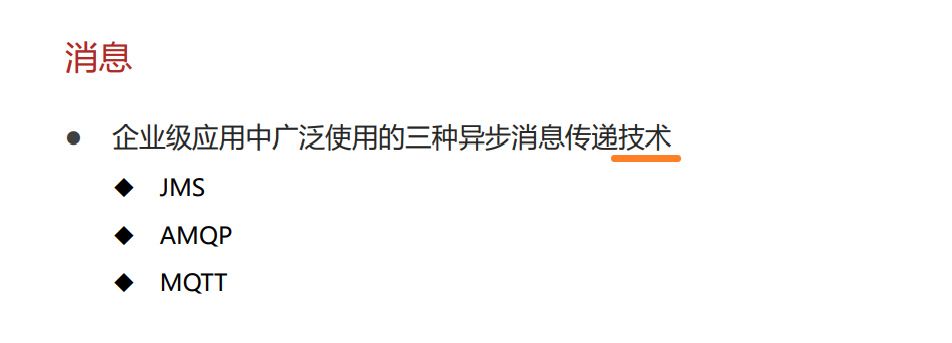
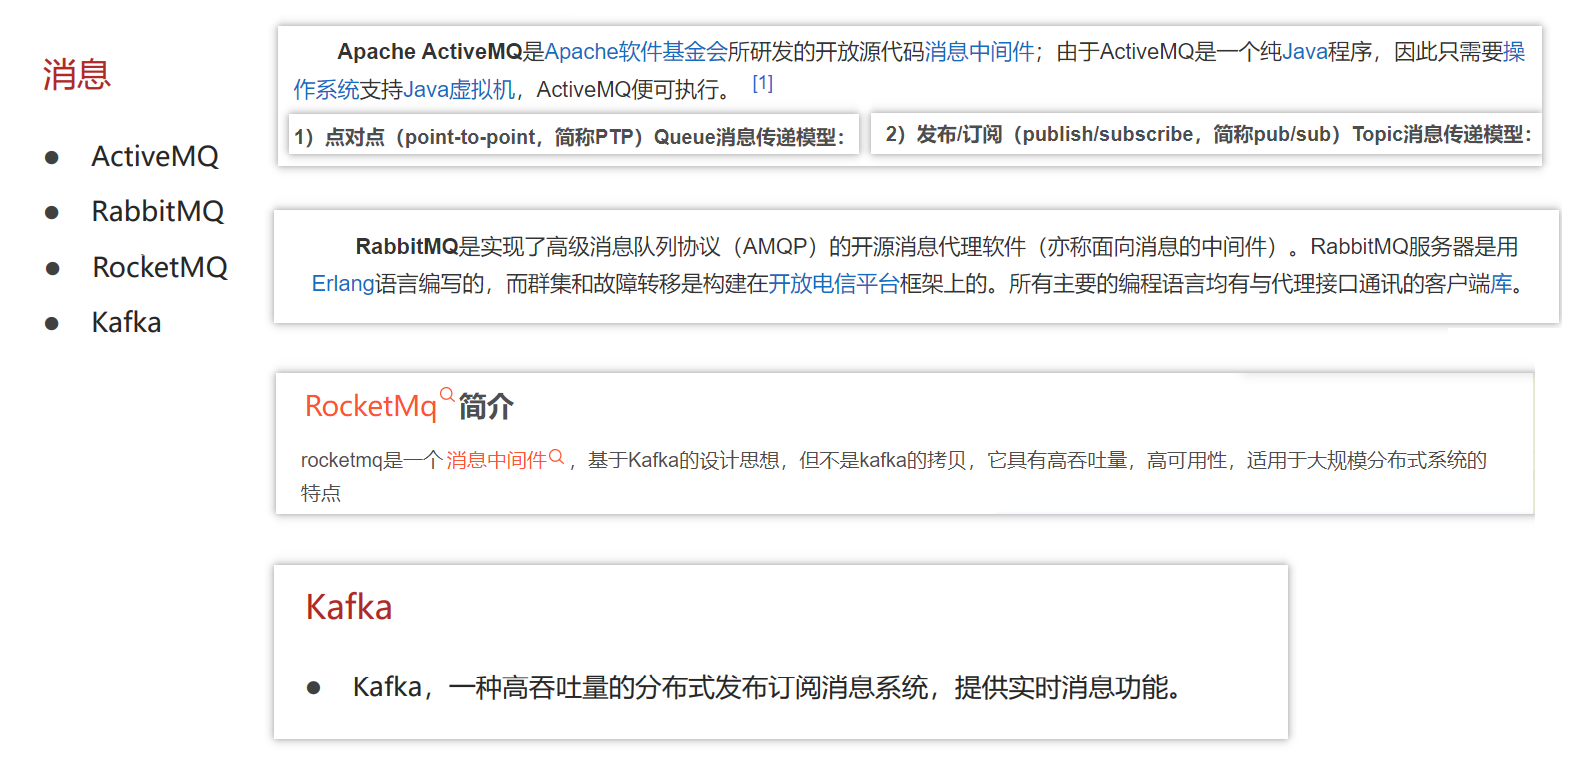
🌸整合消息方案🌸 消息的介绍 消息
⚫ 同步消息
⚫ 异步消息
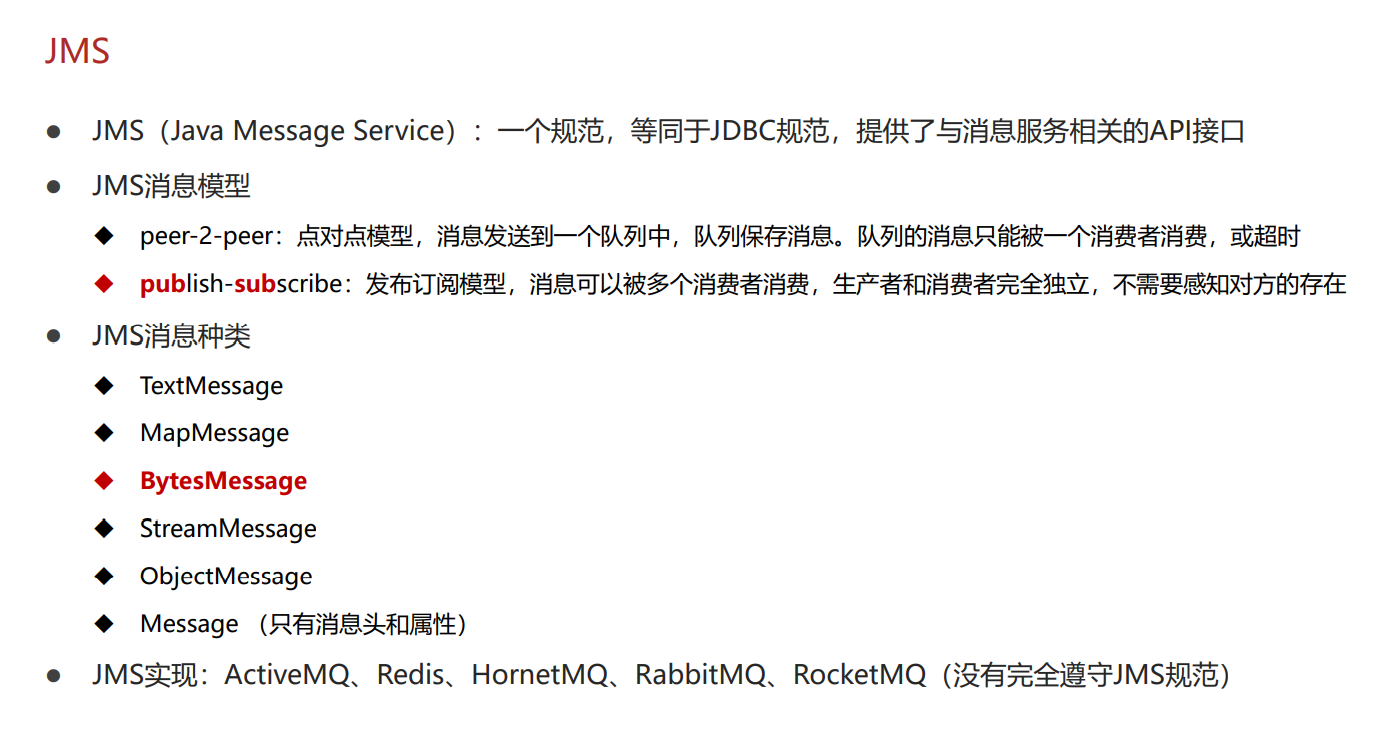
JMS
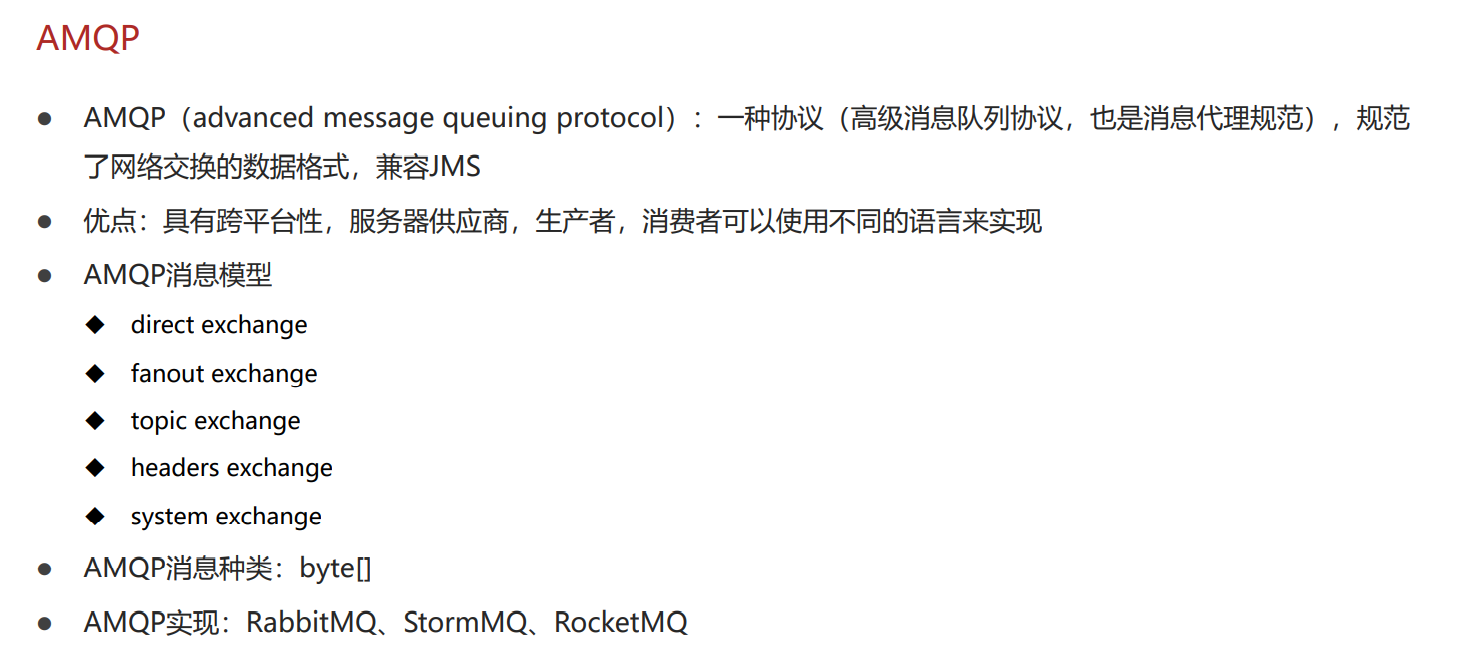
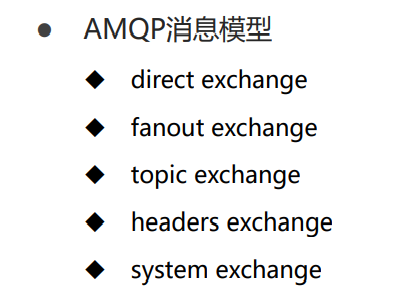
AMQP
MQTT
消息框架技术:
整合ActiveMQ 访问服务器http://127.0.0.1:8161/ 超链接
服务端口:61616,管理后台端口:8161
SpringBoot整合了ActiveMQ
pom.xml
<dependency > <groupId > org.springframework.boot</groupId > <artifactId > spring-boot-starter-activemq</artifactId > </dependency >
application.yml
server: port: 80 spring: activemq: broker-url: tcp://localhost:61616 jms: template: default-destination: msg.default
只需要注入 JmsMessagingTemplate 对象
放入消息队列当中
messagingTemplate.Send();
messagingTemplate.convertAndSend(“order.msg.uid”,uid);
@SendTo(value=” “)
取出消息队列中的消息消费
使用 messagingTemplate.receiveAndConvert(String.class);
使用 @JmsListener(destination = “ “)
dame01:
MessageService
package com.ganga.demo01.servier.impl;import com.ganga.demo01.servier.MessageService;import org.springframework.beans.factory.annotation.Autowired;import org.springframework.jms.core.JmsMessagingTemplate;import org.springframework.stereotype.Service;@Service public class MessageServiceImpl implements MessageService { @Autowired private JmsMessagingTemplate messagingTemplate; @Override public void sendMessage (String uid) { System.out.println("将订单消息放入消息队列 uid:" + uid); messagingTemplate.convertAndSend("order.msg.uid" ,uid); } }
OrderService
package com.ganga.demo01.servier.impl;import com.ganga.demo01.servier.MessageService;import com.ganga.demo01.servier.OrderService;import org.springframework.beans.factory.annotation.Autowired;import org.springframework.stereotype.Service;@Service public class OrderServiceImpl implements OrderService { @Autowired private MessageService messageService; @Override public void doOrder (String uid) { System.out.println("订单业务开始..." ); System.out.println("订单业务结束..." ); messageService.sendMessage(uid); } }
MsgListener
package com.ganga.demo01.listener;import org.springframework.jms.annotation.JmsListener;import org.springframework.messaging.handler.annotation.SendTo;import org.springframework.stereotype.Component;@Component public class MsgListener { @JmsListener(destination = "order.msg.uid") @SendTo("order.msg.xxx.uid") public String receive (String uid) { System.out.println(); System.out.println("order.msg.uid" ); System.out.println("...已监听到该消息队列..." ); System.out.println("已从消息队列中获取 并 处理了消息...uid:" +uid); System.out.println("消息业务完成...uid:" +uid); System.out.println(); return uid; } @JmsListener(destination = "order.msg.xxx.uid") public void receiveX (String uid) { System.out.println(); System.out.println("order.msg.xxx.uid" ); System.out.println("...已监听到该消息队列..." ); System.out.println("已从消息队列中获取 并 处理了消息...uid:" +uid); System.out.println("消息业务完成...uid:" +uid); System.out.println(); } }
Test POST http://127.0.0.1/orders/1
订单业务开始...
订单业务结束...
将订单消息放入消息队列 uid:1

order.msg.uid
...已监听到该消息队列...
已从消息队列中获取 并 处理了消息...uid:1
消息业务完成...uid:1


order.msg.xxx.uid
...已监听到该消息队列...
已从消息队列中获取 并 处理了消息...uid:1
消息业务完成...uid:1
dame02
MsgService
package com.ganga.demo02.service.impl;import com.ganga.demo02.service.MsgService;import org.springframework.beans.factory.annotation.Autowired;import org.springframework.jms.annotation.JmsListener;import org.springframework.jms.core.JmsMessagingTemplate;import org.springframework.messaging.handler.annotation.SendTo;import org.springframework.stereotype.Service;@Service public class MsgServiceImpl implements MsgService { @Autowired private JmsMessagingTemplate messagingTemplate; @Override public void sendMsg (String uid) { System.out.println("正在放入消息队列 uid:" + uid); System.out.println("等待消息监听..." ); System.out.println(); messagingTemplate.convertAndSend("msg.service.uid" ,uid); } @JmsListener(destination = "msg.service.uid") @SendTo(value = "msg.service.x1.uid") public String doMsg01 (String uid) { System.out.println(); System.out.println("msg.service.uid" ); System.out.println("...已监听到该消息队列..." ); System.out.println("已从消息队列中获取 并 处理了消息...uid:" +uid); System.out.println("消息业务完成...uid:" +uid); System.out.println(); return uid; } @JmsListener(destination = "msg.service.x1.uid") public void doMsg02 (String uid) { System.out.println(); System.out.println("msg.service.x1.uid" ); System.out.println("...已监听到该消息队列..." ); System.out.println("已从消息队列中获取 并 处理了消息...uid:" +uid); System.out.println("消息业务完成...uid:" +uid); System.out.println(); } }
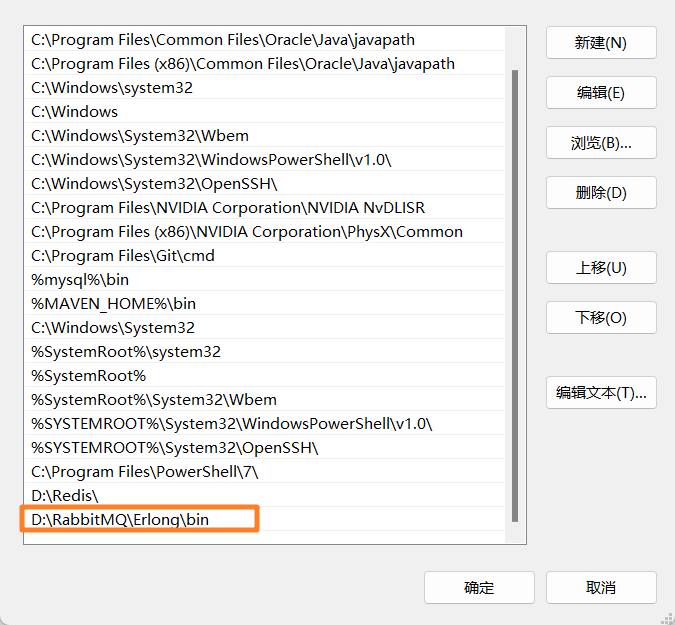
整合RabbitMQ RabbitMQ基于Erlang语言编写,需要安装Erlang
Erlang : https://www.erlang.org/downloads
RabbitMQ
查看已安装的插件列表
rabbitmq-plugins.bat list

开启服务管理插件
rabbitmq-plugins.bat enable rabbitmq_management

启动服务: rabbitmq-service.bat start
关闭服务: rabbitmq-service.bat stop
查看服务状态: rabbitmqctl status

访问服务器
http://localhost:15672/

服务端口:5672

管理后台端口:15672

默认用户名&密码:guest

新添加root用户:rabbitmqctl add_user 用户名 密码
rabbitmqctl add_user root root

查看已有用户 :rabbitmqctl list_users

赋予administrator权限: rabbitmqctl set_user_tags 用户名 administrator
rabbitmqctl set_user_tags 用户名 administrator
pom.xml
<dependency > <groupId > org.springframework.boot</groupId > <artifactId > spring-boot-starter-amqp</artifactId > </dependency >
application.yml
spring: rabbitmq: host: localhost port: 5672
连接模式:
1:direct exchange
config
package com.ganga.direct.config;import org.springframework.amqp.core.Binding;import org.springframework.amqp.core.BindingBuilder;import org.springframework.amqp.core.DirectExchange;import org.springframework.amqp.core.Queue;import org.springframework.context.annotation.Bean;import org.springframework.context.annotation.Configuration;@Configuration public class DirectExchangeConfig { @Bean public Queue directQueue () { return new Queue ("simple_direct_uid" ,true ,false ,false ); } @Bean public Queue directQueue2 () { return new Queue ("simple_direct2_uid" ); } @Bean public DirectExchange directExchange () { return new DirectExchange ("directExchange" ); } @Bean public Binding bindingDirect () { return BindingBuilder.bind(directQueue()).to(directExchange()).with("direct" ); } @Bean public Binding bindingDirect2 () { return BindingBuilder.bind(directQueue2()).to(directExchange()).with("direct2" ); } }
service
package com.ganga.direct.service.impl;import com.ganga.direct.service.MsgService;import org.springframework.amqp.core.AmqpTemplate;import org.springframework.beans.factory.annotation.Autowired;import org.springframework.stereotype.Service;@Service public class MsgServiceImpl implements MsgService { @Autowired private AmqpTemplate amqpTemplate; @Override public void sendMsg (String uid) { System.out.println("正在放入消息队列 uid:" + uid); System.out.println("等待消息监听..." ); System.out.println(); amqpTemplate.convertAndSend("directExchange" ,"direct" ,uid); } }
controller
package com.ganga.direct.controller;import com.ganga.direct.service.MsgService;import org.springframework.beans.factory.annotation.Autowired;import org.springframework.web.bind.annotation.PathVariable;import org.springframework.web.bind.annotation.PostMapping;import org.springframework.web.bind.annotation.RequestMapping;import org.springframework.web.bind.annotation.RestController;public class MsgController { @Autowired private MsgService msgService; @PostMapping("{uid}") public String sendMessage (@PathVariable String uid) { msgService.sendMsg(uid); return "消息发送成功...订单号:" +uid; } }
listener
package com.ganga.direct.listener;import org.springframework.amqp.rabbit.annotation.RabbitListener;import org.springframework.stereotype.Component;@Component public class MsgListener { @RabbitListener(queues = {"simple_direct_uid"}) public void msgListener (String uid) { System.out.println(); System.out.println("----- simple_direct_uid ------" ); System.out.println("------- 已监听 监听器001 -------" ); System.out.println("已从消息队列中获取 并 处理了消息...uid:" +uid); System.out.println("消息业务完成...uid:" +uid); System.out.println(); } @RabbitListener(queues = {"simple_direct_uid"}) public void msgListener2 (String uid) { System.out.println(); System.out.println("----- simple_direct_uid ------" ); System.out.println("------- 已监听 监听器002 -------" ); System.out.println("已从消息队列中获取 并 处理了消息...uid:" +uid); System.out.println("消息业务完成...uid:" +uid); System.out.println(); } }
2: topic exchange
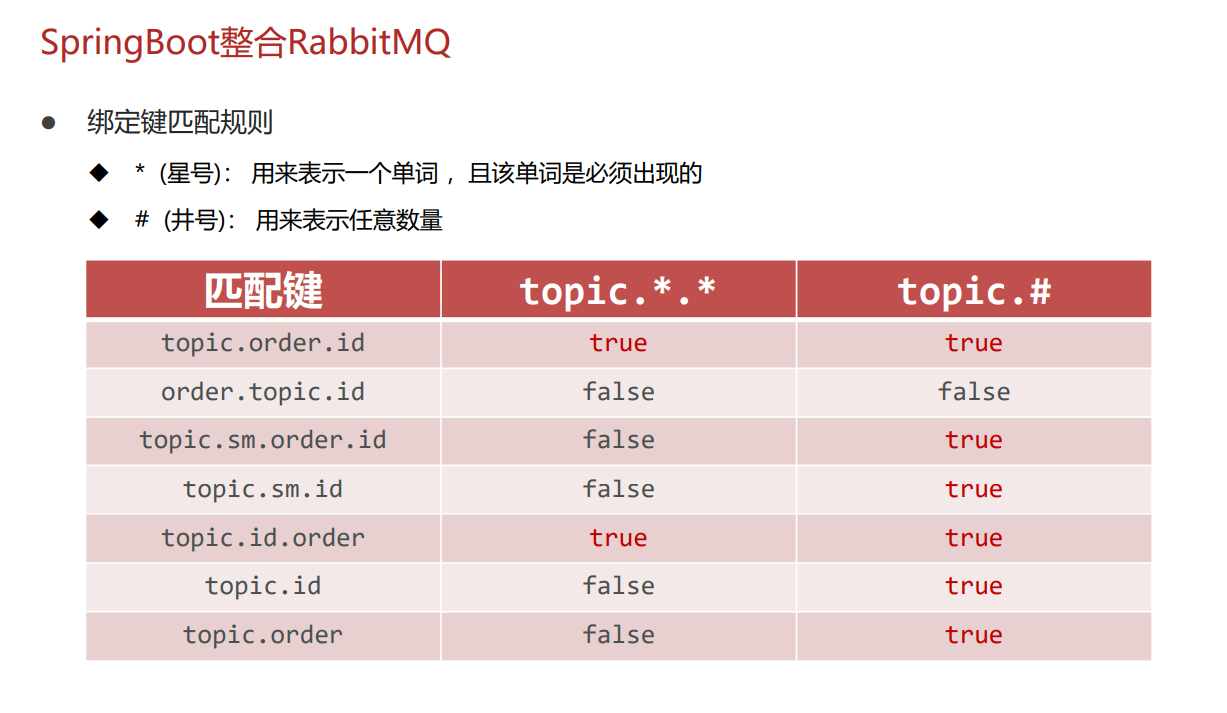
绑定键匹配规则
config
package com.ganga.topic.config;import org.springframework.amqp.core.Binding;import org.springframework.amqp.core.BindingBuilder;import org.springframework.amqp.core.Queue;import org.springframework.amqp.core.TopicExchange;import org.springframework.context.annotation.Bean;import org.springframework.context.annotation.Configuration;@Configuration public class TopicExchangeConfig { @Bean public Queue queueTopic () { return new Queue ("topic_queue_uid" ); } @Bean public Queue queueTopic2 () { return new Queue ("topic_queue2_uid" ); } @Bean public TopicExchange topicExchange () { return new TopicExchange ("topicExchange" ); } @Bean public Binding topicBinding () { return BindingBuilder .bind(queueTopic()).to(topicExchange()).with("topic.user.*" ); } @Bean public Binding topicBinding2 () { return BindingBuilder .bind(queueTopic2()).to(topicExchange()).with("#.uid" ); } }
service
package com.ganga.topic.service.impl;import com.ganga.topic.service.MsgTopicService;import org.springframework.amqp.core.AmqpTemplate;import org.springframework.beans.factory.annotation.Autowired;import org.springframework.stereotype.Service;@Service public class MsgServiceImpl implements MsgTopicService { @Autowired private AmqpTemplate amqpTemplate; @Override public void sendMsg01 (String uid) { System.out.println(); System.out.println("正在放入消息队列 uid:" + uid); System.out.println("等待消息监听..." ); System.out.println(); amqpTemplate.convertAndSend("topicExchange" ,"topic.user.xxx" ,uid); } @Override public void sendMsg02 (String uid) { System.out.println(); System.out.println("正在放入消息队列 uid:" + uid); System.out.println("等待消息监听..." ); System.out.println(); amqpTemplate.convertAndSend("topicExchange" ,"xxx.xxx.uid" ,uid); } @Override public void sendMsg03 (String uid) { System.out.println(); System.out.println("正在放入消息队列 uid:" + uid); System.out.println("等待消息监听..." ); System.out.println(); amqpTemplate.convertAndSend("topicExchange" ,"topic.user.uid" ,uid); } }
listener
package com.ganga.topic.listener;import org.springframework.amqp.rabbit.annotation.RabbitListener;import org.springframework.stereotype.Component;@Component public class UserMsgListener { @RabbitListener(queues = "topic_queue_uid") public void userMsgListener (String uid) { String name = Thread.currentThread().getName() + " : " ; System.out.println(); System.out.println(name + "----- topic_queue_uid ------" ); System.out.println(name + "------- 已监听 监听器001 -------" ); System.out.println(name + "已从消息队列中获取 并 处理了消息...uid:" + uid); System.out.println(name + "业务AAAAAAA完成...uid:" + uid); System.out.println(); } @RabbitListener(queues = "topic_queue2_uid") public void userMsgListener2 (String uid) { String name = Thread.currentThread().getName() + " : " ; System.out.println(); System.out.println(name + "----- topic_queue2_uid ------" ); System.out.println(name + "------- 已监听 监听器001 -------" ); System.out.println(name + "已从消息队列中获取 并 处理了消息...uid:" + uid); System.out.println(name + "业务BBBBBBB完成...uid:" + uid); } }
controller
package com.ganga.topic.controller;import com.ganga.direct.service.MsgService;import com.ganga.topic.service.MsgTopicService;import org.springframework.beans.factory.annotation.Autowired;import org.springframework.web.bind.annotation.*;@RestController @RequestMapping("/topic/msg") public class MsgController { @Autowired private MsgTopicService msgTopicService; @PostMapping("{uid}") public String sendMessage (@PathVariable String uid) { msgTopicService.sendMsg01(uid); return "消息发送成功...订单号:" +uid; } @GetMapping("{uid}") public String sendMessage2 (@PathVariable String uid) { msgTopicService.sendMsg02(uid); return "消息发送成功...订单号:" +uid; } @PutMapping("{uid}") public String sendMessage3 (@PathVariable String uid) { msgTopicService.sendMsg03(uid); return "消息发送成功...订单号:" +uid; } }
TODO:
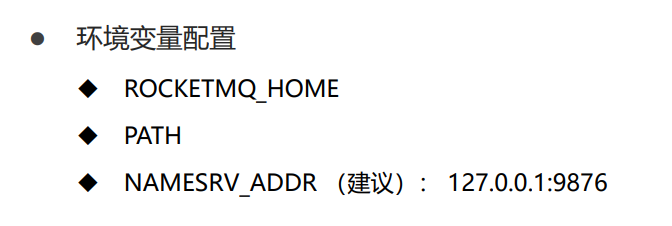
整合RoctetMQ 环境变量
NAMESRV_ADDR
127.0.0.1:9876
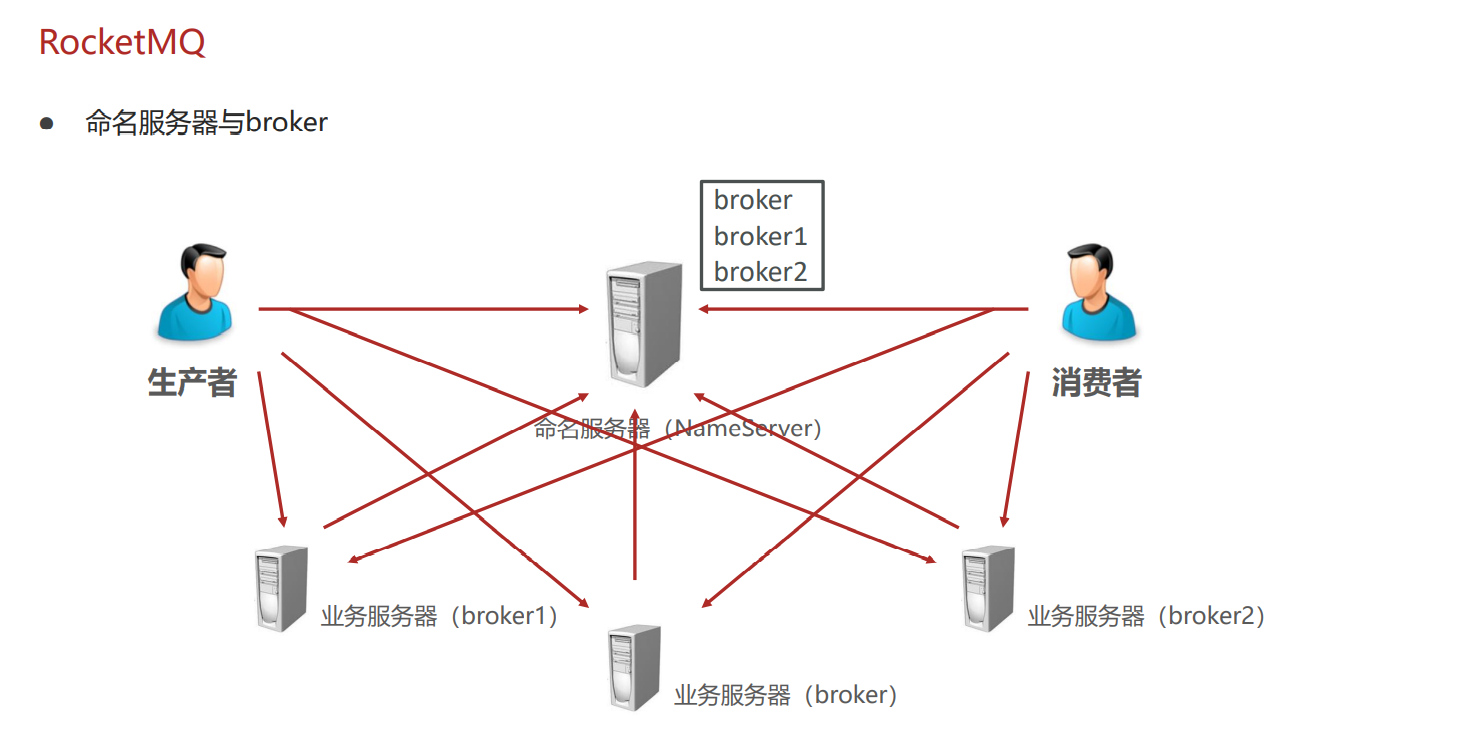
命名服务器 和 业务服务器
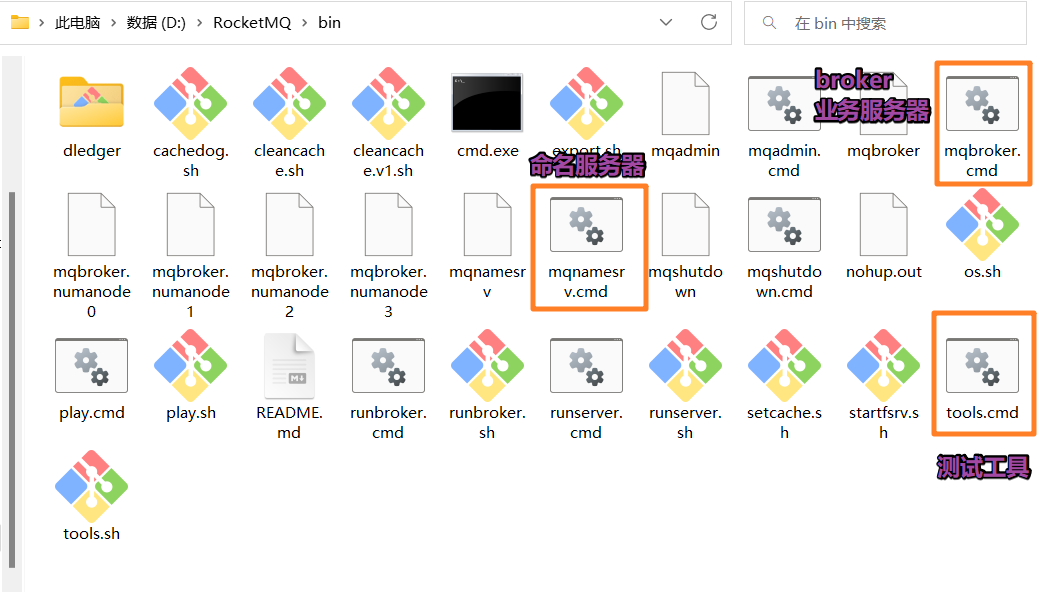
启动 命名服务器 和 业务服务器
测试 tools.cmd
服务器功能测试:生产者
tools org.apache.rocketmq.example.quickstart.Producer
服务器功能测试:消费者
tools org.apache.rocketmq.example.quickstart.Consumer
pom坐标
<dependency > <groupId > org.apache.rocketmq</groupId > <artifactId > rocketmq-spring-boot-starter</artifactId > <version > 2.2.2</version > </dependency >
application.yml
rocketmq: name-server: localhost:9876 producer: group: order_user
生产消息 – 同步消息
@Service public class MsgServiceImpl implements MsgService { @Autowired private RocketMQTemplate rocketMQTemplate; @Override public void sendMsg (String uid) { System.out.println("正在放入消息队列 uid:" + uid); System.out.println("等待消息监听..." ); System.out.println(); rocketMQTemplate.convertAndSend("order_msg_uid" ,uid); } }
生产消息 – 异步消息
@Service public class MsgServiceImpl implements MsgService { @Autowired private RocketMQTemplate rocketMQTemplate; @Override public void sendMsg (String uid) { System.out.println("正在放入消息队列 uid:" + uid); System.out.println("等待消息监听..." ); System.out.println(); SendCallback message = new SendCallback () { @Override public void onSuccess (SendResult sendResult) { System.out.println("消息 [成功] 放入队列后的回调函数..." ); } @Override public void onException (Throwable throwable) { System.out.println("消息 [失败] 放入队列后的回调函数..." ); } }; rocketMQTemplate.asyncSend("order_msg_uid" ,uid,message); } }
消费消息
package com.ganga.listener;import org.apache.rocketmq.spring.annotation.RocketMQMessageListener;import org.apache.rocketmq.spring.core.RocketMQListener;import org.springframework.stereotype.Component;@Component @RocketMQMessageListener(topic = "order_msg_uid",consumerGroup = "order_user") public class MsgListener implements RocketMQListener <String> { @Override public void onMessage (String uid) { System.out.println("----- 消息已监听 ------" ); System.out.println("已从消息队列中获取 并 处理了消息...uid:" + uid); System.out.println("消息业务完成...uid:" + uid); System.out.println(); } }
整合Kafka 下载:https://kafka.apache.org/downloads
windows命令:
启动zookeeper 默认端口:2181
zookeeper-server-start.bat ..\..\config\zookeeper.properties
启动kafka 默认端口:9092
kafka-server-start.bat ..\..\config\server.properties
创建 topic
旧版本
kafka-topics.bat --create --zookeeper localhost:2181 --replication-factor 1 --partitions 1 --topic ganga_demo

新版本
kafka-topics.bat --create --bootstrap-server localhost:9092 --replication-factor 1 --partitions 1 --topic ganga_demo
查看 topic
旧版本
kafka-topics.bat --zookeeper 127.0.0.1:2181 --list

新版本
kafka-topics.bat --bootstrap-server localhost:9092 --list
创建 topic
旧版本
kafka-topics.bat --delete --zookeeper localhost:2181 --topic ganga_demo

新版本
kafka-topics.bat --delete -bootstrap-server localhost:9092 --topic ganga_demo
生产者功能测试
kafka-console-producer.bat --broker-list localhost:9092 --topic ganga_demo
消费者功能测试
afka-console-consumer.bat --bootstrap-server localhost:9092 --topic ganga_demo --from-beginning
pom.xml
<dependency > <groupId > org.springframework.kafka</groupId > <artifactId > spring-kafka</artifactId > </dependency >
application.yml
spring: kafka: bootstrap-servers: localhost:9092 consumer: group-id: order_msg
生产者
package com.ganga.service.impl;import com.ganga.service.MsgService;import org.springframework.beans.factory.annotation.Autowired;import org.springframework.kafka.core.KafkaTemplate;import org.springframework.stereotype.Service;@Service public class MsgServiceImpl implements MsgService { @Autowired private KafkaTemplate<String,String> kafkaTemplate; @Override public void sendMsg (String uid) { System.out.println("正在放入消息队列 uid:" + uid); System.out.println("等待消息监听..." ); System.out.println(); kafkaTemplate.send("order_topic_uid" ,uid); } }
消费者
package com.ganga.listener;import org.apache.kafka.clients.consumer.ConsumerRecord;import org.springframework.kafka.annotation.KafkaListener;import org.springframework.stereotype.Component;@Component public class MsgListener { @KafkaListener(topics = {"order_topic_uid"}) public void onMessage (ConsumerRecord<String,String> consumerRecord) { String uid = consumerRecord.value(); System.out.println(consumerRecord.timestamp()); System.out.println("----- 消息已监听 ------" ); System.out.println("已从消息队列中获取 并 处理了消息...uid:" + uid); System.out.println("消息业务完成...uid:" + uid); System.out.println(); } }
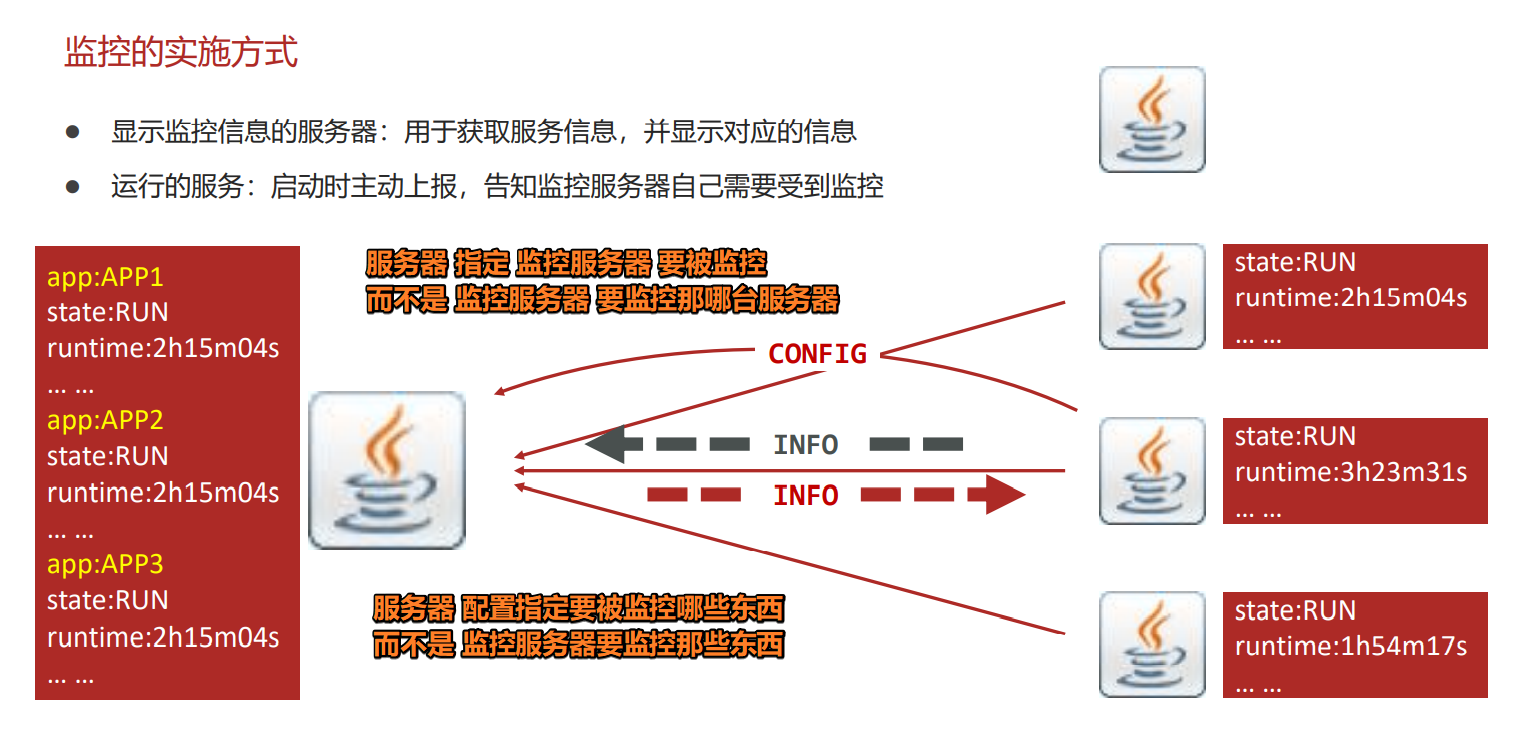
🌸监控相关🌸 监控的意义
监控的实现
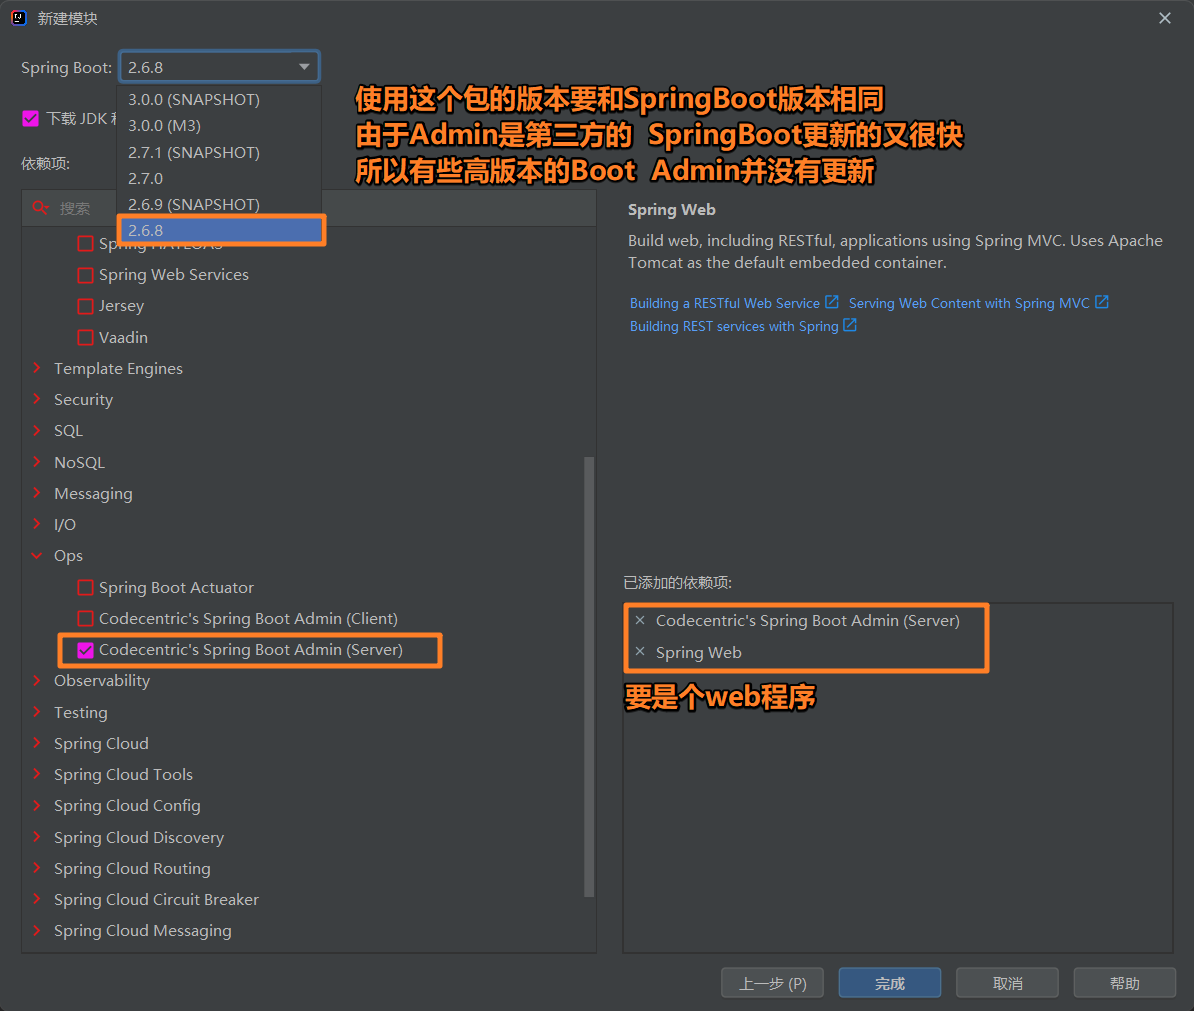
整合SpringBootAdmin 监控服务器 Admin
pom.xml [自行导入坐标 version和springboot版本对应就行]
<dependency > <groupId > de.codecentric</groupId > <artifactId > spring-boot-admin-starter-server</artifactId > <version > 2.6.6</version > </dependency >
application.xml
Application.java
package com.ganga;import de.codecentric.boot.admin.server.config.EnableAdminServer;import org.springframework.boot.SpringApplication;import org.springframework.boot.autoconfigure.SpringBootApplication;@SpringBootApplication @EnableAdminServer public class AdminServerApplication { public static void main (String[] args) { SpringApplication.run(AdminServerApplication.class, args); } }
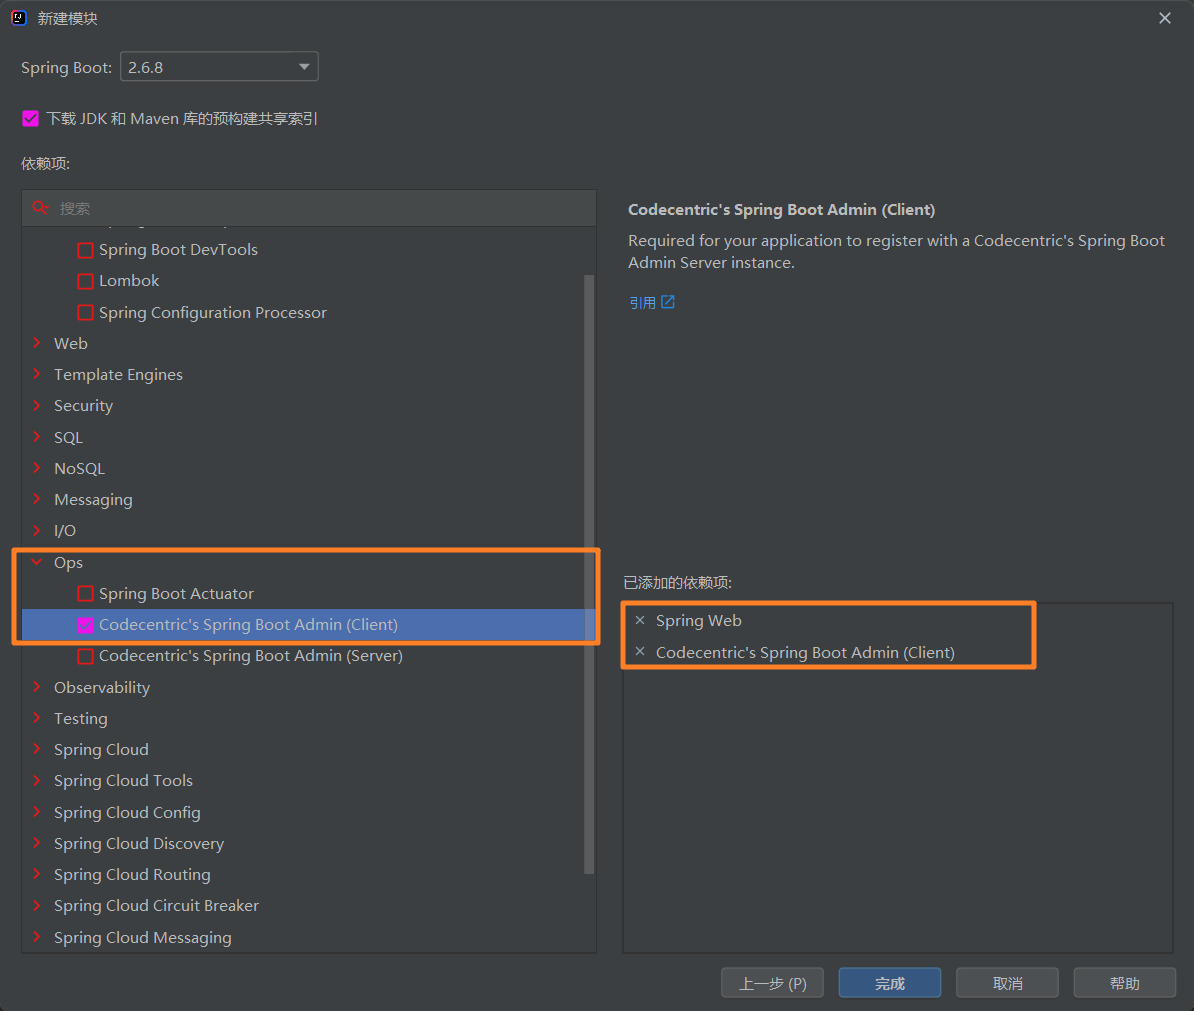
业务服务器
pom.xml [自行导入坐标 version和springboot版本对应就行]
<dependency > <groupId > de.codecentric</groupId > <artifactId > spring-boot-admin-starter-client</artifactId > <version > 2.6.6</version > </dependency >
application.yml
spring: boot: admin: client: url: http://localhost:8080 management: endpoint: health: show-details: always endpoints: web: exposure: include: "*"
Application.java 不需要加关于 监控的注解
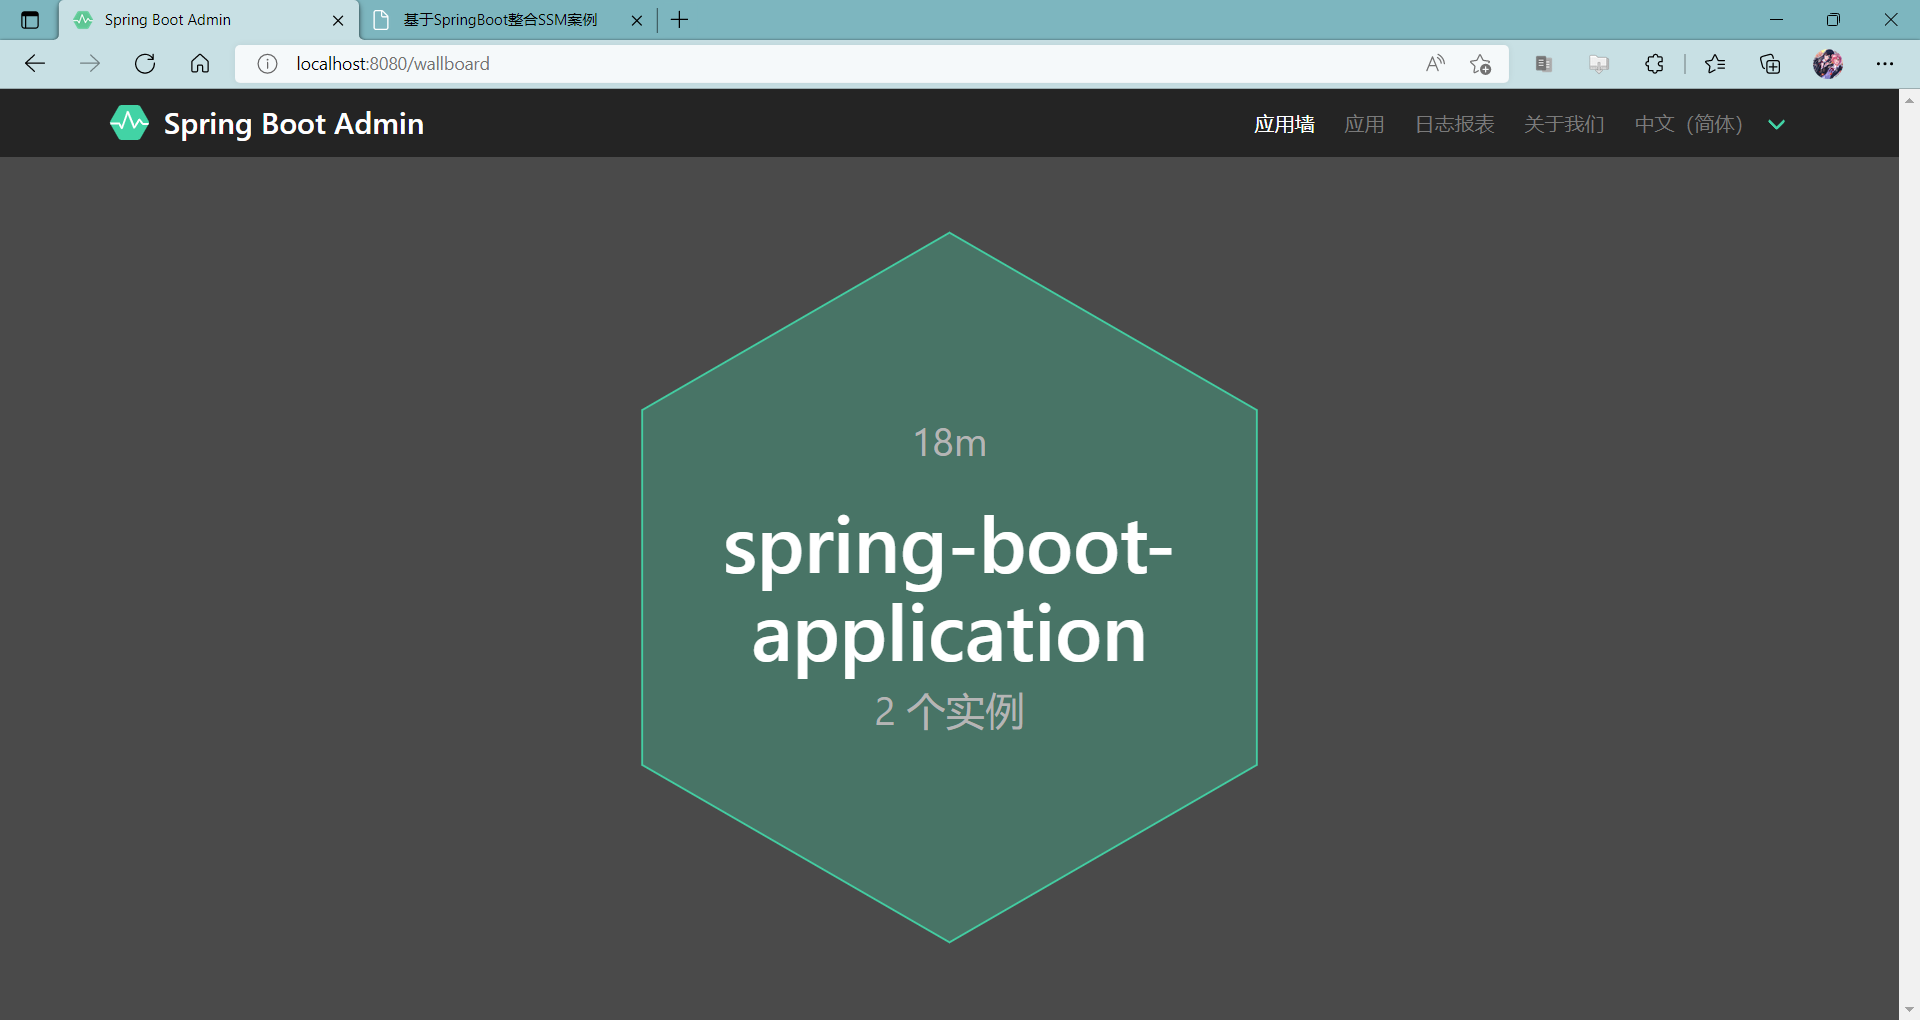
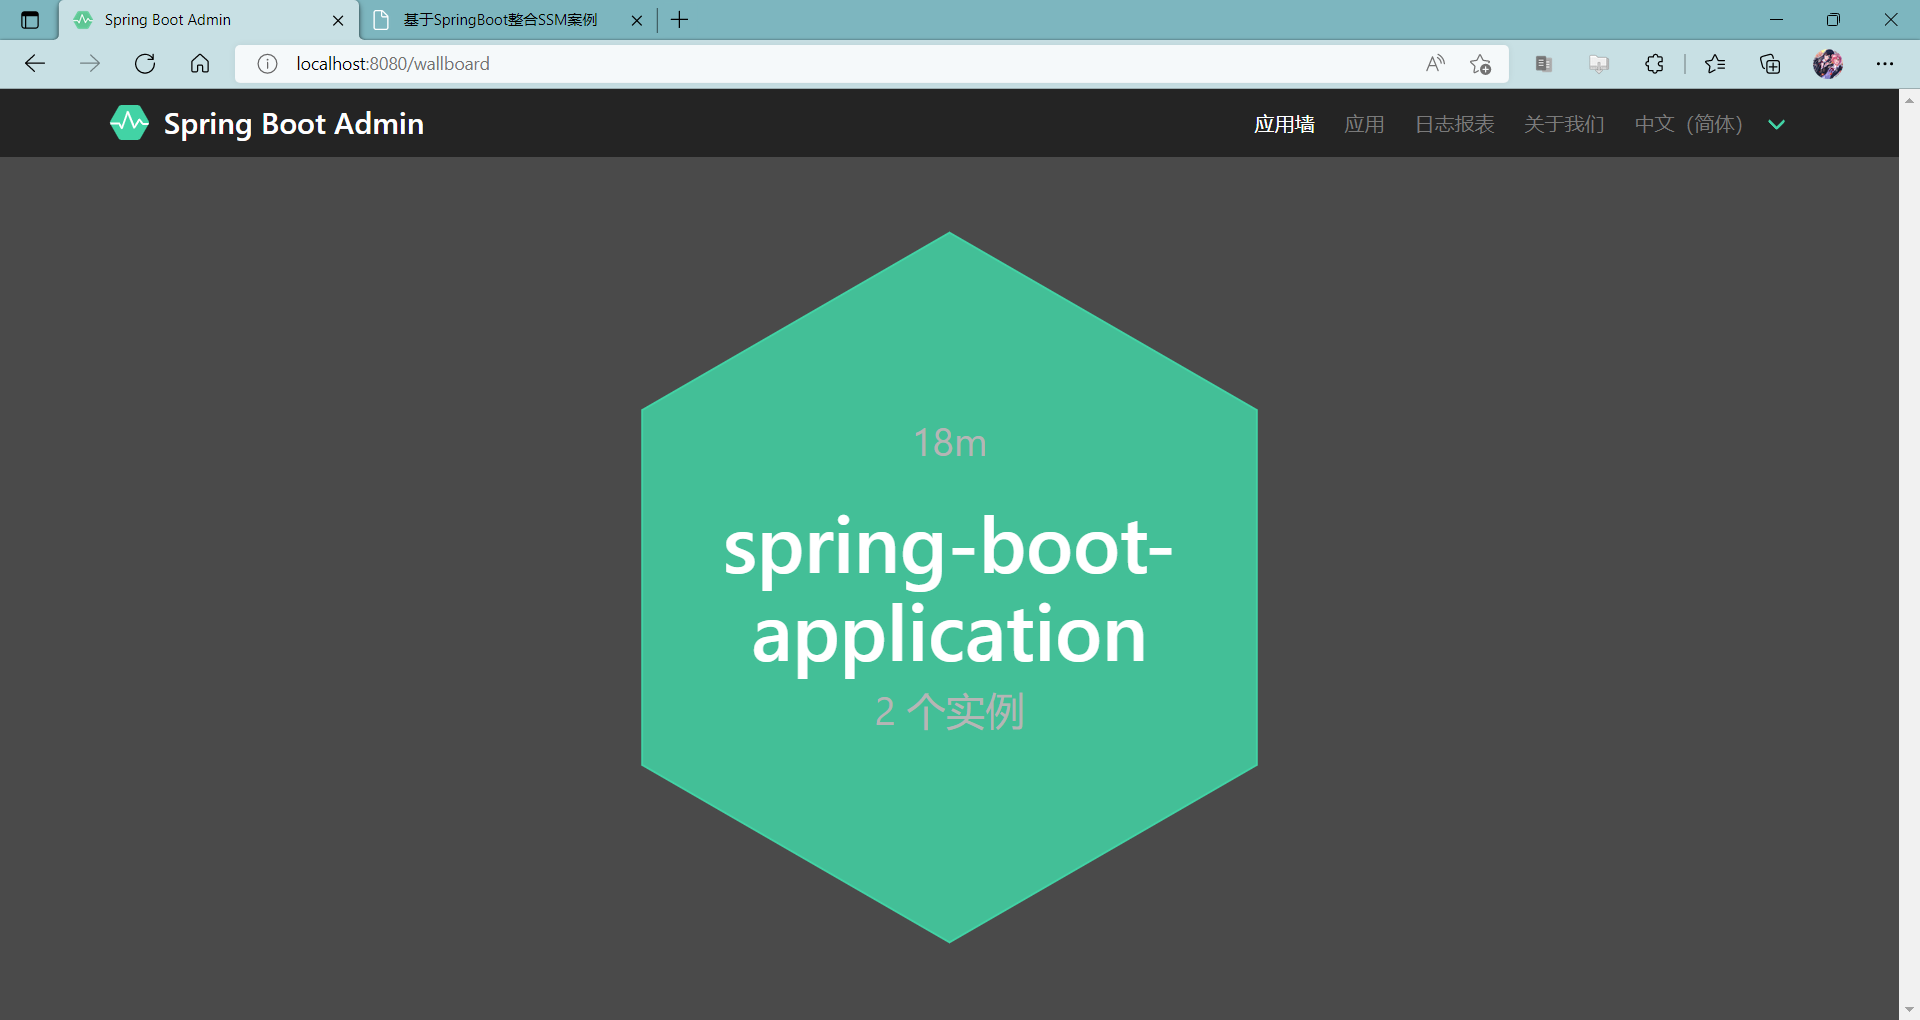
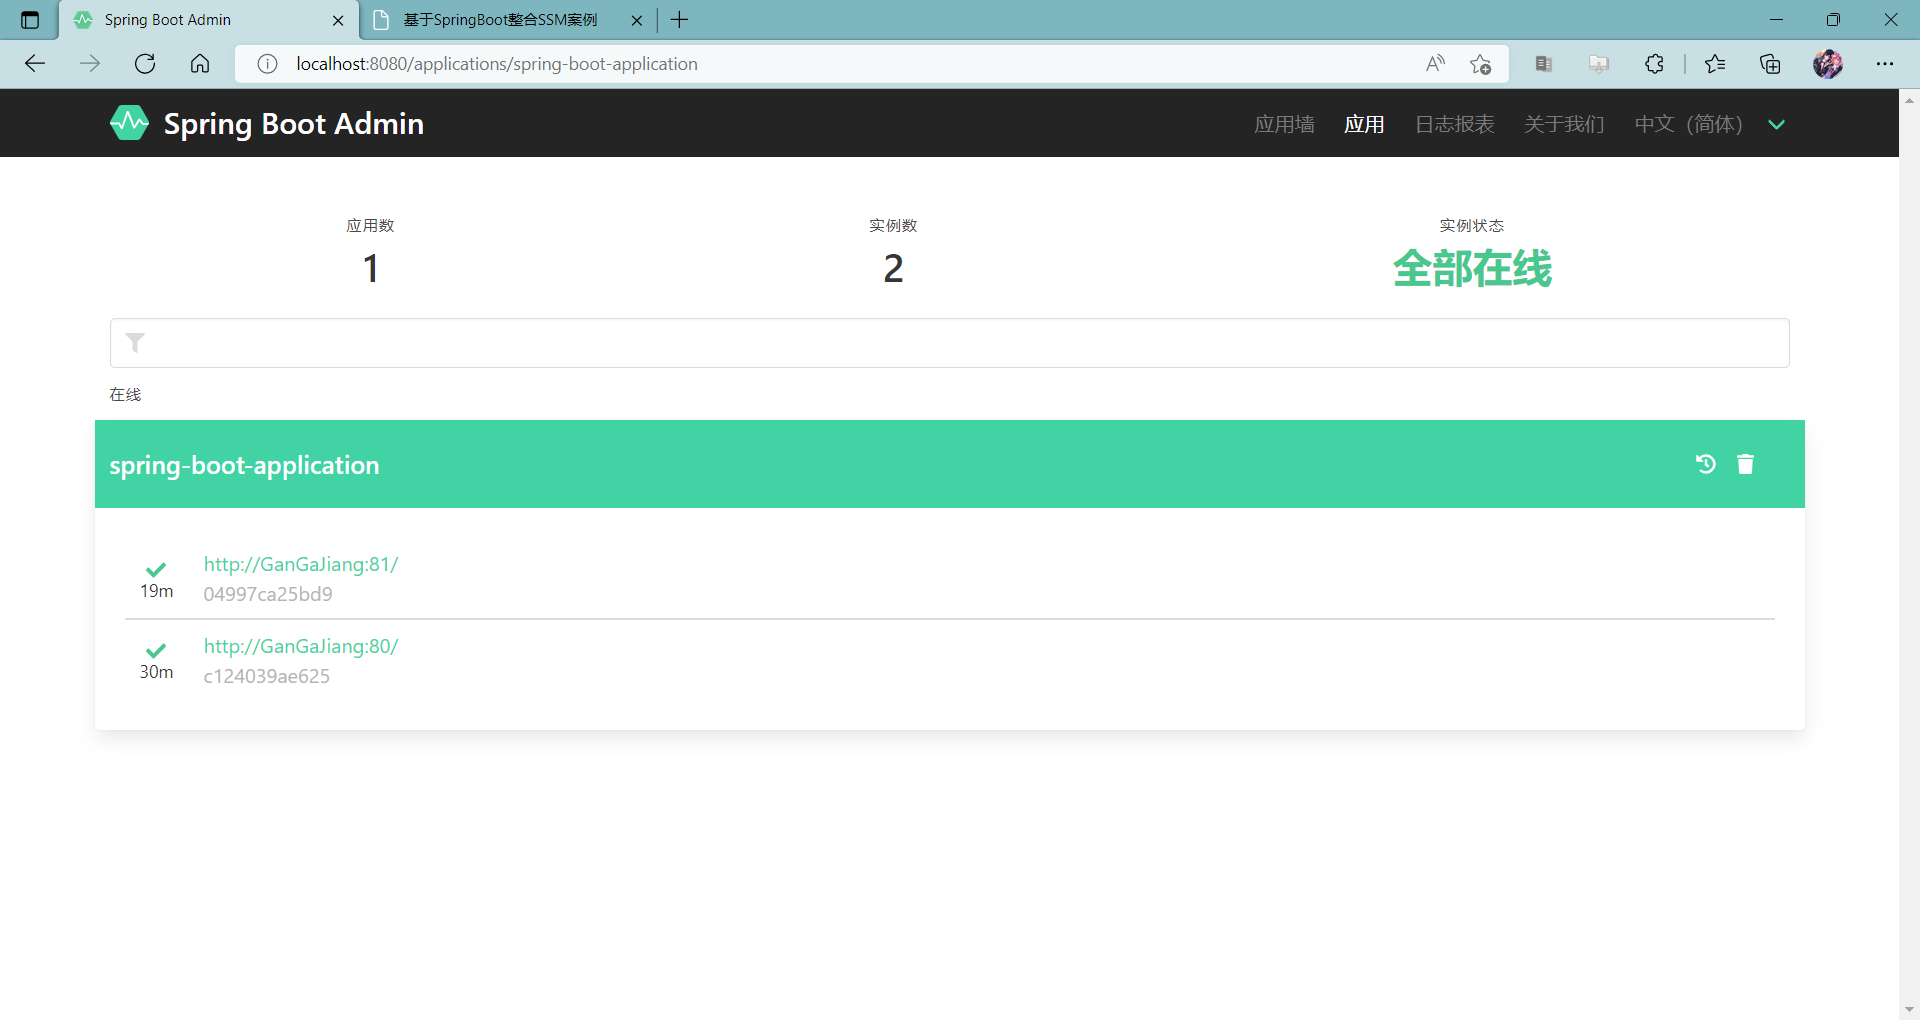
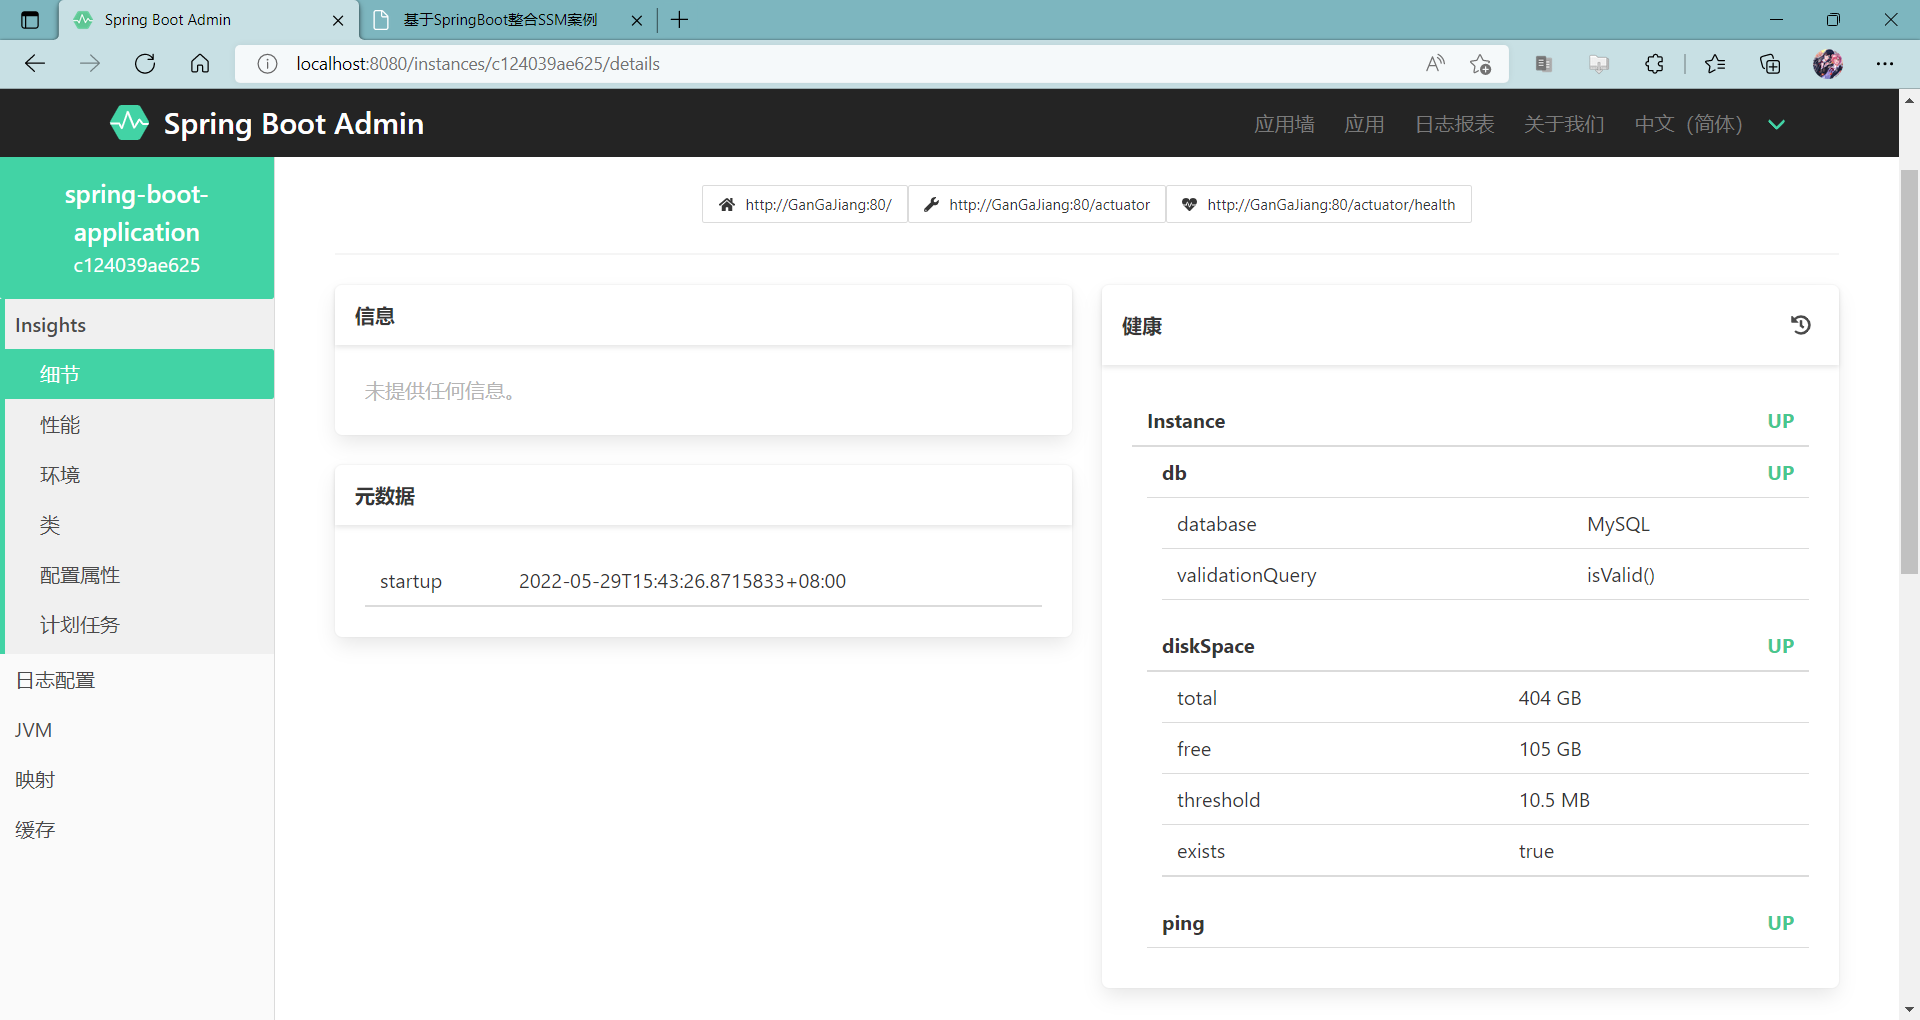
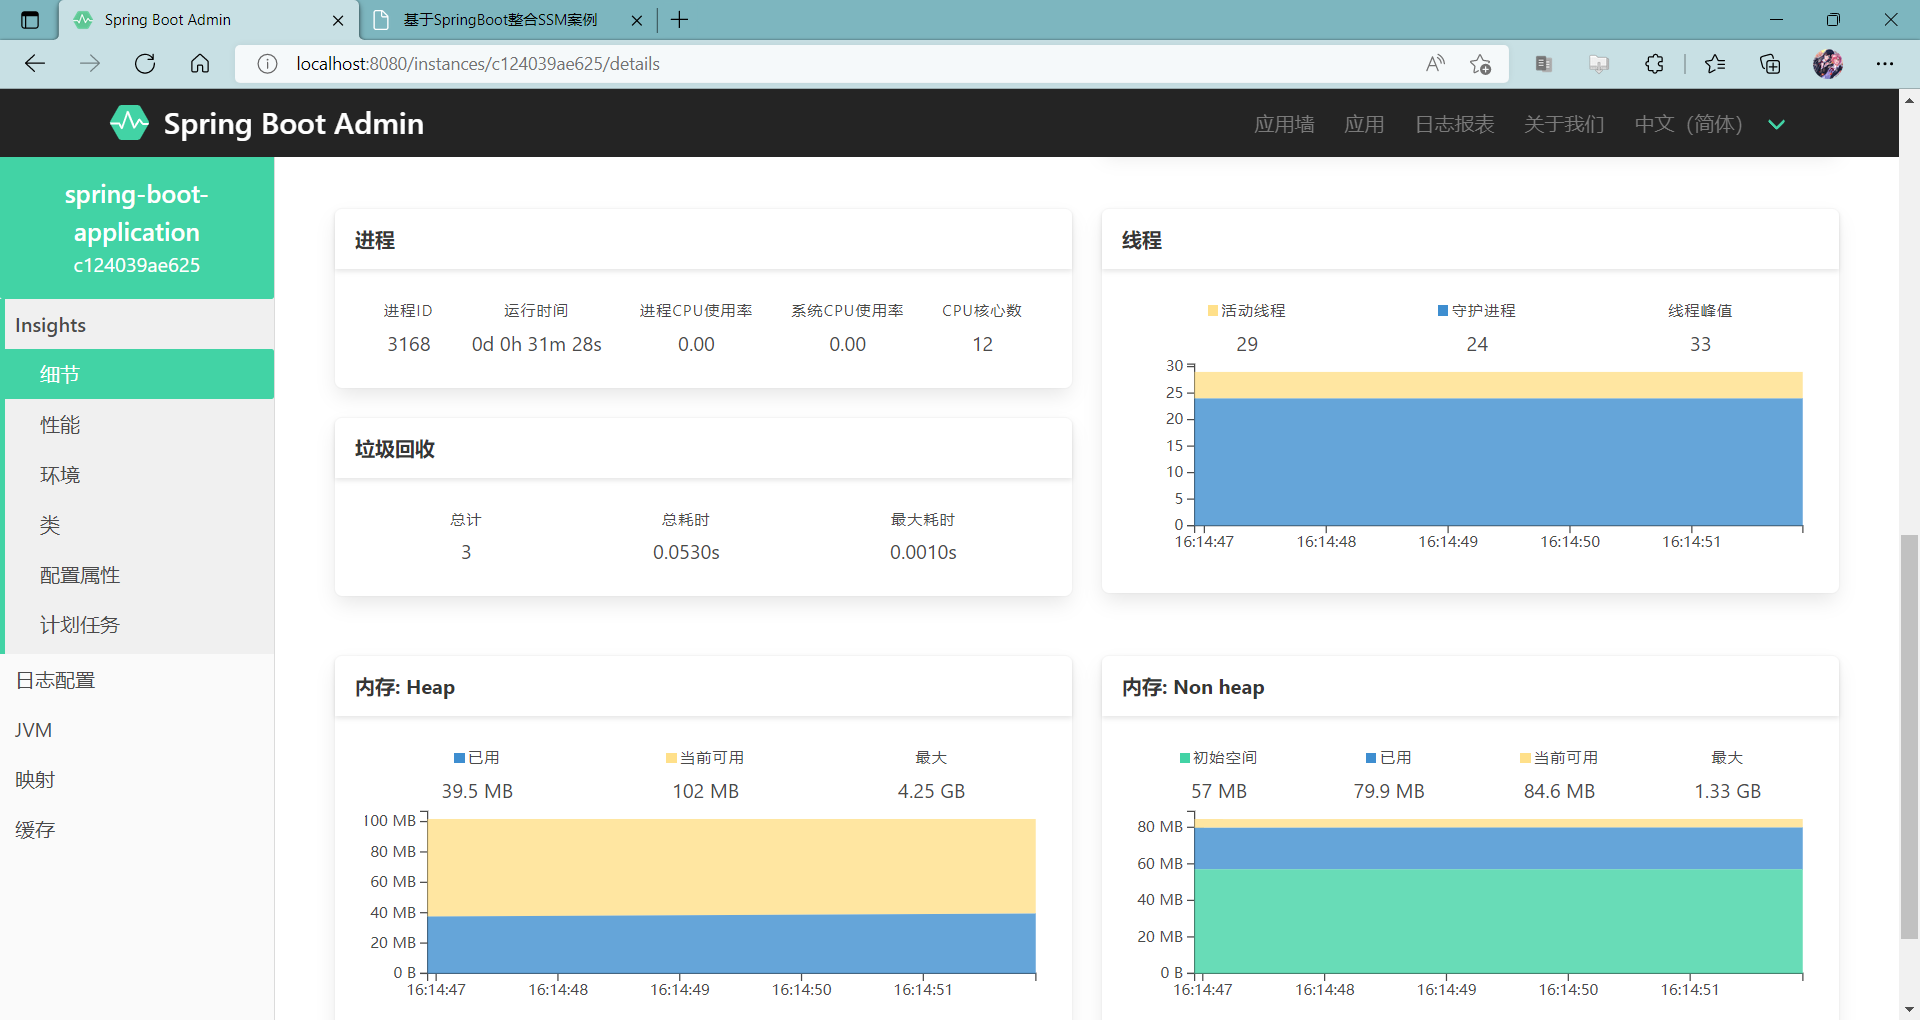
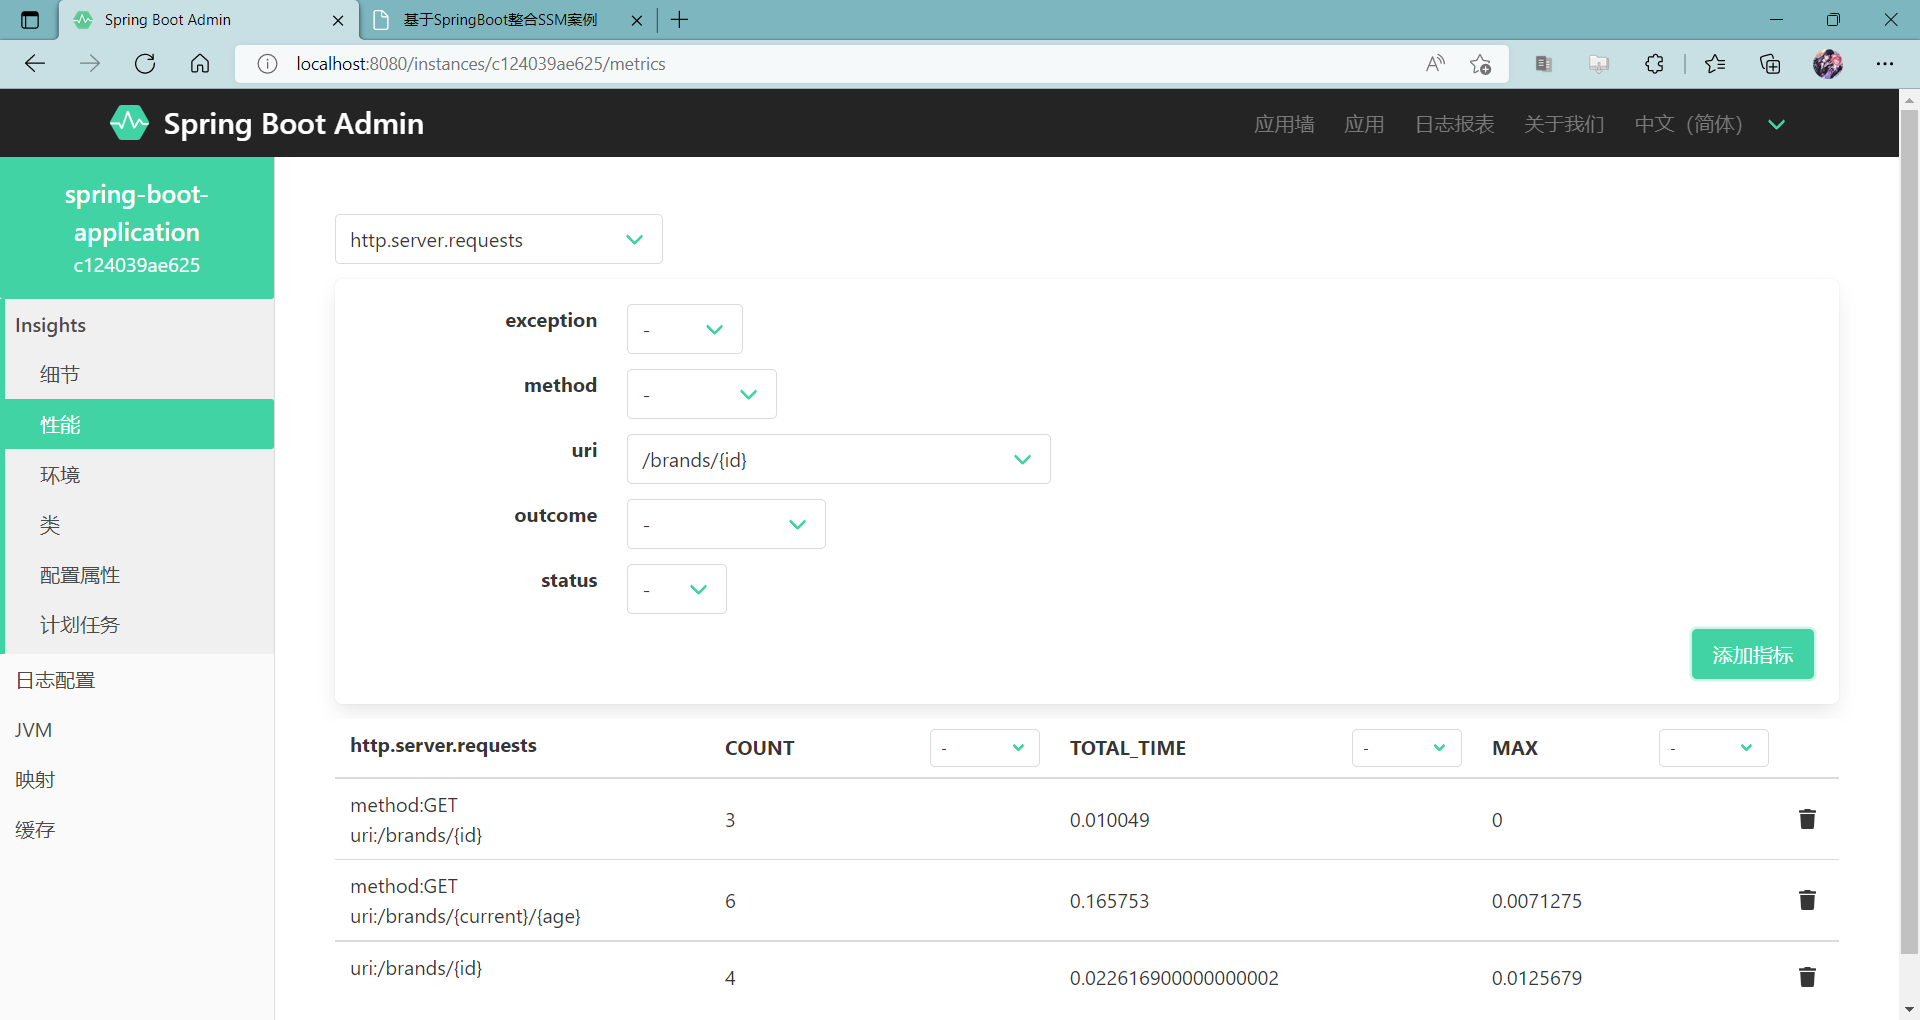
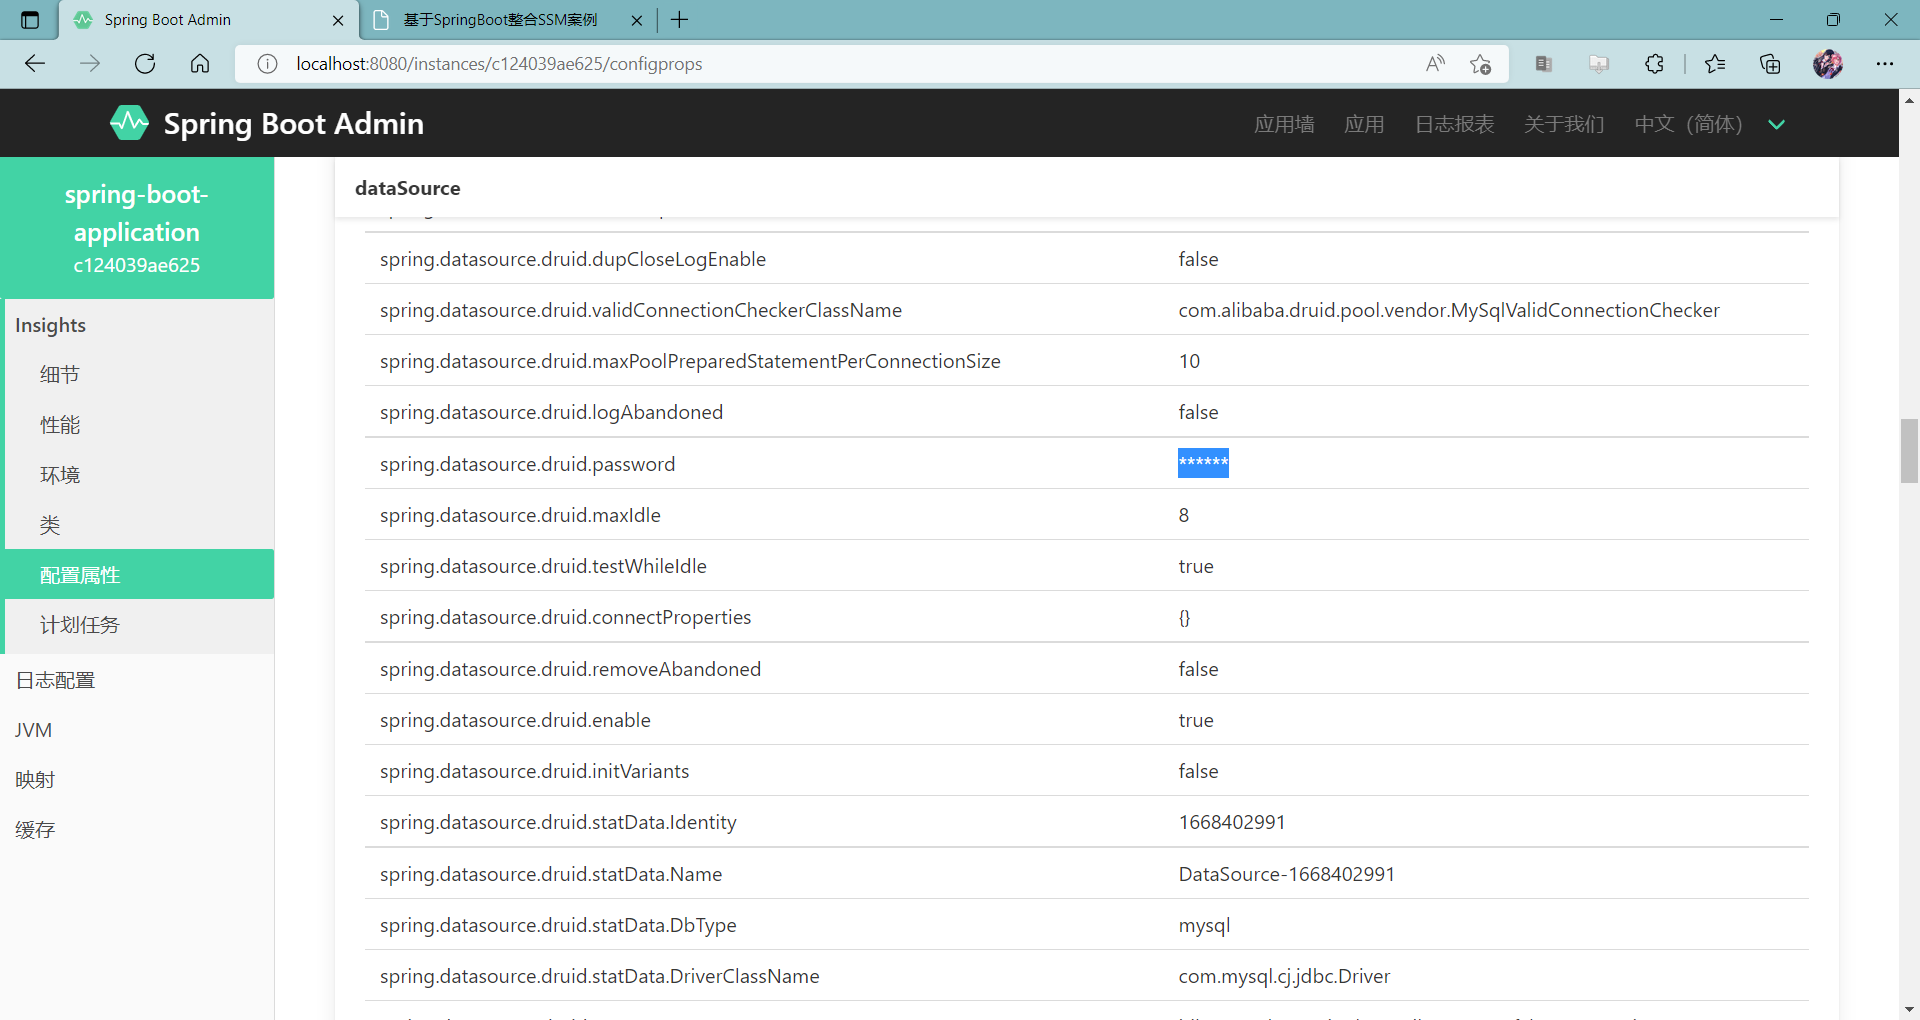
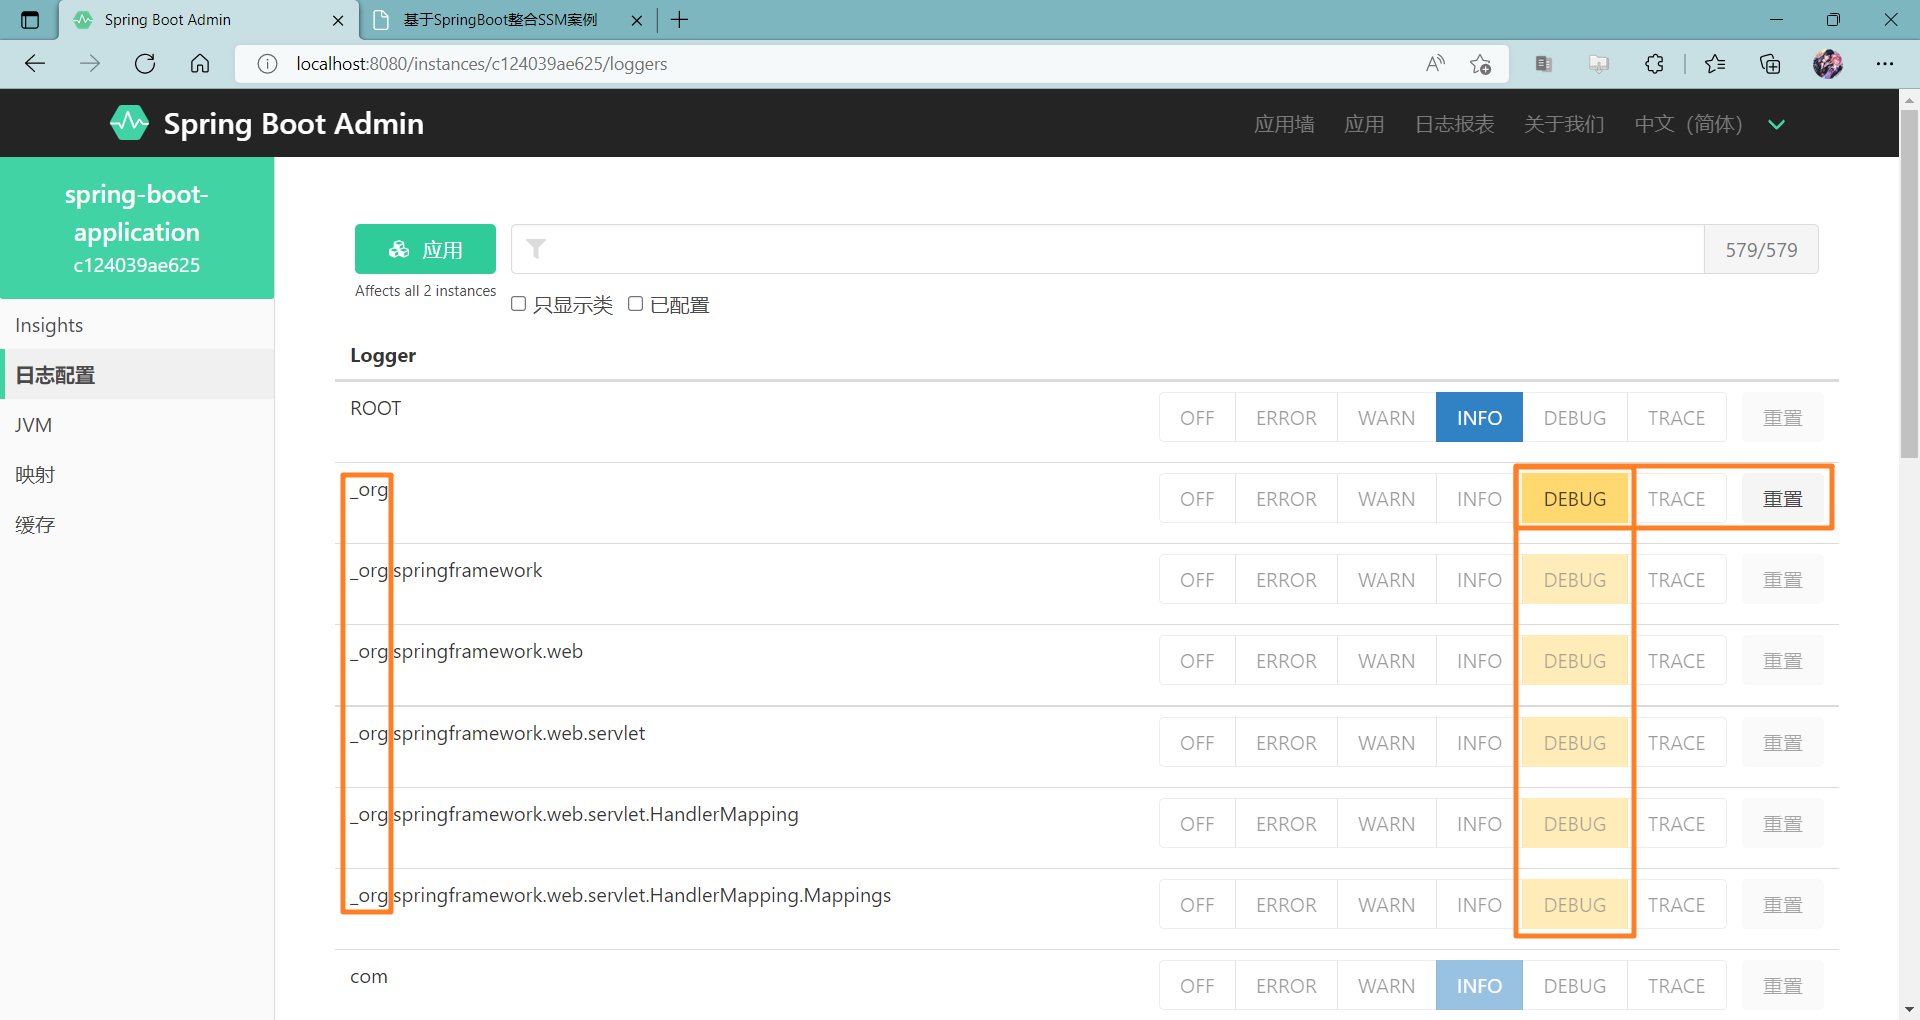
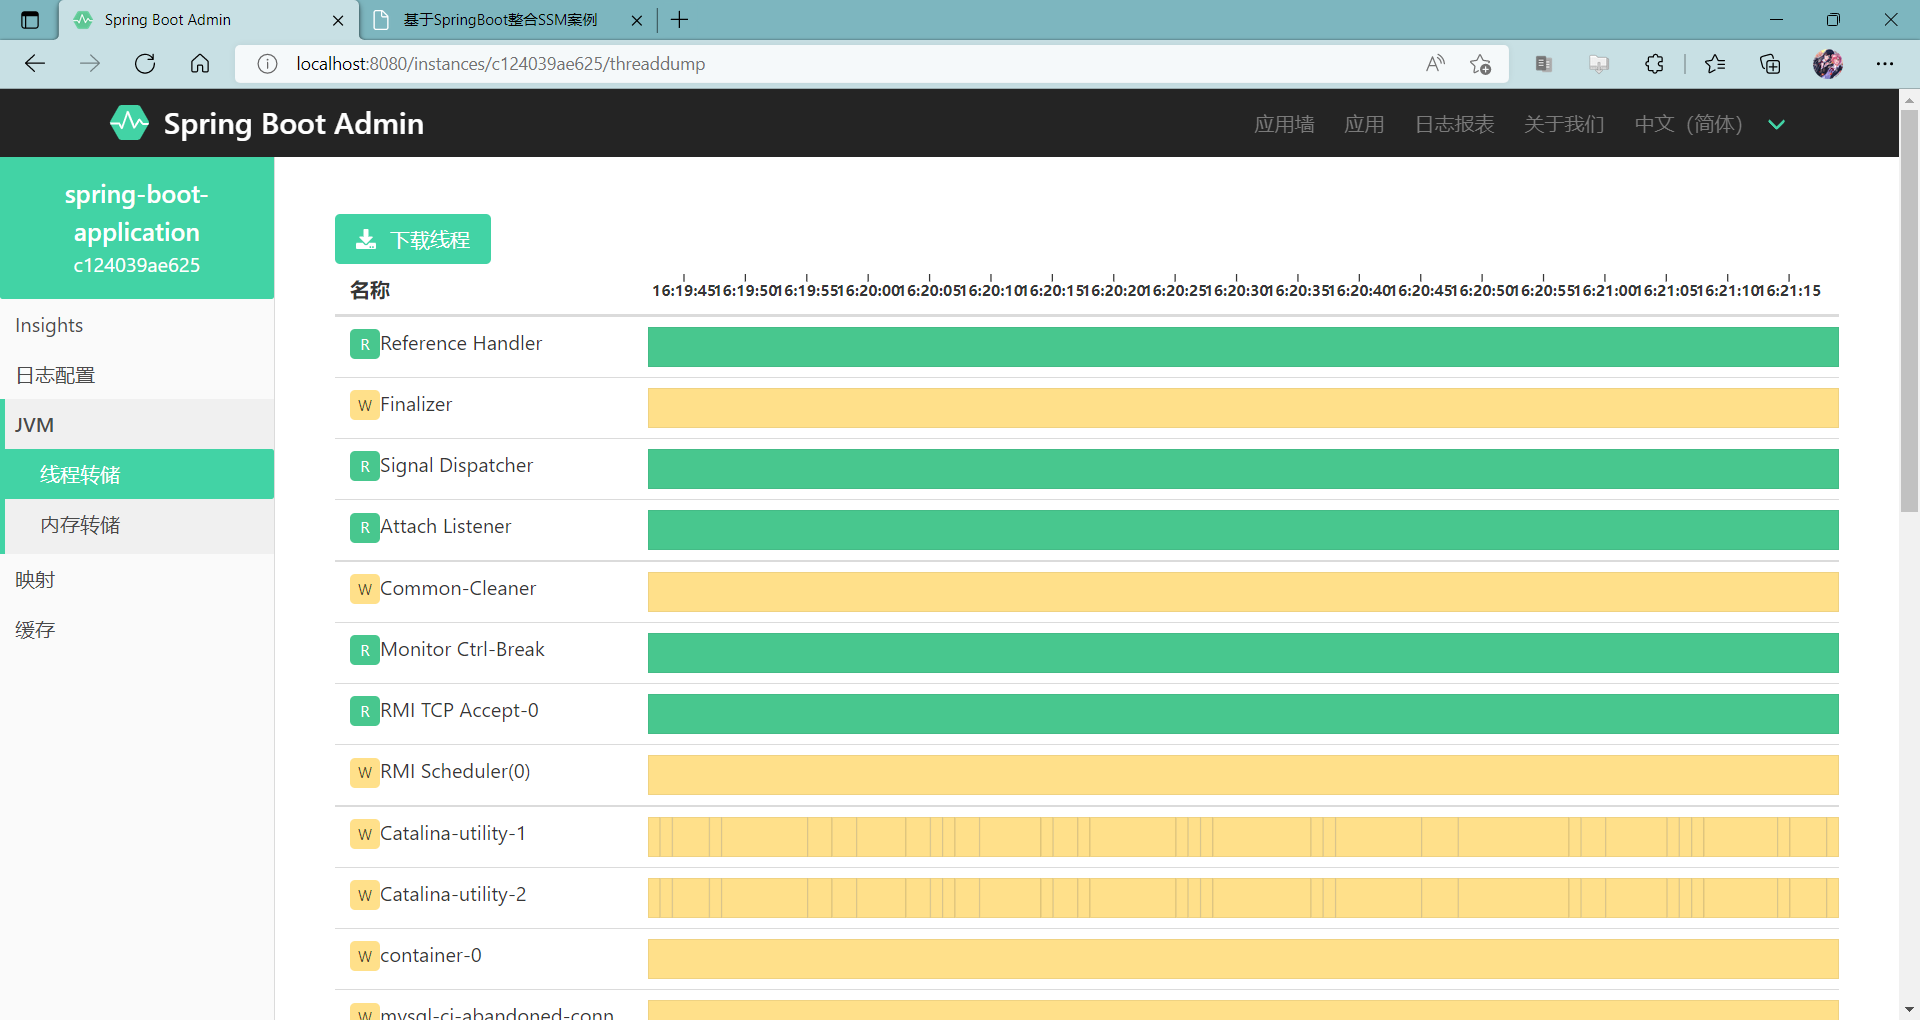
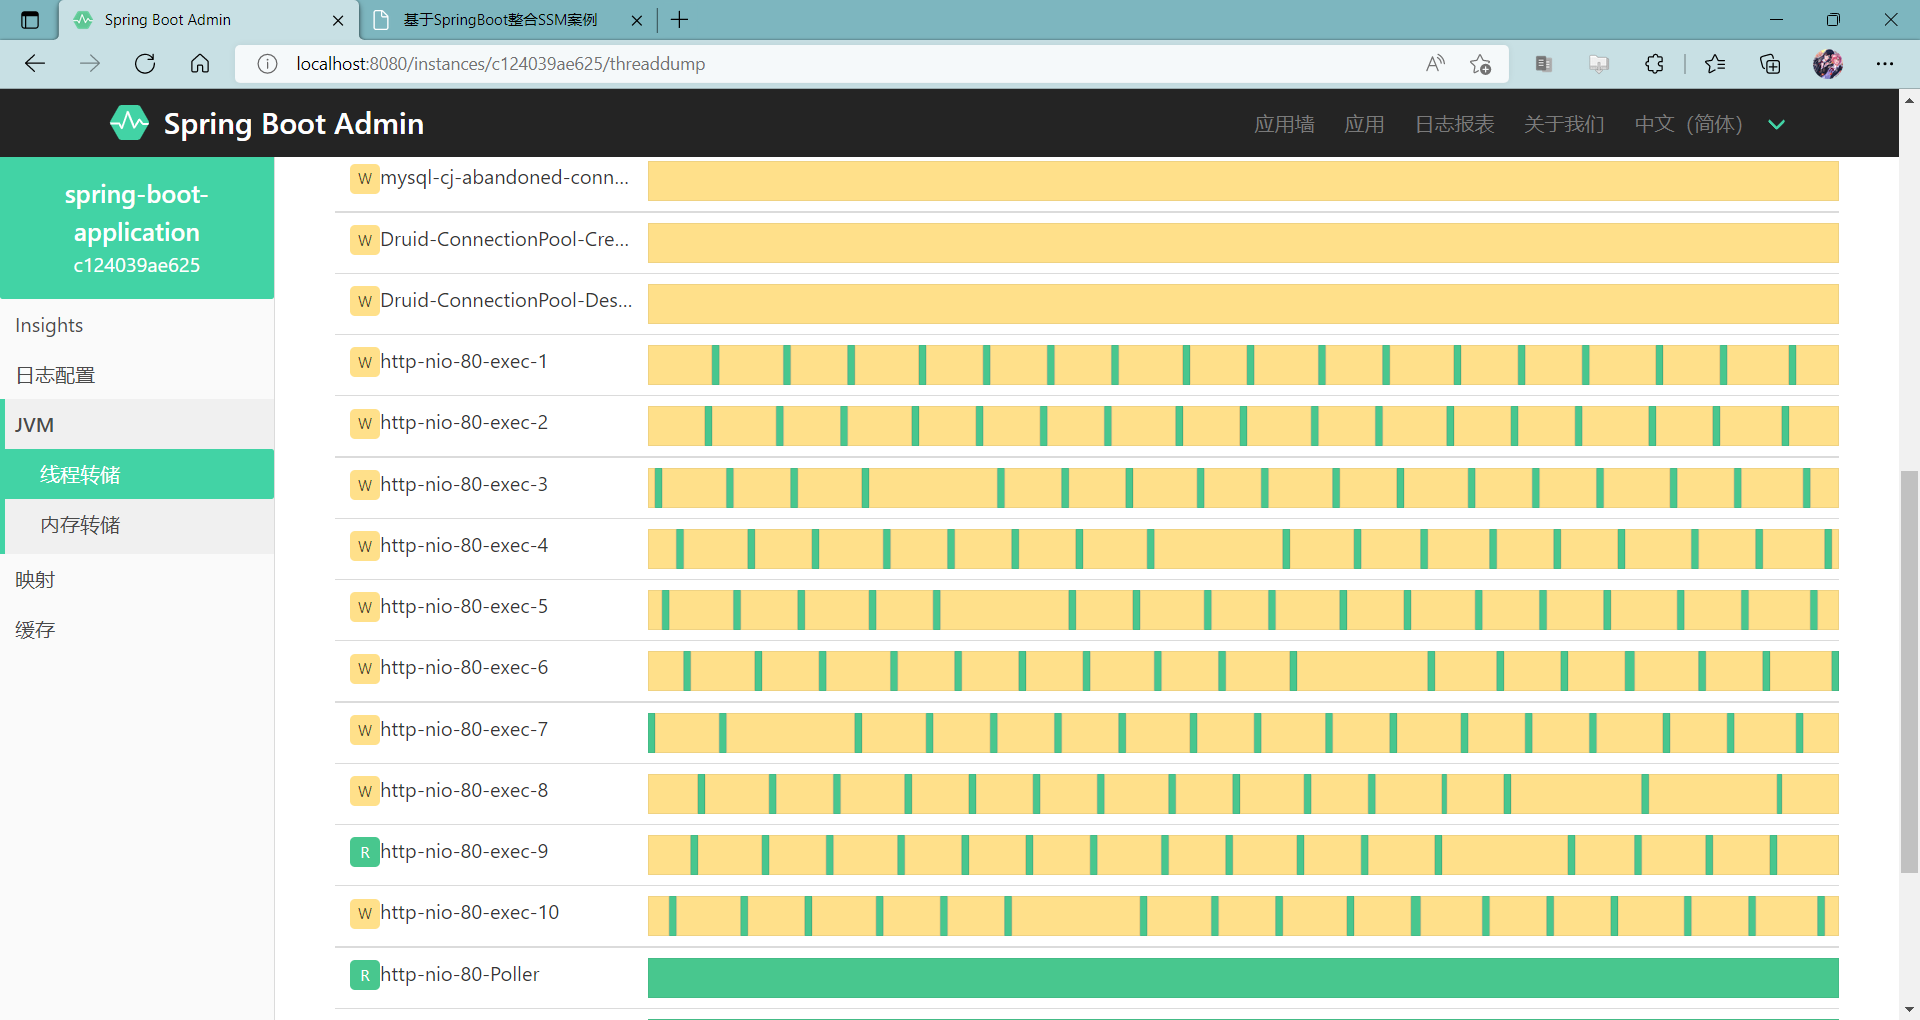
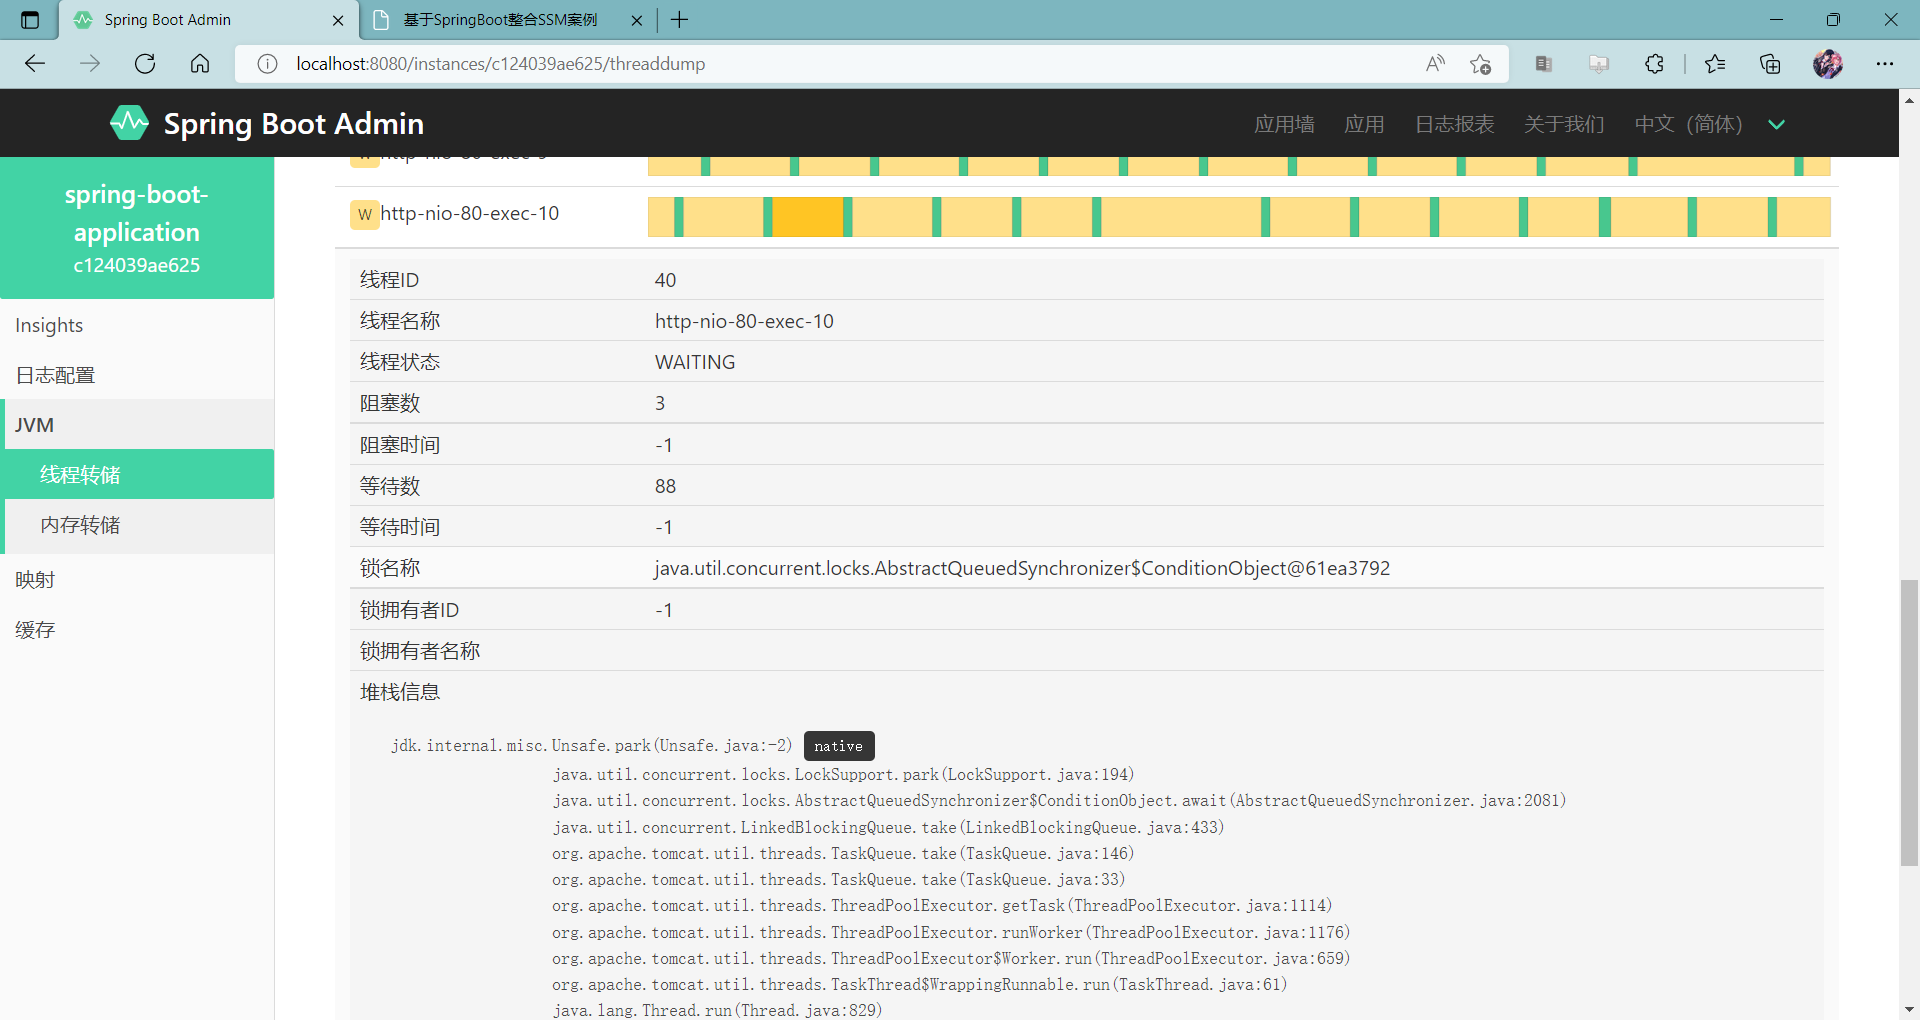
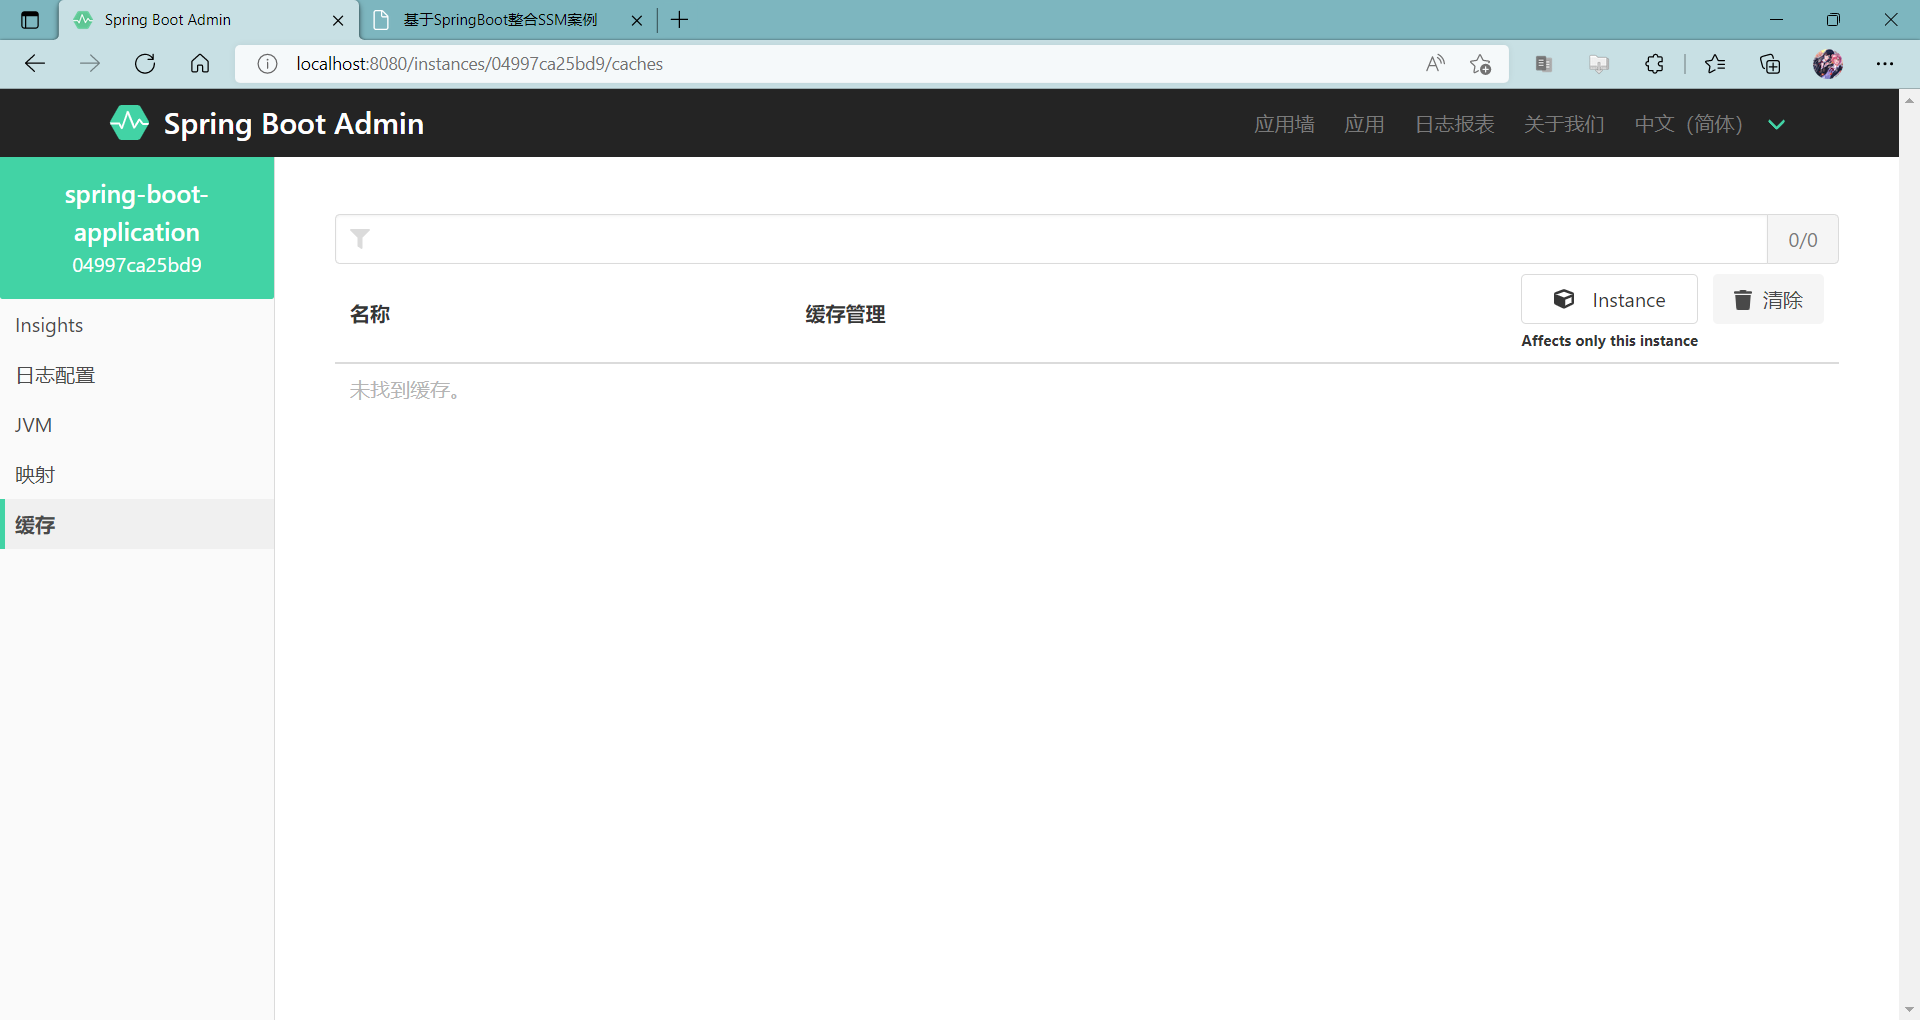
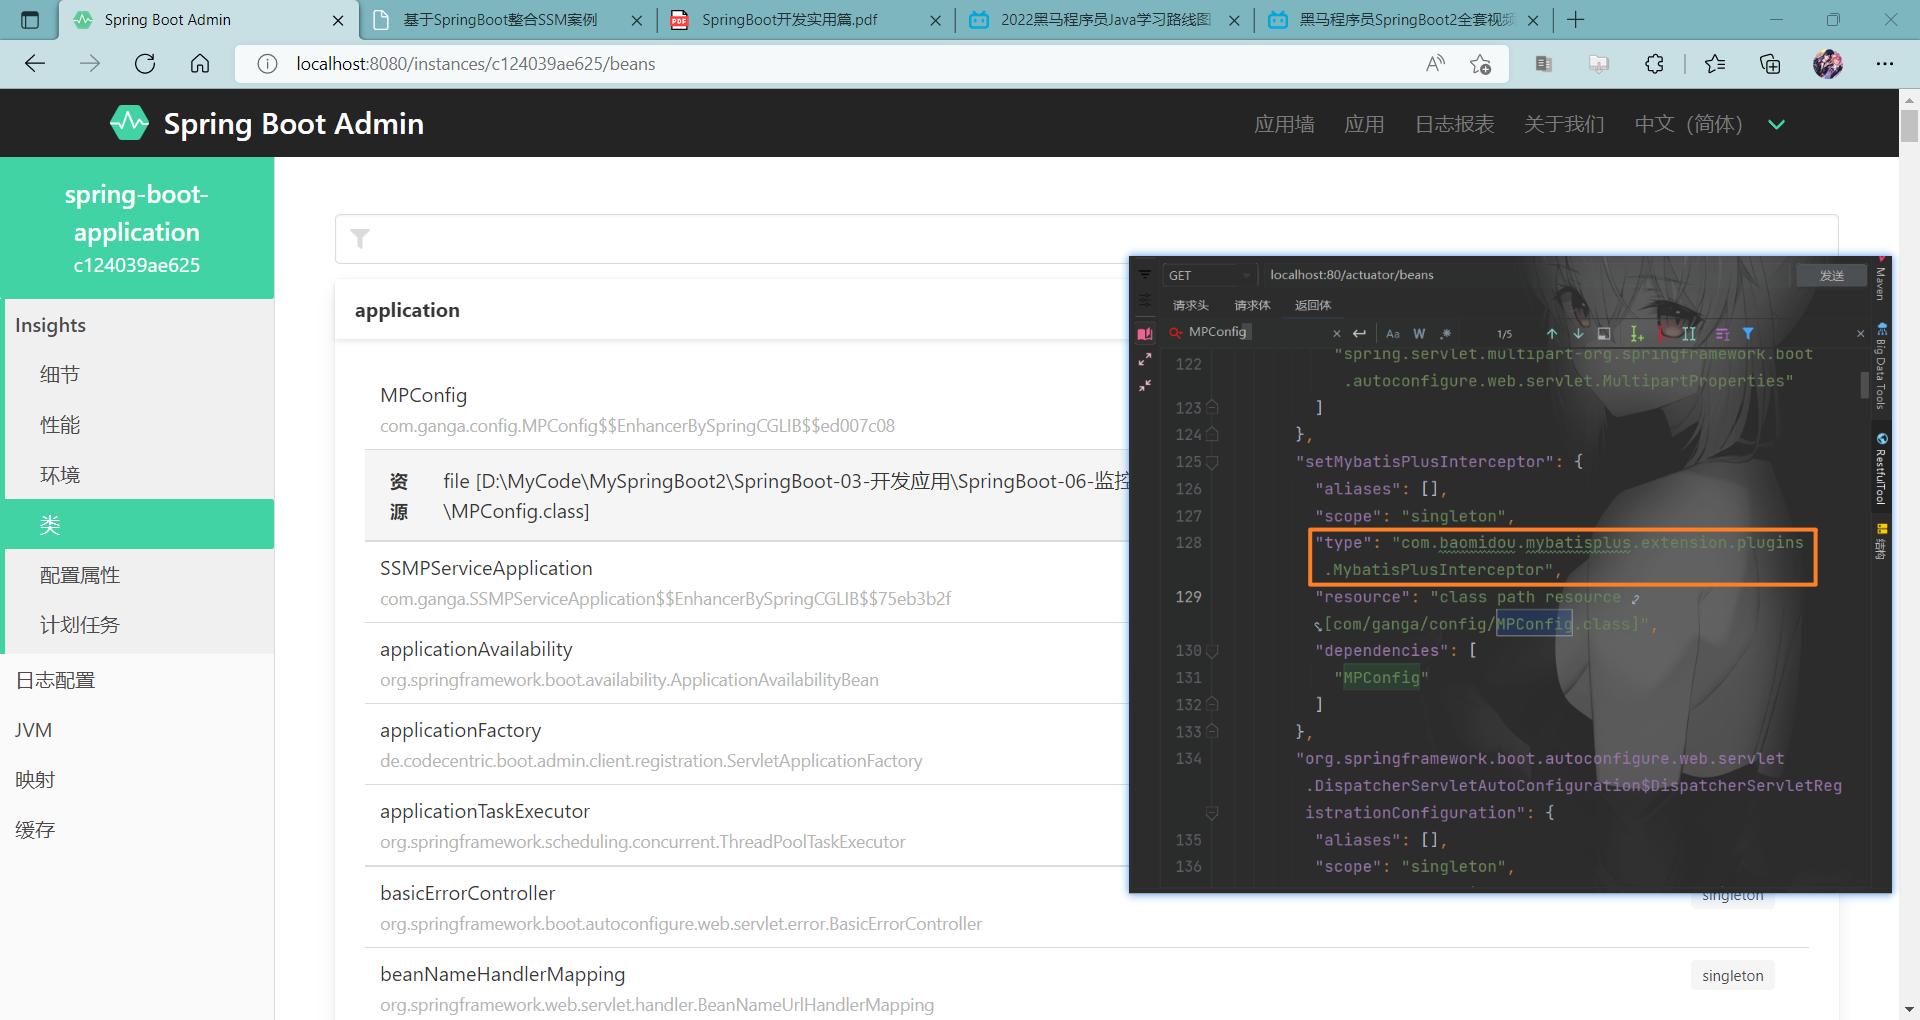
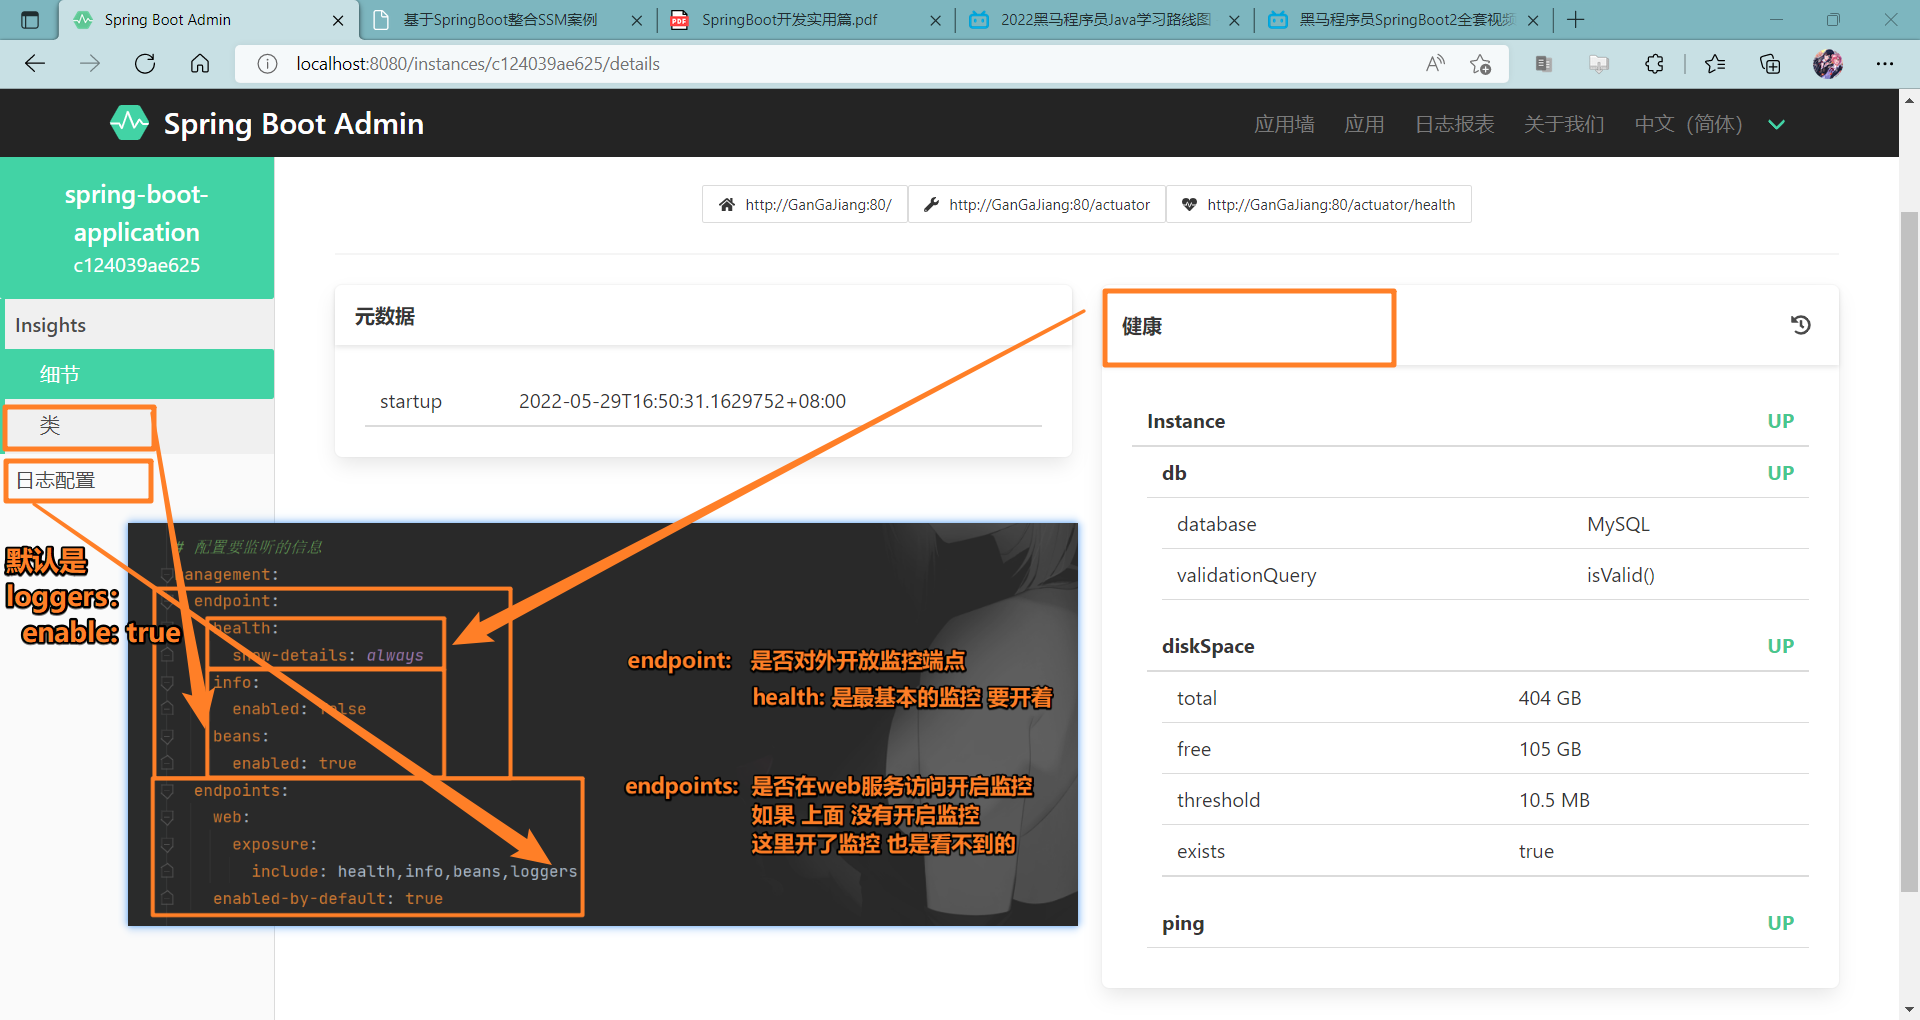
监控页面
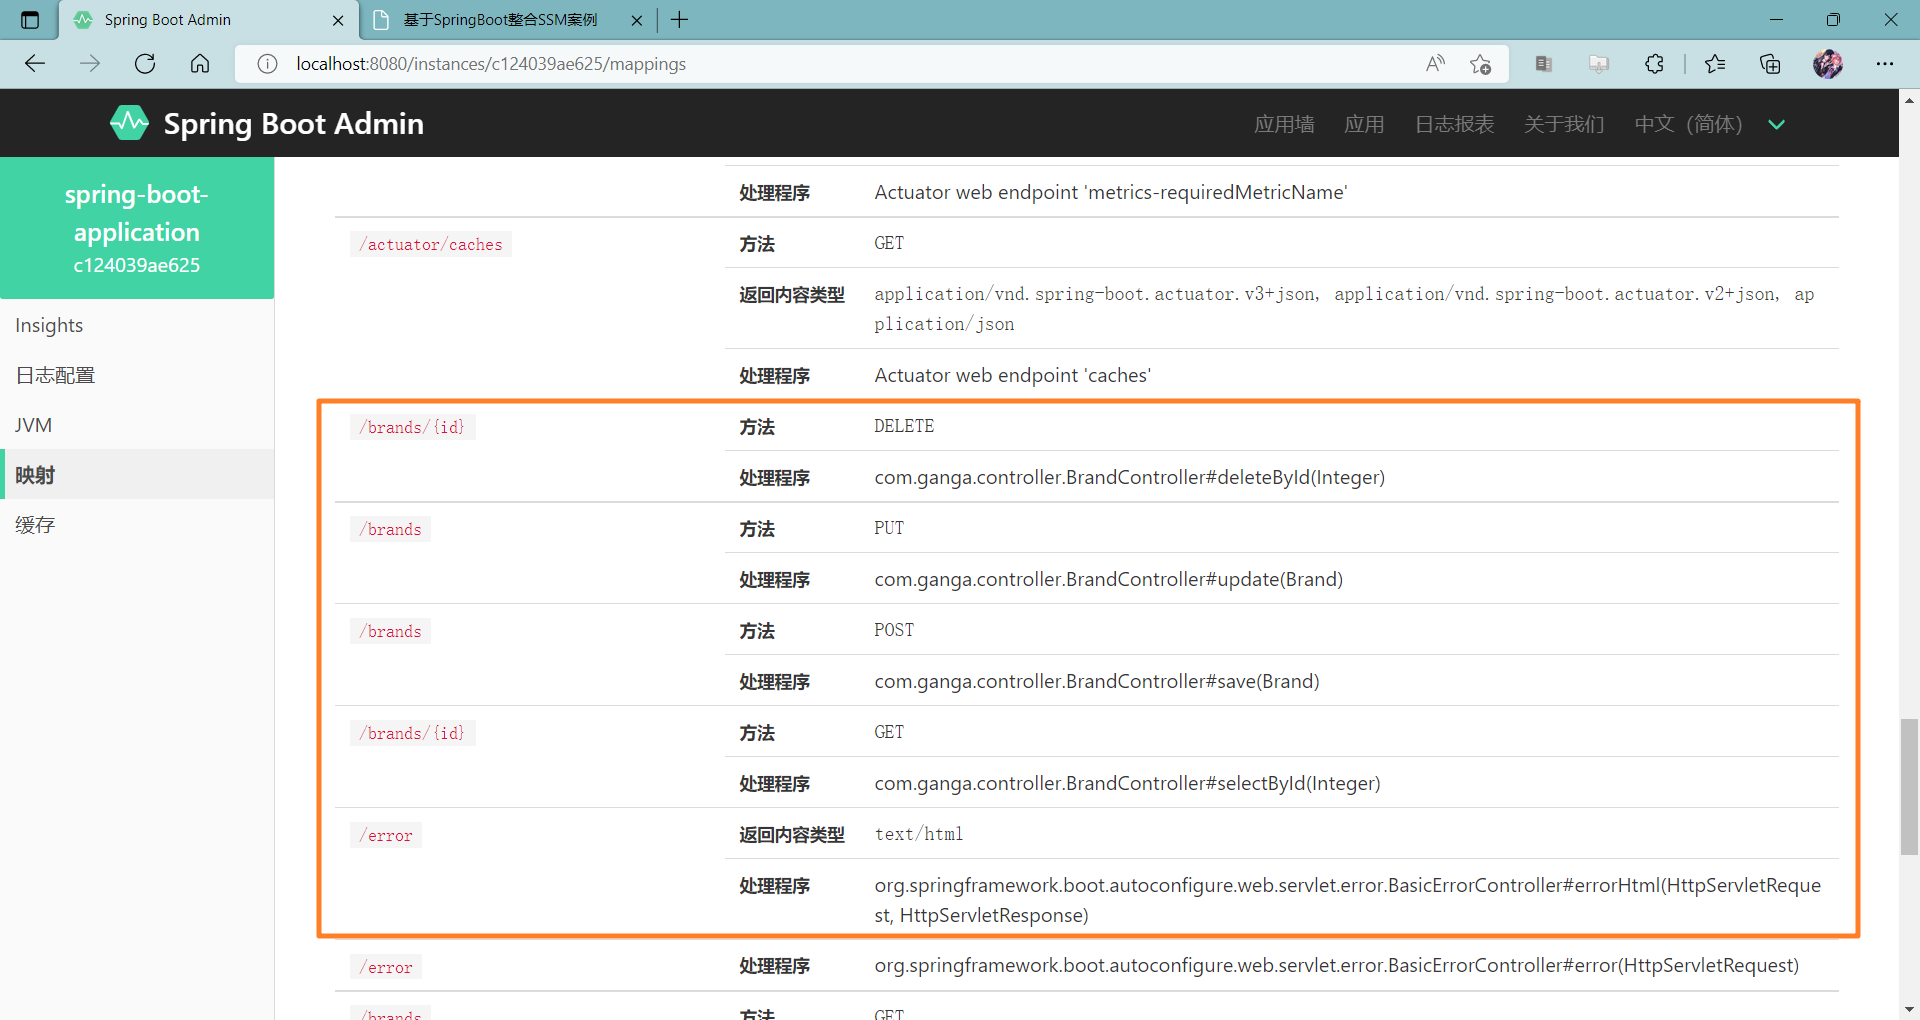
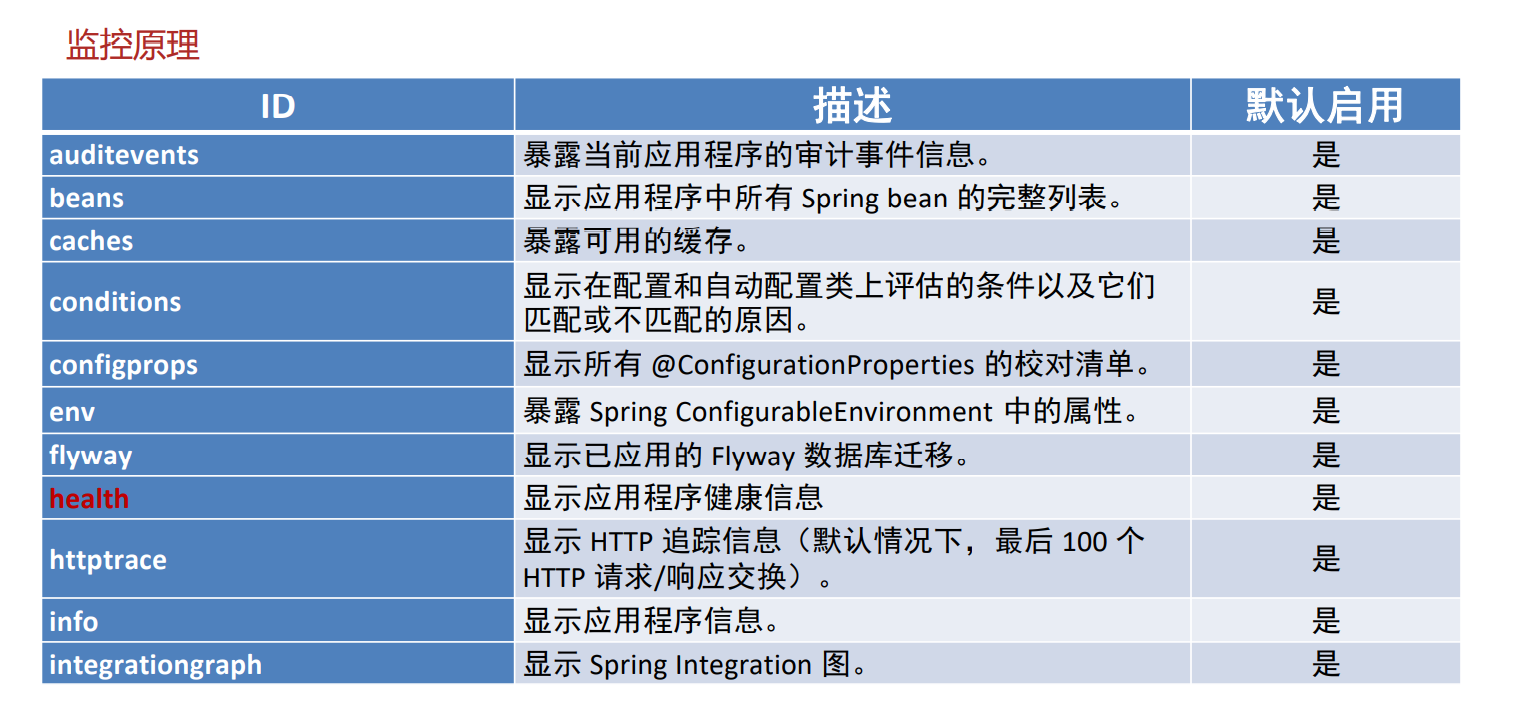
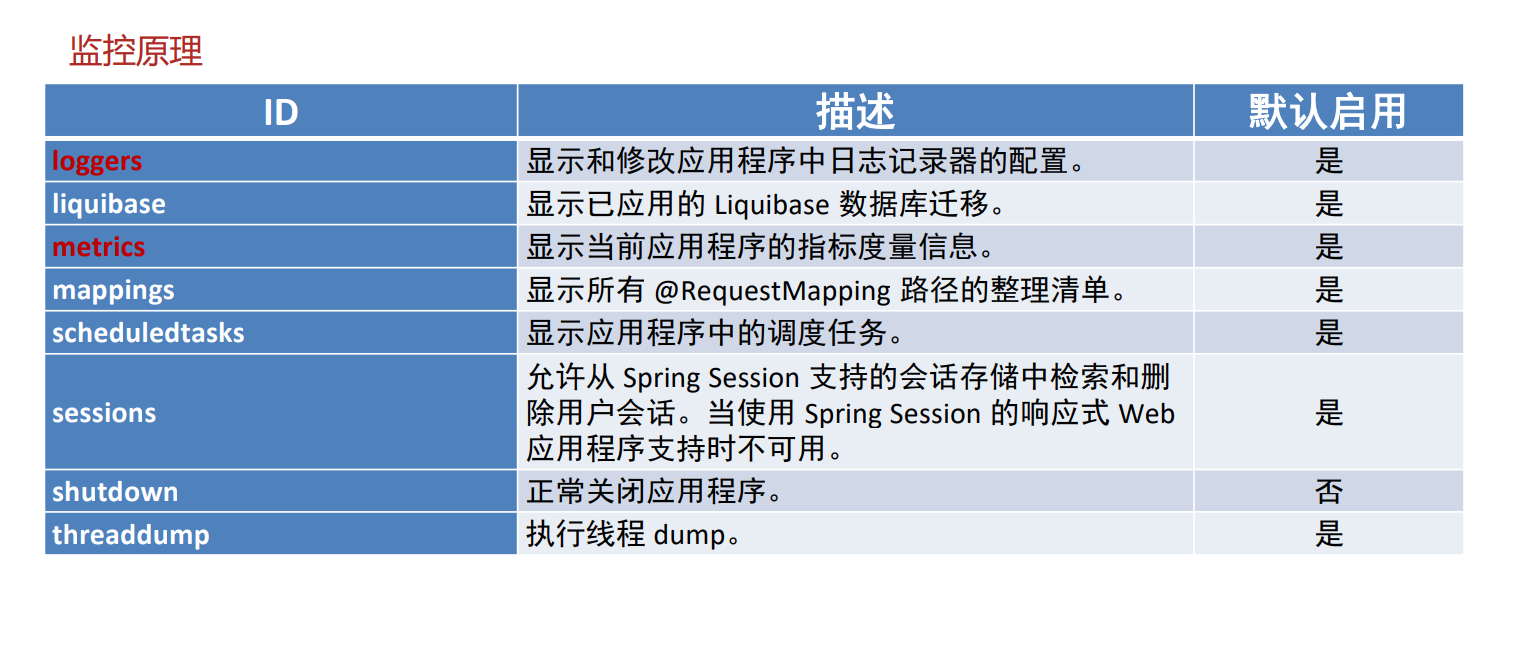
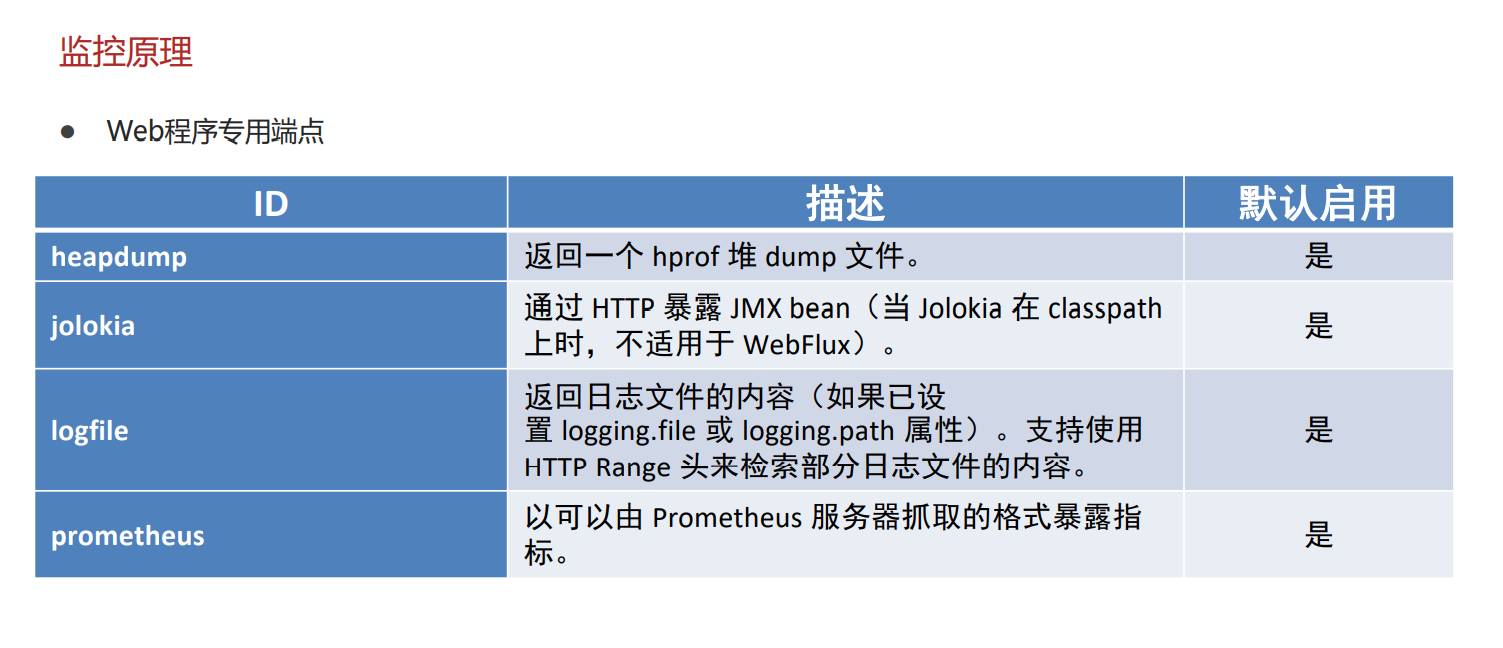
监控原理
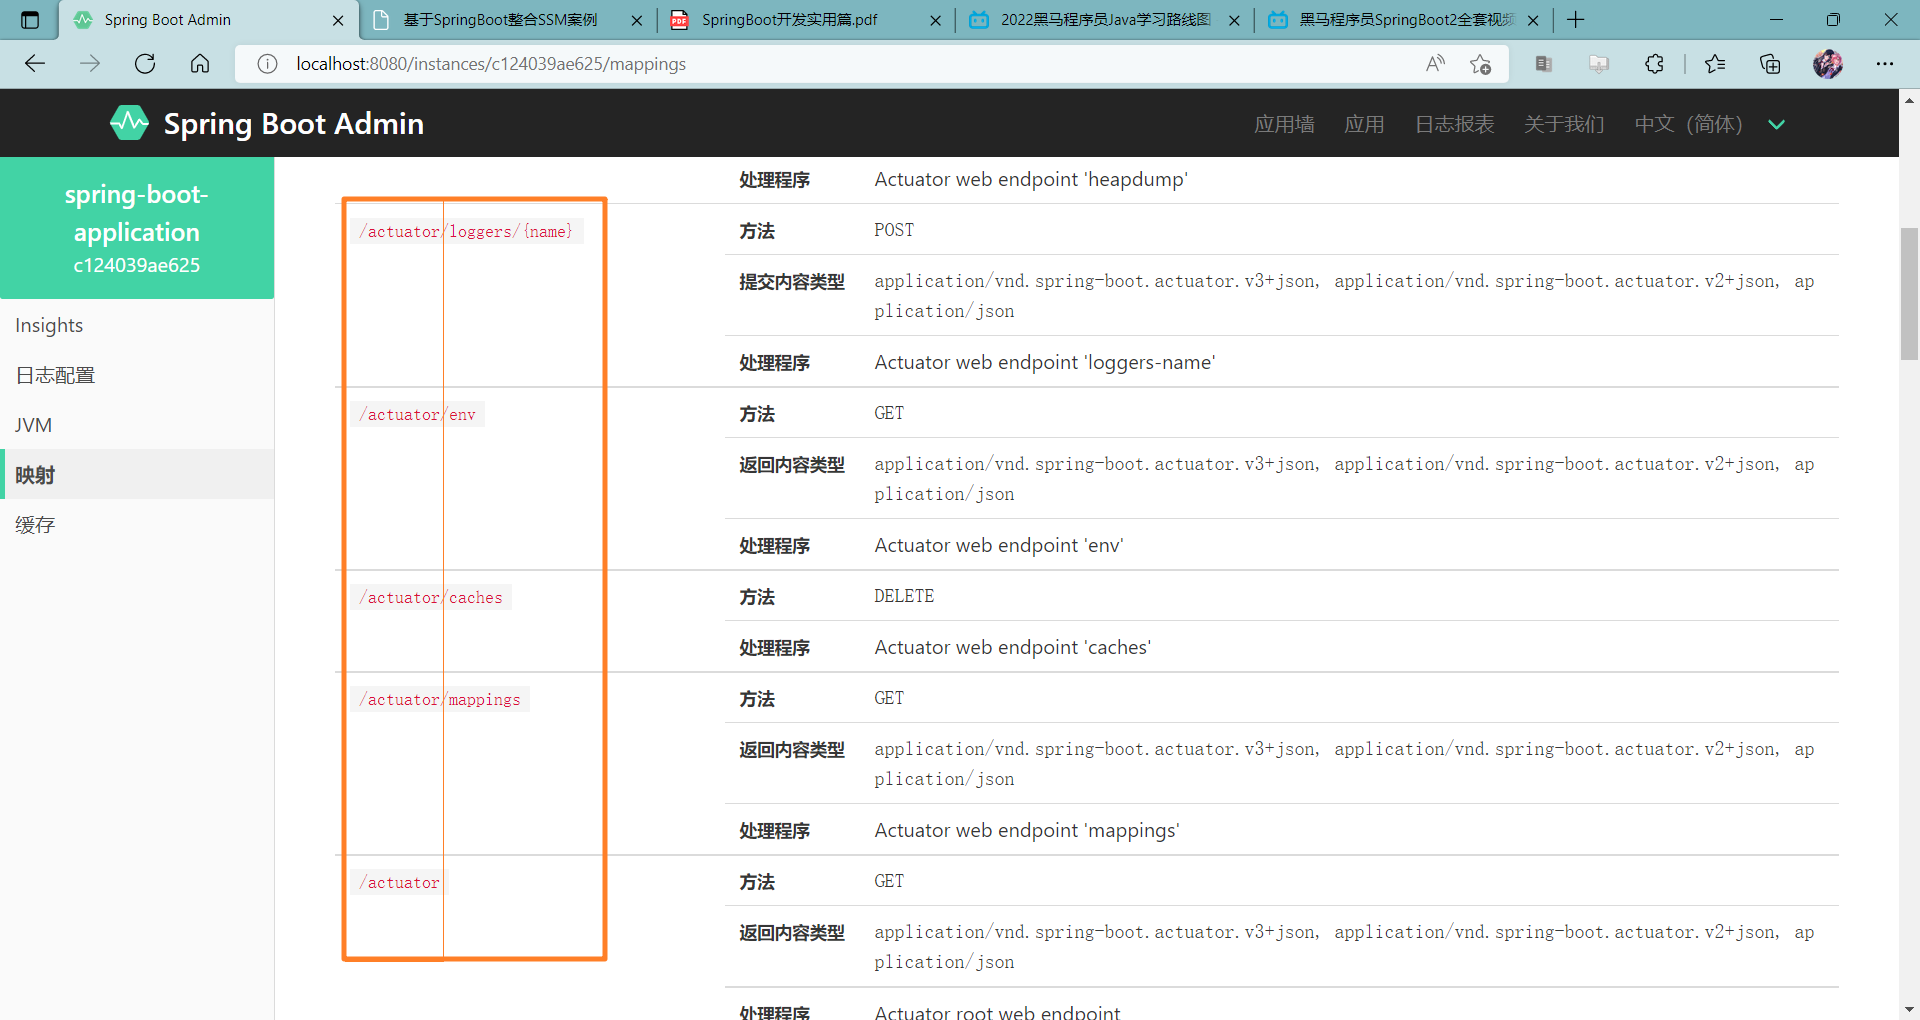
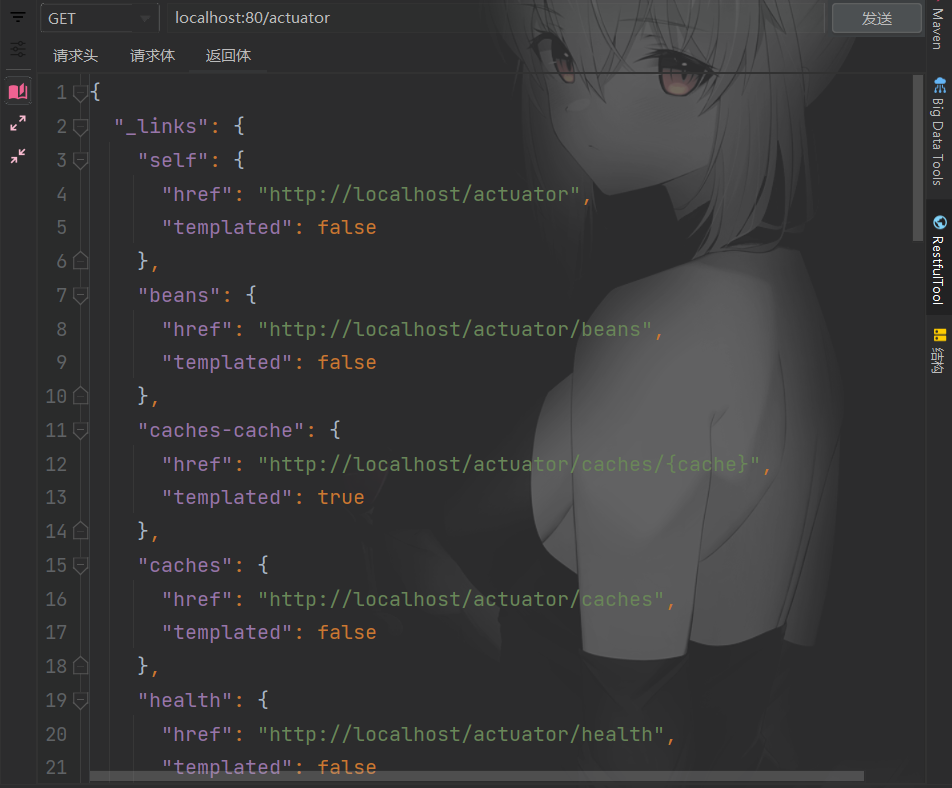
生成了一些 以 /actuator开头的服务
请求一下
监控的请求 /actuator/端点名称
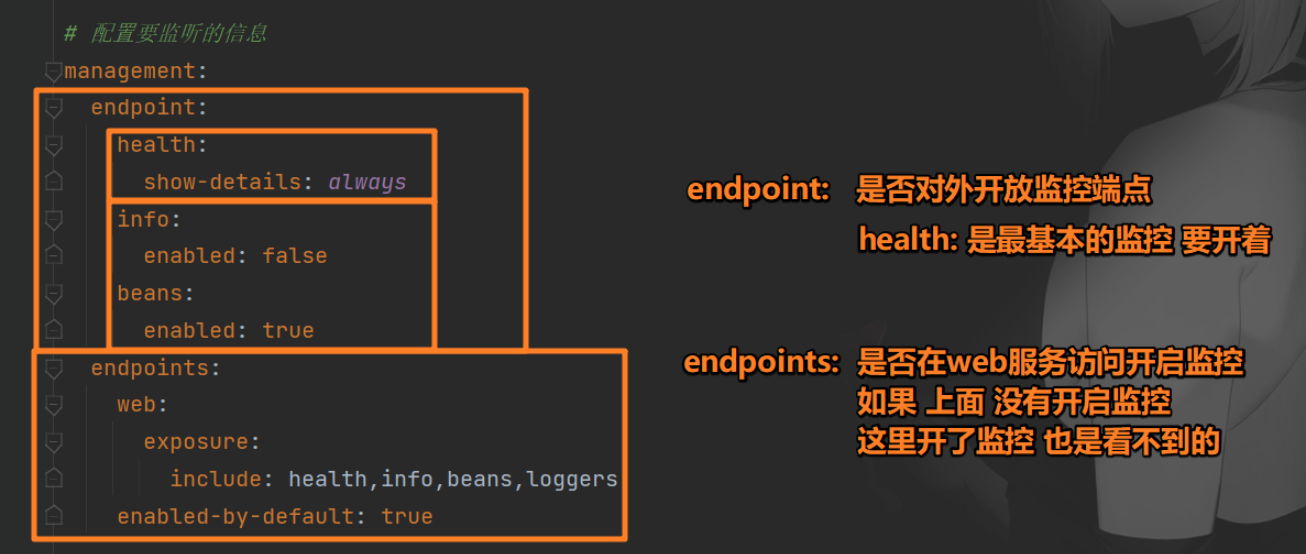
自定义监控配置
management: endpoint: health: show-details: always info: enabled: false beans: enabled: true endpoints: web: exposure: include: health,info,beans,loggers enabled-by-default: true
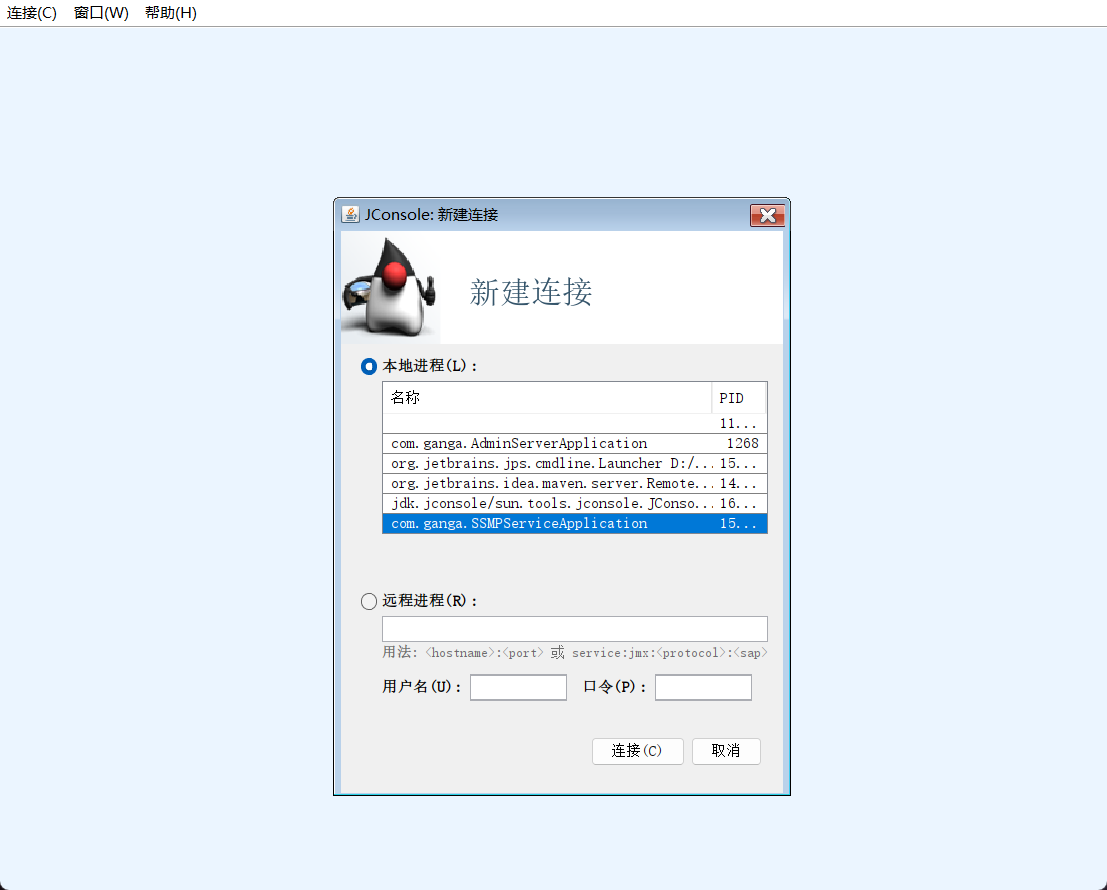
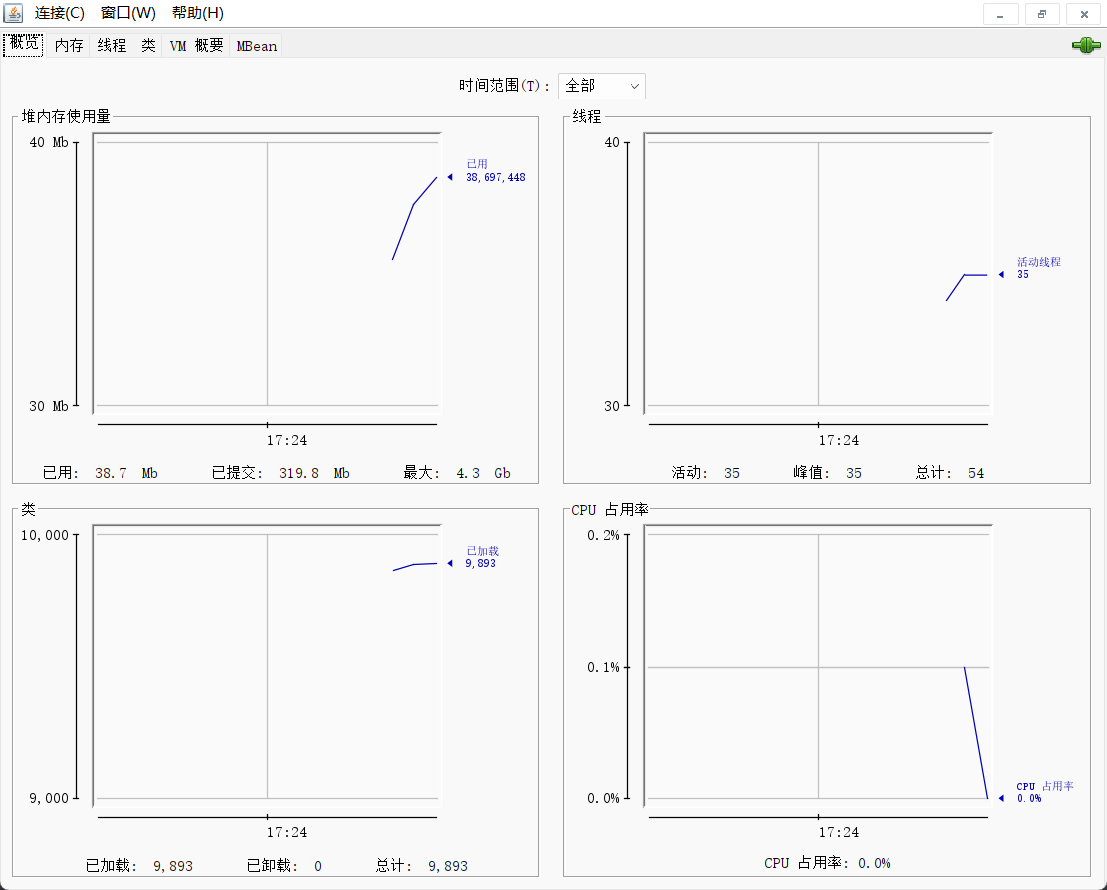
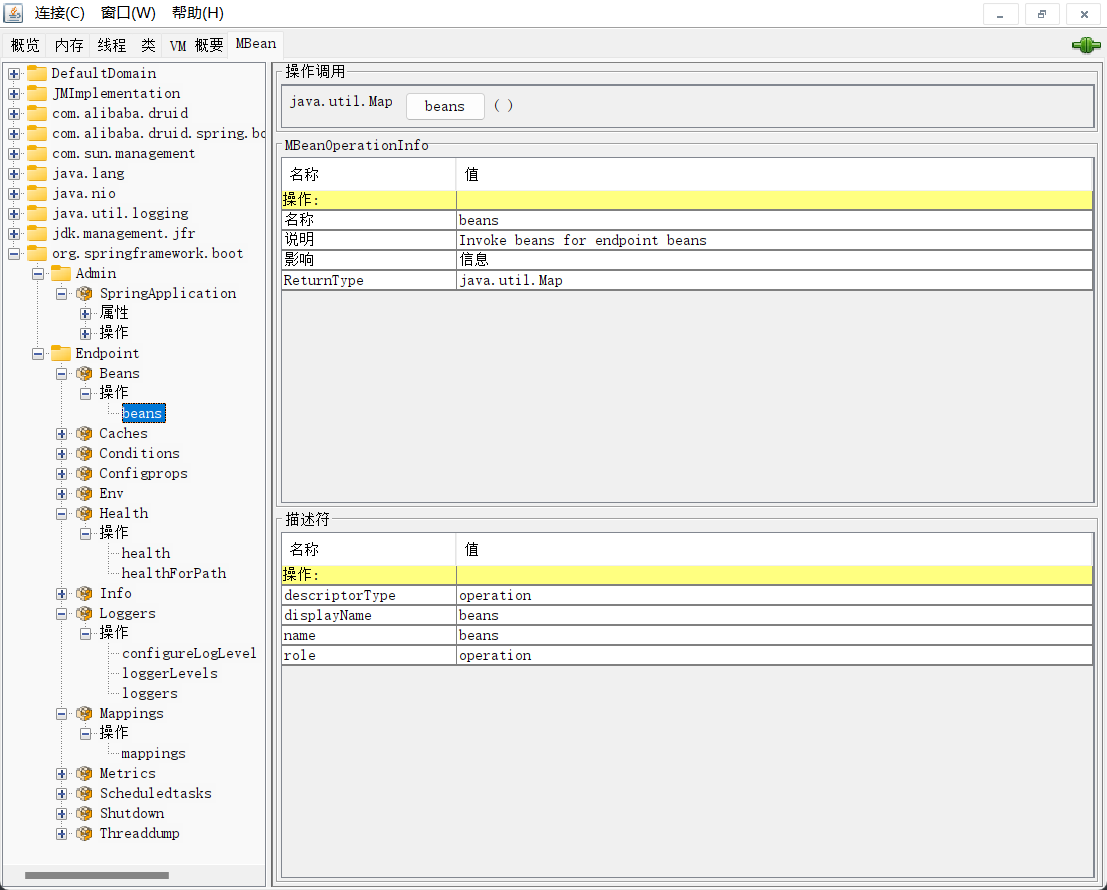
jconsole JAVA提供的监控器
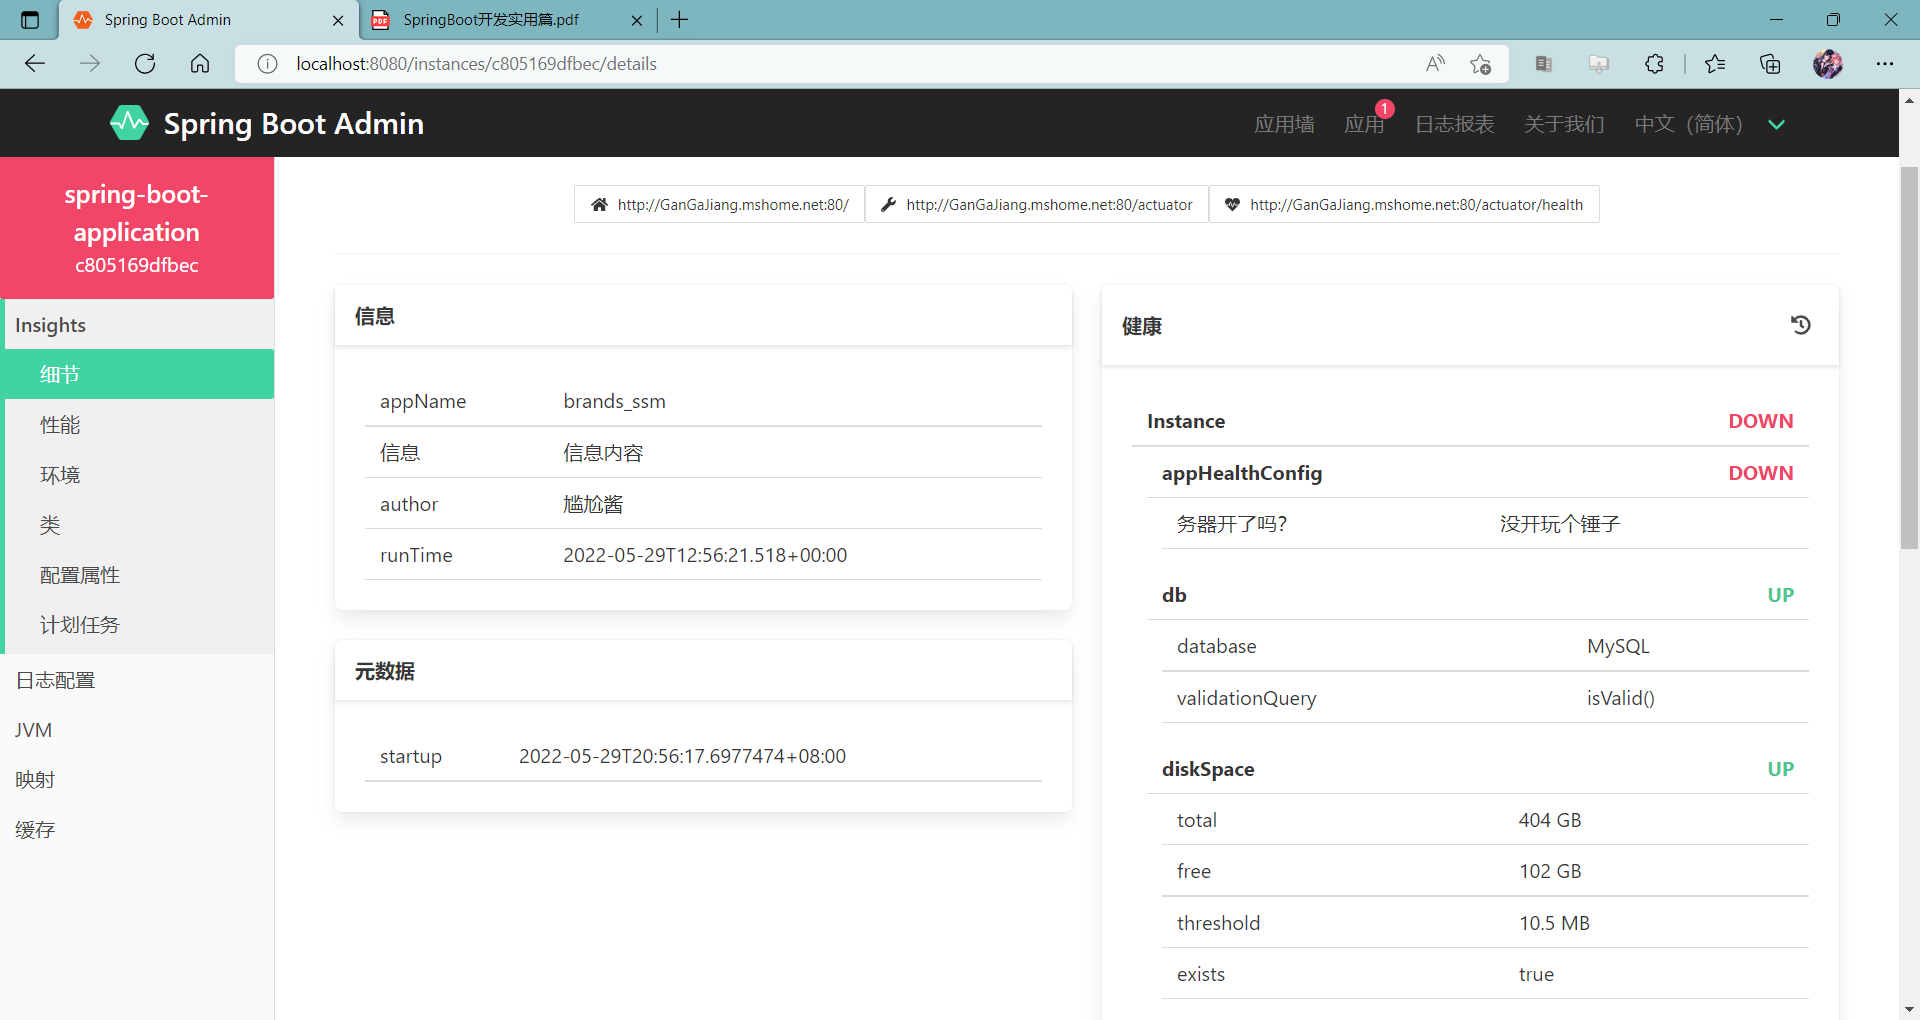
自定义 Info 和 Health info
package com.ganga.actuator;import org.springframework.boot.actuate.info.Info;import org.springframework.boot.actuate.info.InfoContributor;import org.springframework.stereotype.Component;import java.util.Date;import java.util.HashMap;import java.util.Map;@Component public class AppInfoConfig implements InfoContributor { @Override public void contribute (Info.Builder builder) { builder.withDetail("appName" ,"brands_ssm" ); Map<String,Object> infos = new HashMap <>(); Date date = new Date (System.currentTimeMillis()); infos.put("runTime" ,date); infos.put("author" ,"尴尬酱" ); infos.put("信息" ,"信息内容" ); builder.withDetails(infos); } }
health
package com.ganga.actuator;import org.springframework.boot.actuate.health.AbstractHealthIndicator;import org.springframework.boot.actuate.health.Health;import org.springframework.boot.actuate.health.Status;import org.springframework.stereotype.Component;import java.util.Date;@Component public class AppHealthConfig extends AbstractHealthIndicator { @Override protected void doHealthCheck (Health.Builder builder) throws Exception { boolean condition = false ; if (condition){ builder.withDetail("尴尬" ,"尴尬了" ); builder.withDetail("runTim" ,new Date (System.currentTimeMillis())); builder.withDetail("brands" ,"ssm" ); builder.status(Status.UP); }else { builder.withDetail("务器开了吗?" ,"没开玩个锤子" ); builder.status(Status.DOWN); } } }
效果:
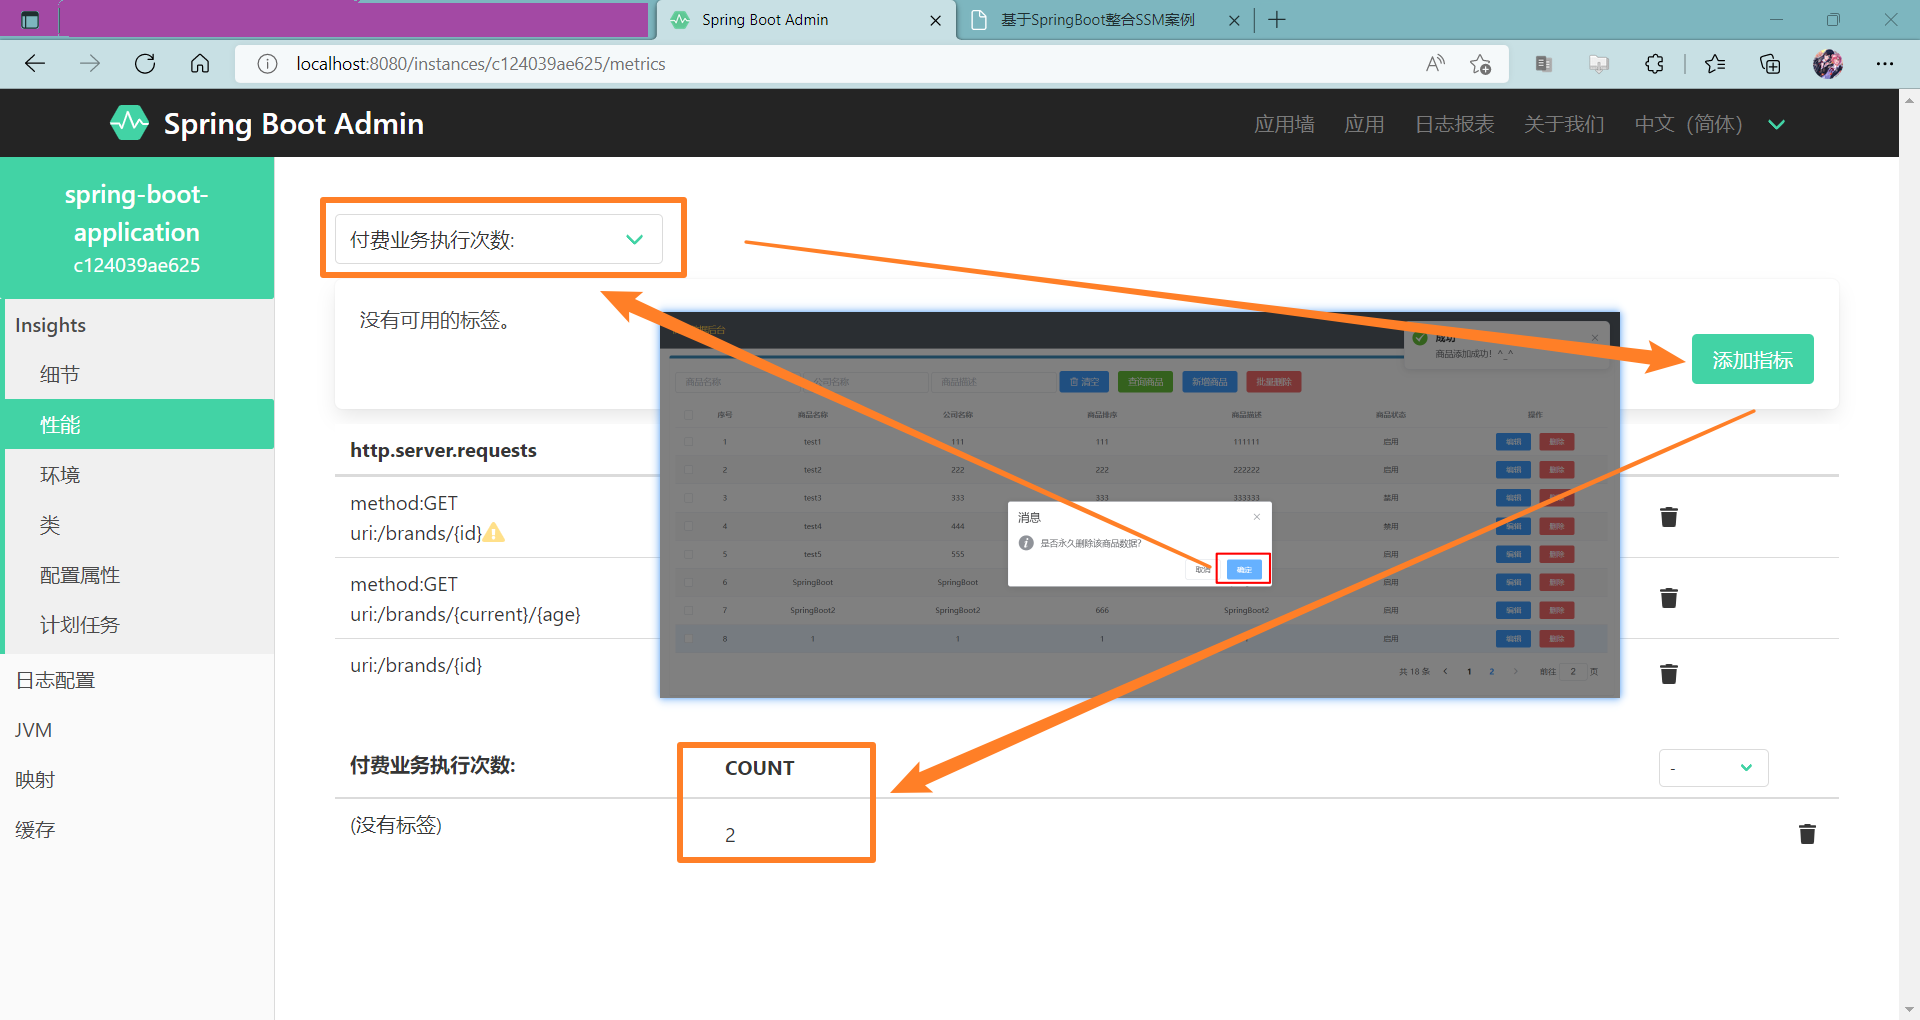
自定义 metrics @Service public class BrandServiceImpl extends ServiceImpl <BrandMapper, Brand> implements IBrandService { @Autowired private BrandMapper brandMapper; private Counter counter; public BrandServiceImpl (MeterRegistry meterRegistry) { counter = meterRegistry.counter("付费业务执行次数:" ); } public boolean deleteById (Integer id) { boolean b = brandMapper.deleteById(id) > 0 ; if (b){ counter.increment(); } return b; } }
🌸 TODO: 🌸 


